Rows offers multiple Actions to make your spreadsheet work smart. Most of them leverage data integrations with external tools like Facebook or Google Analytics to retrieve specific data points and plug them dynamically into the spreadsheet. Once one of those integrations is connected, then you can create dynamic Data Tables with custom layouts and automated refreshes. This is the first step towards richer and more effective reports.
Action Example
Let’s see an example of a real Action:
Try it yourself
- Click the Actions button in the toolbar.
- In the side panel (Data Wizard), choose Import data from an integration. (If you are familiar with APIs you can also use the Connect to a custom API option.)
- Search for the integration name you are looking for. For example, Company Finder, our proprietary integration that fetches data from Companies such as the domain, LinkedIn URL, or employees size.
- In the list available, select the job you want to complete. For example, “Search for companies”, our proprietary function that allows you to search for companies based on size, industry, and location.
- Now, it’s time to define the data you are looking for. In the Data Wizard, fill in all required fields and the optional ones to customize the result. For example, set the “employees” input field of the “Search for companies” Action to ">1000".
Connect the integration
Once you get the hang of Actions, you'll want to know how to work with your newly-acquired data and display it in a nice new table.
That's where Data Tables come in. Unlike normal tables (where you type or paste in the data by hand) Data Tables are dynamically created based on data retrieved from an Action. You just have to tell Rows what columns it should display.
Data Table Example
Here's an example walkthrough of how data tables work:
You can create Data Tables from built-in integrations or custom API requests and for that, you have two options:
- In the toolbar, click the Insert button and in the following menu, click on Create Data Table.
- If you are not sure about the Action you want to use, click the Actions button and follow one of the two paths: Import data from an integration or Connect to a custom API.
Send data to an integration
Now, to create a Data Table from scratch, follow these steps:
- Find and set up the Action.
- Click the Next Step button.
Configure the options for the Data Table:
Option Use To Table Columns Select the attributes that you want to see such as "company size" or "location". - This adds table headers for the attributes as well as the data itself.
Table Orientation Select where the headers should go. - The default option puts the headers in the first row, so that each column has a name.
- You can also put the headers in the first column, so that each row has a name.
</ul>Table Behavior Choose what should happen when the function is refreshed. - The default option always replaces the entire set of results with the newest data.
- You can also choose to retain previous results and only add new data and updates to existing rows.
</ul>Table Automation Define whether and when the table should refresh. - The default option does not update the table automatically. The table will need to be refreshed manually.
Click Create Data Table.
- If this button is disabled, double-check that you've selected some Table Columns first.
You get also the option to insert a Data Table when you use any integration-related function (or a custom API request) — basically any function that pulls data from an external service.
To create a Data Table from the result of a function, follow these steps:
Therefore, the first prerequisite step is to insert an integration function such as SEARCH_COMPANIES or GET_PAGE_POSTS_LINKEDIN.
- In the
{data}cell, click the Cell Actions button and in the menu that appears, click Create Data Table. - From now on, everything else is the same. Click the Next step to configure your Data Table.
Editing Data Tables
You can adjust the structure and behavior of a Data Table after you've created it. For example, here's a short walkthrough where we change the columns from the previous example.
There's also an easy way to delete the data table or update the source data.
Editing a Data Table
To edit a data table, follow these steps
- Go to the Data Tables you have created.
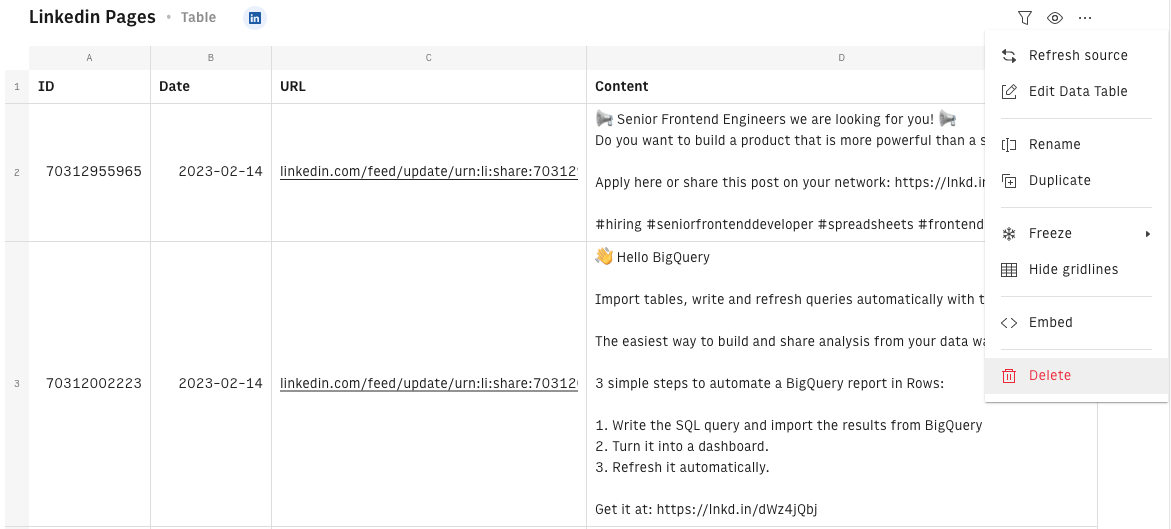
- Click the '…' menu on the top right corner of the table.
- Click Edit Data Table.
- In the Data Table options panel, update the Table Columns, Orientation, Behavior or Destination.
- In the source, you can click the pencil icon to review and update the Data request.
💡 To quickly remove headers, mouse over the header names in the Table Columns field and click 'X'.
💡 To reorder the Table Columns grab a field name and drag it to wherever you desired to.
Deleting a Data Table
To delete a data table:
- In the '…' menu on the top right corner of the table, click Delete data table.
Adding columns to a Data Table
You might want to add one or more columns to your Data Table to transform or enrich the data in it. You can do so by right clicking on a column and choosing to insert a column left or right of that selected column. You will be provided with an additional context menu that will give you 2 options for the new column.
Standard
This column works exactly as a column in any other table.
Formula
The formula column will automatically apply the given formula to each row of data (even new rows added). Similarly to how the AUTOFILL() function would work in a standard column but inherently for data tables.
Choose Update method to make columns persist
update method.