How to Wrap Text in Google Sheets [2025]

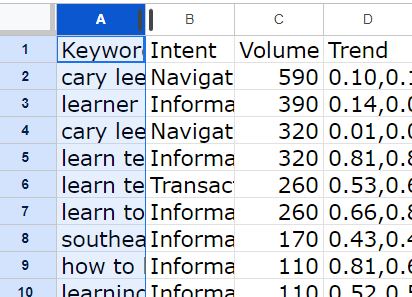
We've all been there. You're working on a Google Sheets project, and everything's going smoothly. Then, you paste in some data with long text strings. Suddenly, your neat spreadsheet looks like a mess, with text spilling over into other cells or getting cut off entirely. It's frustrating, especially when dealing with important information like detailed addresses or product descriptions.
But don't worry—there are several ways to fix this common problem. In this guide, we'll explore different methods for wrapping text in Google Sheets.
Common Methods for Wrapping Text in Google Sheets
Google Sheets offers six primary methods for wrapping text: the menu bar icon, the wrap text button, keyboard shortcuts, column width adjustment, the WRAP() formula, and the text-to-columns feature. Each method has its strengths and limitations, suitable for different scenarios and user preferences.
Here's a detailed breakdown of each method, including steps, notes, and potential drawbacks:
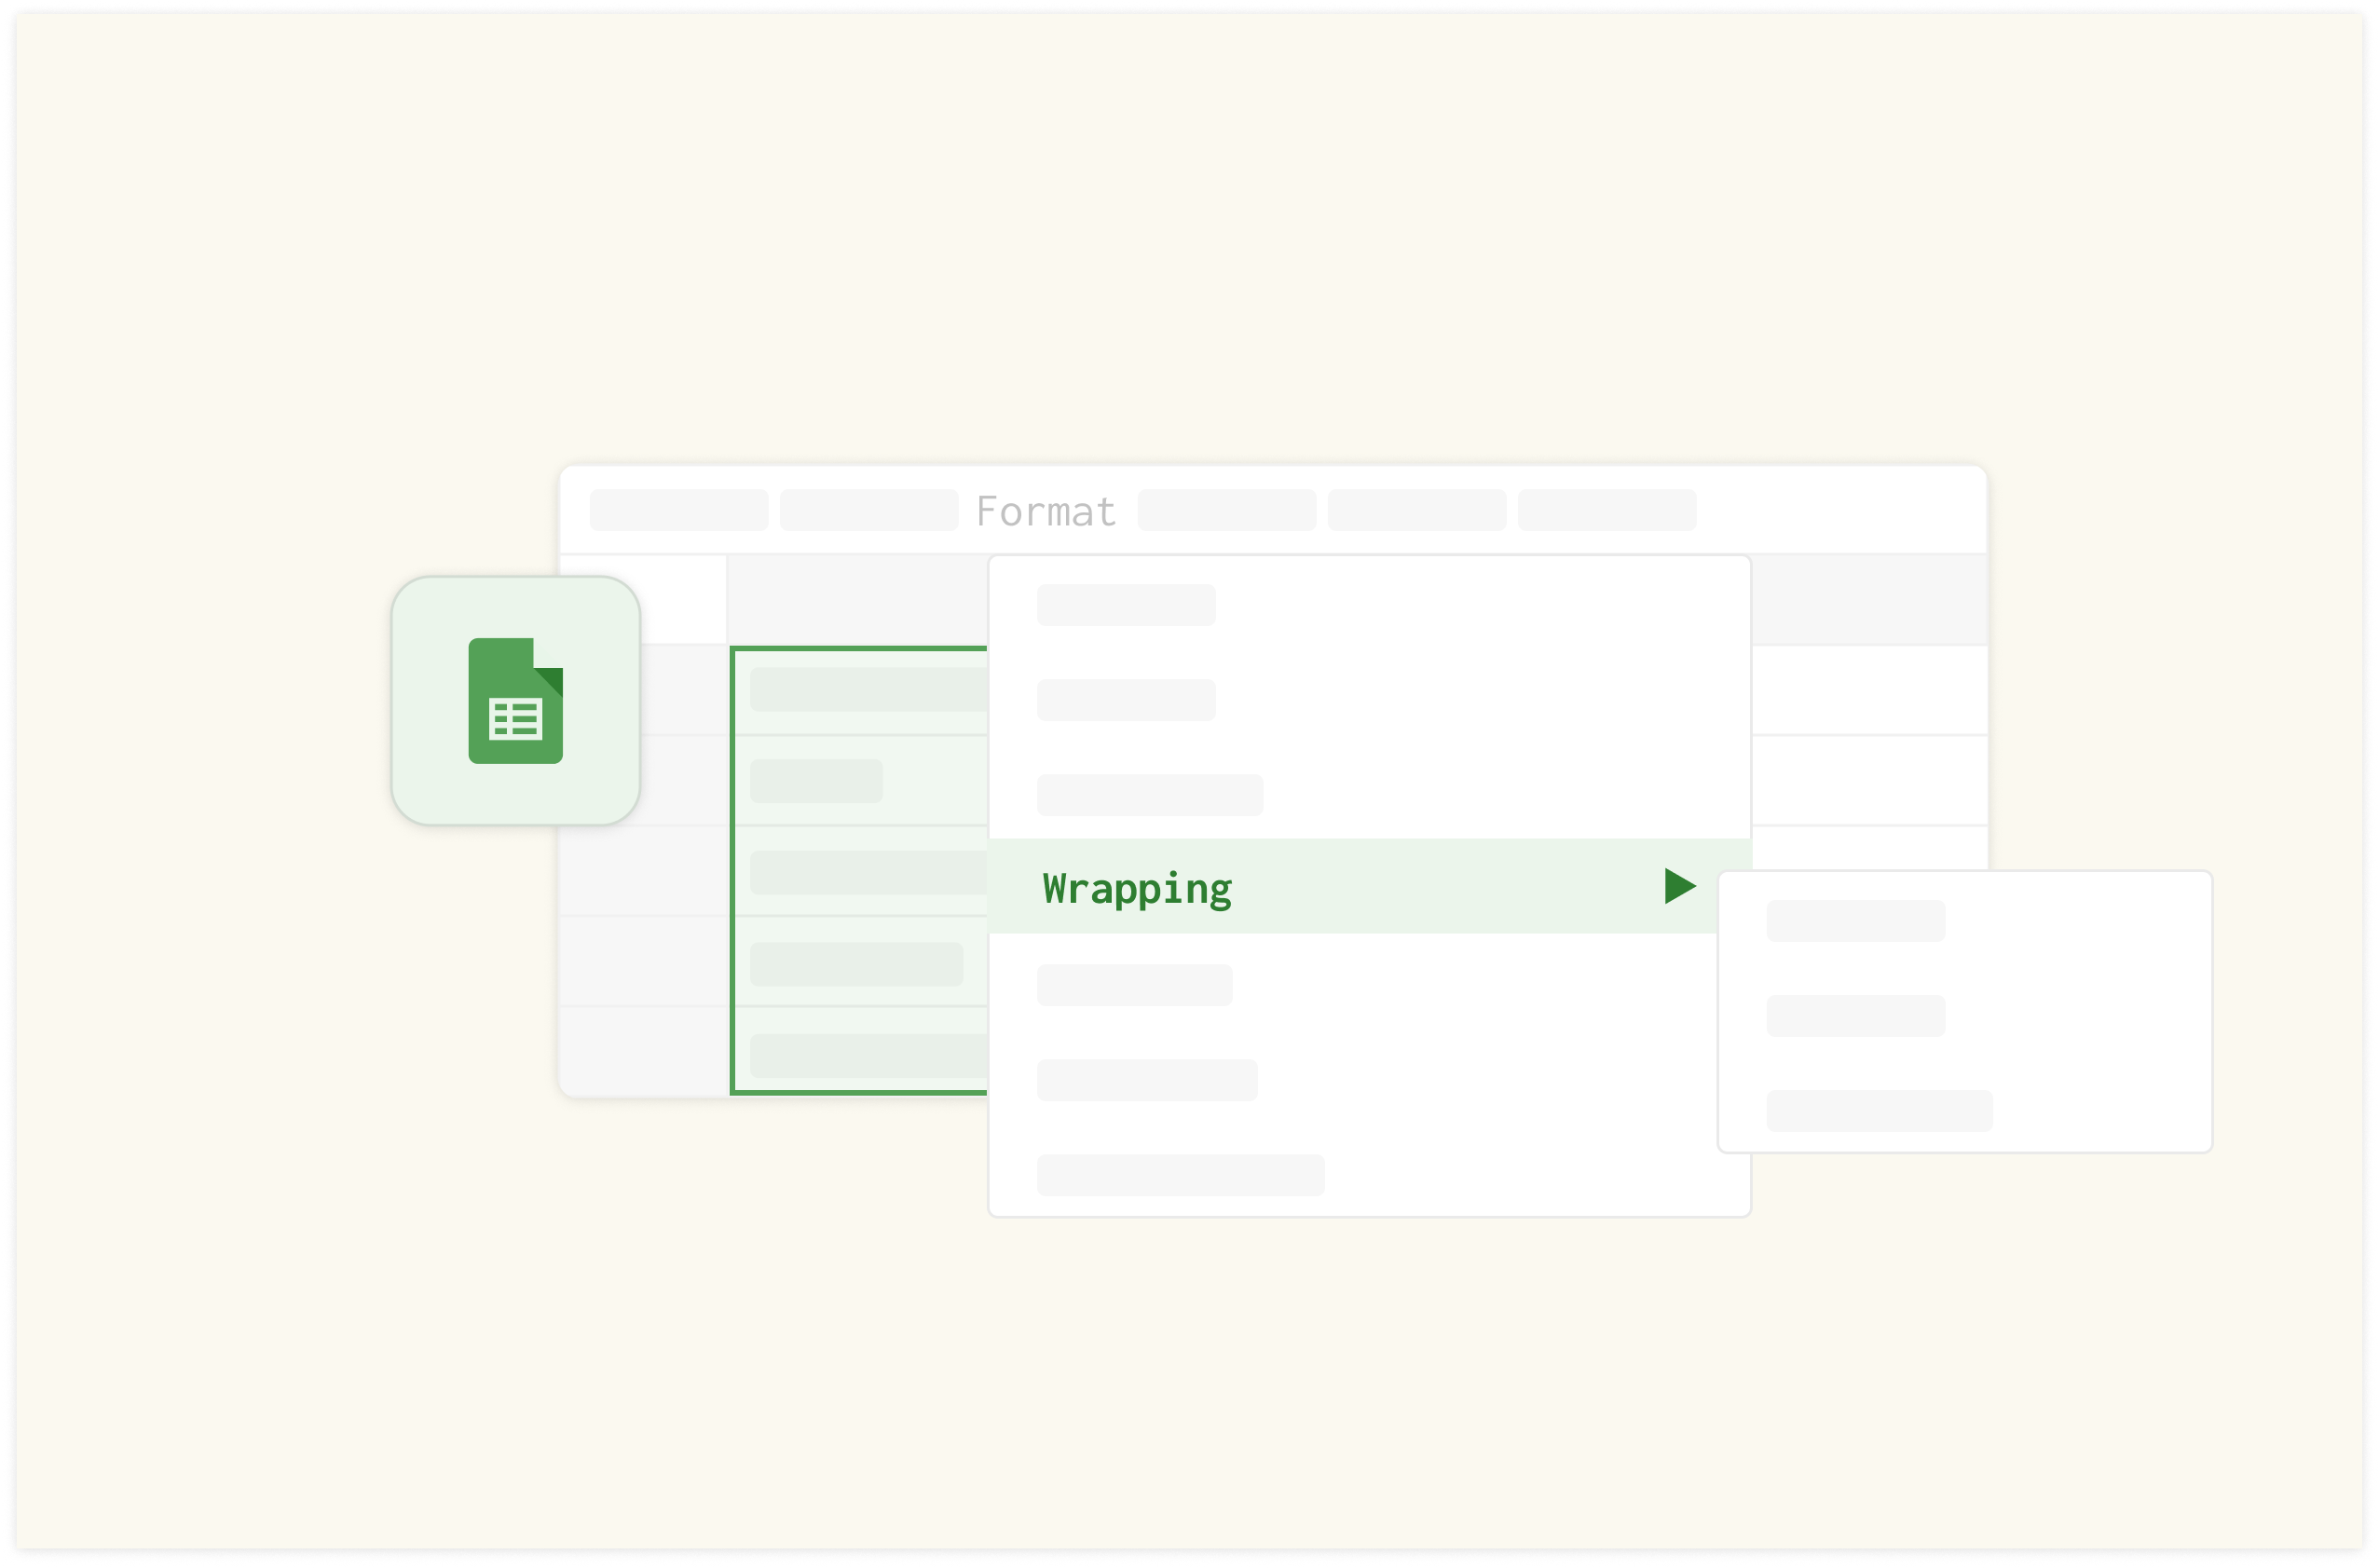
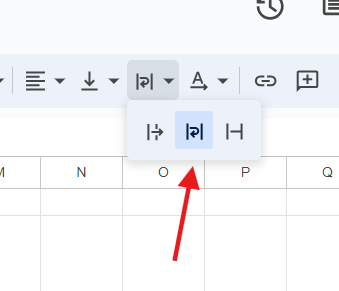
Method #1: Using Text Wrap Icon in the Menu Bar
This method provides quick access to text wrapping options directly from the toolbar.
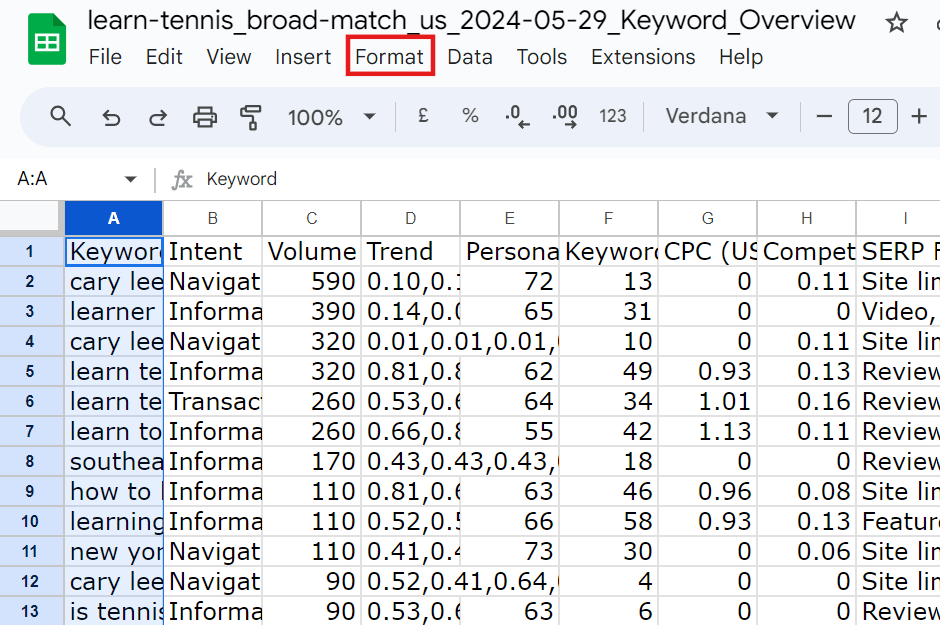
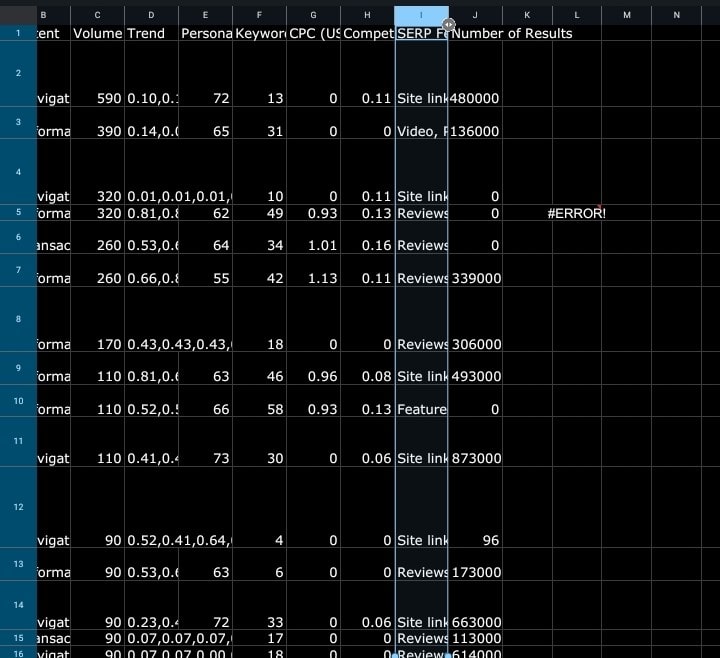
Step 1. Select the cell or range of cells on your sheet where you want to wrap text.

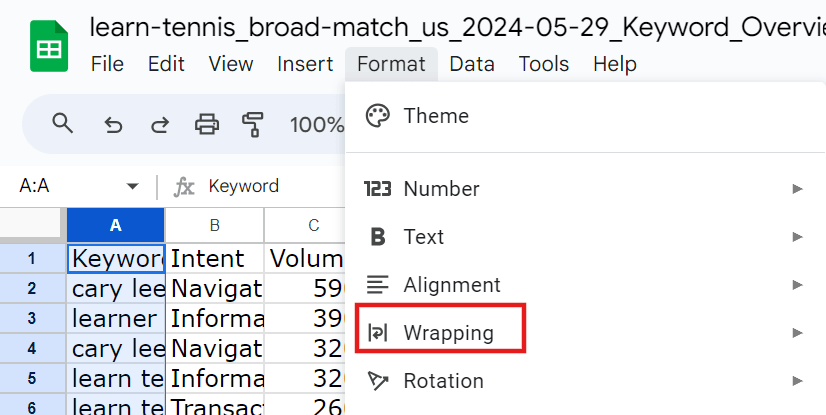
Step 2. Next, locate the “Format menu” at the top of the toolbar.
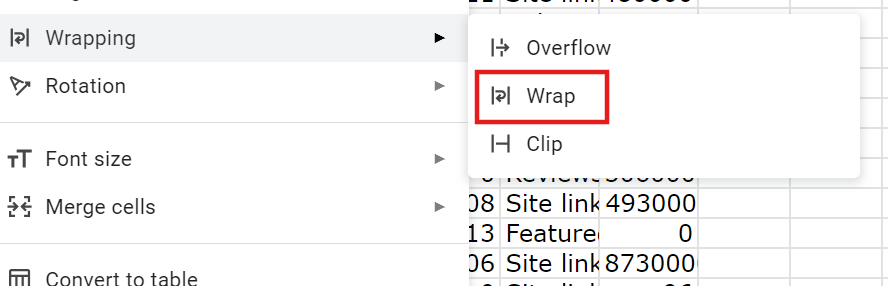
Step 3. Hover over "Text wrapping" in the dropdown menu.
Step 4. Select "Wrap" from the submenu.
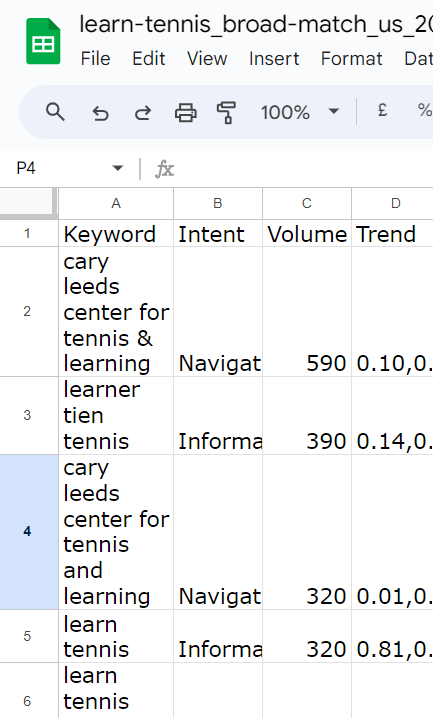
And voila, your texts are wrapped.
Note: This method applies wrapping to all selected cells, which may not always be desirable for mixed data types.
Drawback: It doesn't allow for fine-tuned control over how the text wraps within each cell.
To adjust text that appears cramped or awkwardly broken due to cell width, you can easily resize the column. One simple method is to position your mouse over the divider in the column header. This will change your cursor to a horizontal resize icon. Click and drag to adjust the width as needed. You'll only be able to expand from the right side for the leftmost column. This technique allows you to optimize cell width for better text display and readability.

The spreadsheet where data comes to life
Connected to your business data. Powered by AI. Delightful to share.
Try Rows for Free
Method #2: The Wrap Text Button
The wrap text button is the most popular and most straightforward way to wrap a text in a single or multiple cells.
Like in the previous method, select the cells or range of cells.
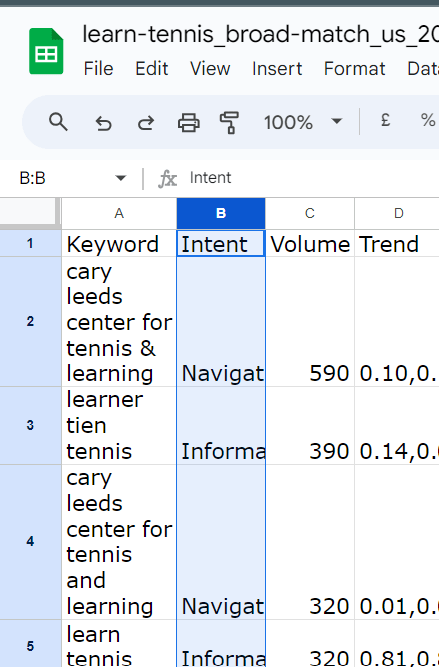
Step 2. Scroll to the top and locate the "Wrapping text" button in the toolbar.

Step 3. Select the wrap text option from the submenu to enable text wrapping.
Note: This method is quick but applies a uniform wrapping style to all selected cells.
Drawback: It may not be ideal for cells with varying content lengths or types.

Your new AI Data Analyst
Extract from PDFs, import your business data, and analyze it using plain language.
Try Rows (no signup)Method #3: Keyboard Shortcut
For more precise control over where your text wraps, you can use keyboard shortcuts to insert manual line breaks:
Step 1. Double-click the cell containing the text you want to wrap, or select the cell.

Step 2. Place the cursor where you want to insert your line break.
Next, Press Alt + Enter (Windows). or Option + Enter (Mac) to start a new line within the cell.
Step 3. Repeat for each new line you want to create.
This method is convenient when you need specific formatting or when dealing with addresses or other structured text. This method gives you precise control over line breaks but can be time-consuming for multiple cells.
Drawback: Manual line breaks don't automatically adjust if you change the cell or column width later.
Method #4: Adjusting Column Width
Hover your cursor over the right edge of the column header until it turns into a double-sided arrow.
Click and drag to adjust the column width. Release when the desired width is reached, allowing text to wrap automatically.
Drawback: Widening columns may disrupt your overall spreadsheet layout or make it less compact.
Method # 5: Using Formula: WRAP()
For more advanced users or those dealing with large datasets, the WRAP() formula offers a programmatic approach to text wrapping:
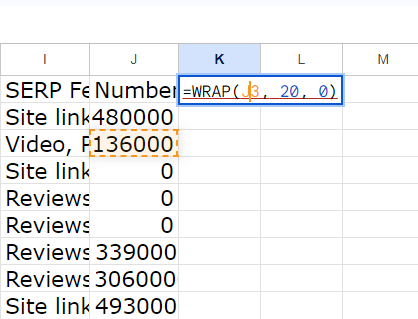
Step 1. In an adjacent cell, enter the formula: =WRAP(text, width, [break_type])
Where:
text: Reference to the cell containing the text you want to wrap
width: The number of characters at which you want the text to wrap
break_type: An optional parameter. Use 0 for word breaks (default) or 1 for character breaks
For example: =WRAP(A1, 20, 0)
Press Enter to apply the formula. The text from the referenced cell will appear in the new cell, wrapped according to your specifications.
This method is beneficial for maintaining consistent wrapping across multiple cells or when you need to wrap text based on specific character counts.
Drawbacks:
It requires an additional column or row to display the wrapped text.
Changes to the original cell won't automatically update the wrapped version.
The formula may need adjustment if the source data changes significantly.
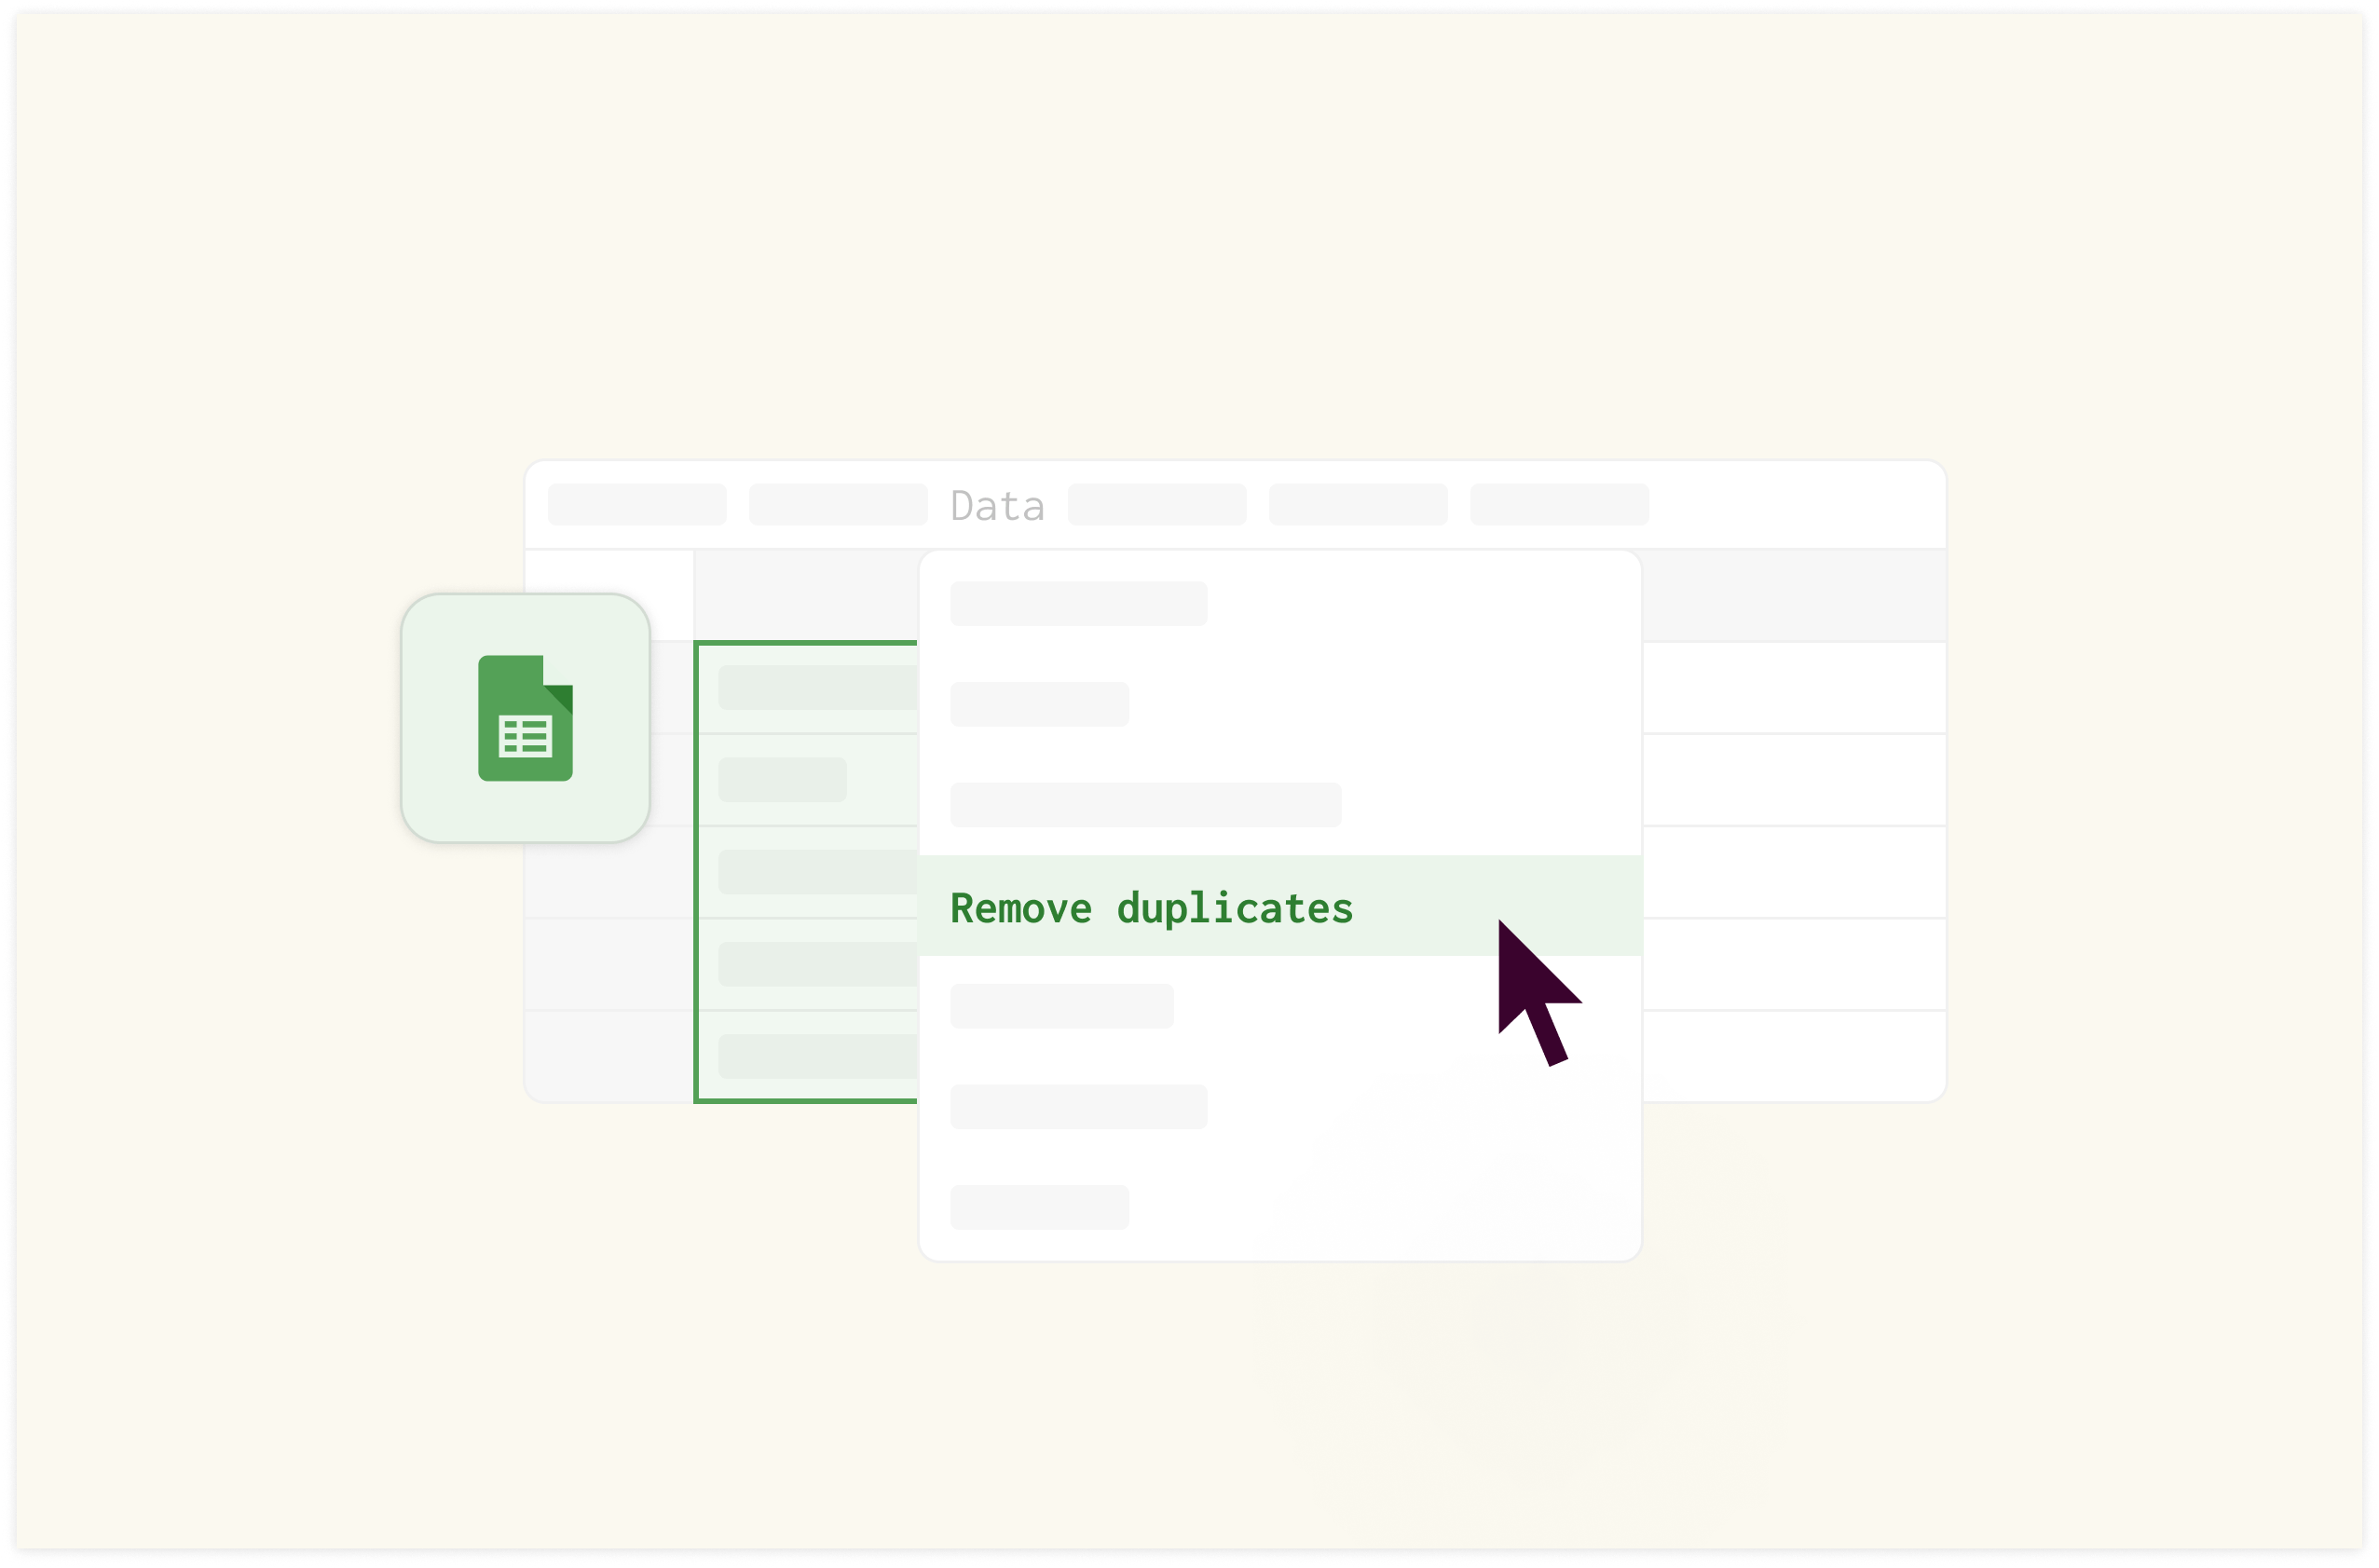
Method #6: Text to Columns Feature
While primarily used for splitting text, this feature can also be used for text wrapping:
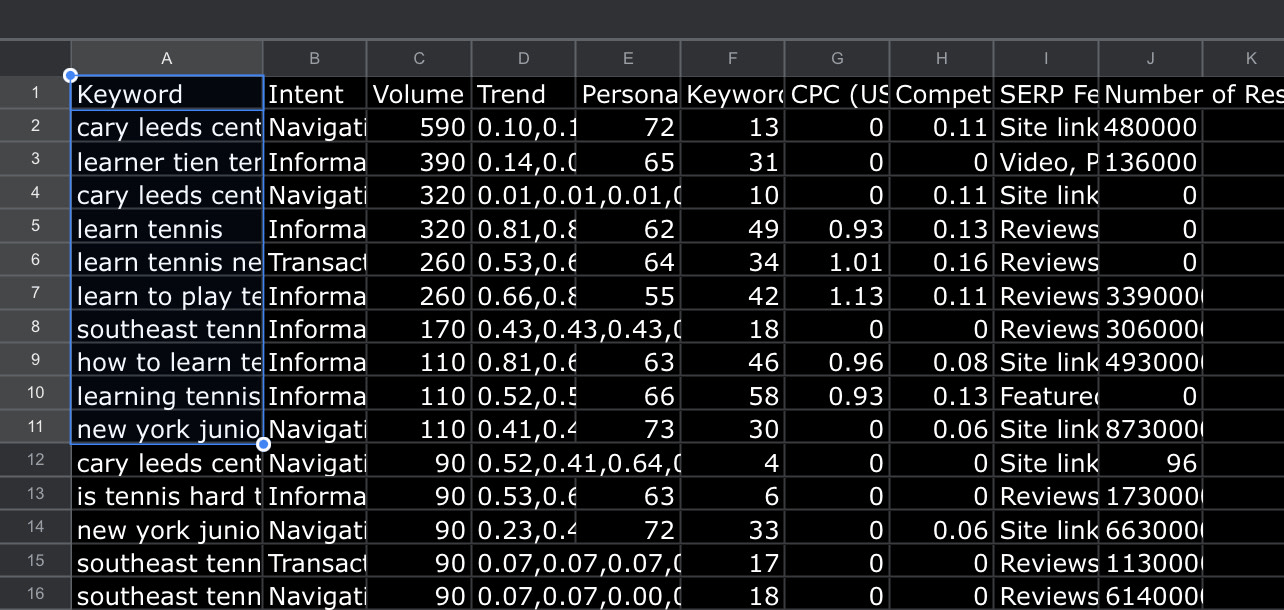
Step 1. Like the other methods, select or highlight the text or texts you want to wrap.
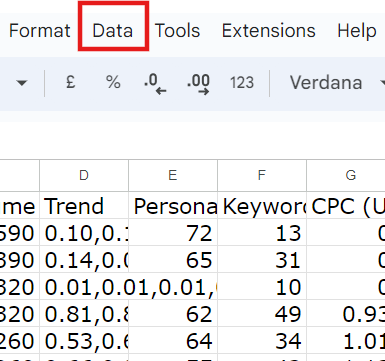
Step 2. Click on "Data" in the menu bar.
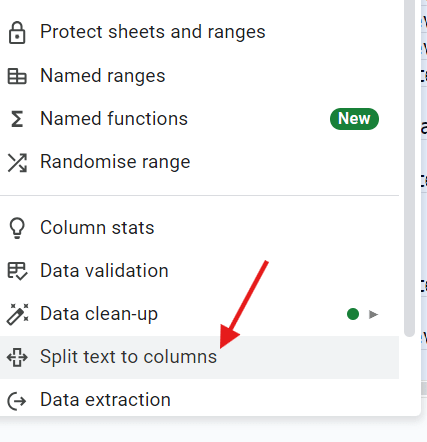
Step 3. Select "Split text to columns".
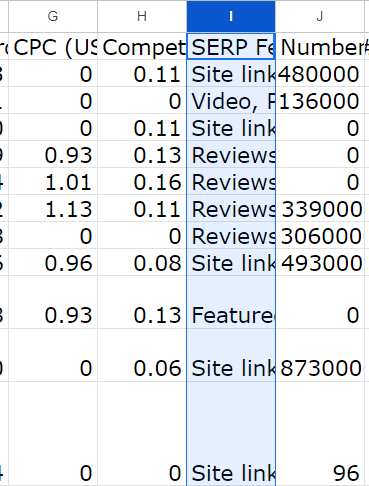
Step 4. Choose your preferred separator options.
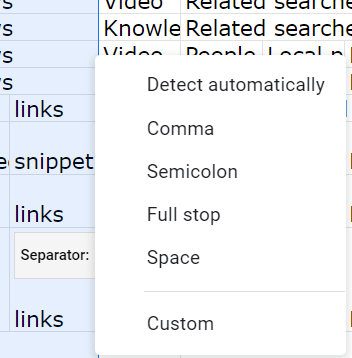
In this example, I chose space as the separator.
The text to column method is best for long sentences or paragraphs where you want to split the text at natural break points.
Note: This method can alter your data structure significantly and may require reformatting afterwards.
Drawbacks:
It splits your text into multiple cells, which may not be desirable for data integrity.
It can be challenging to reverse if you're not satisfied with the result.
It may not work well with texts with natural spaces in important places (e.g., names or addresses).
How to Wrap Text in Google Sheets on Mobile Devices
Wrapping text in Google Sheets on mobile devices lets you view and edit long text entries within a single cell. Android and iOS handle this process a bit differently.
How to Wrap Text in Google Sheets on Android Devices
You can wrap text in Google Sheets on Android by adjusting the cell format settings.
Steps:
1. Open your Google Sheets document on your Android device.
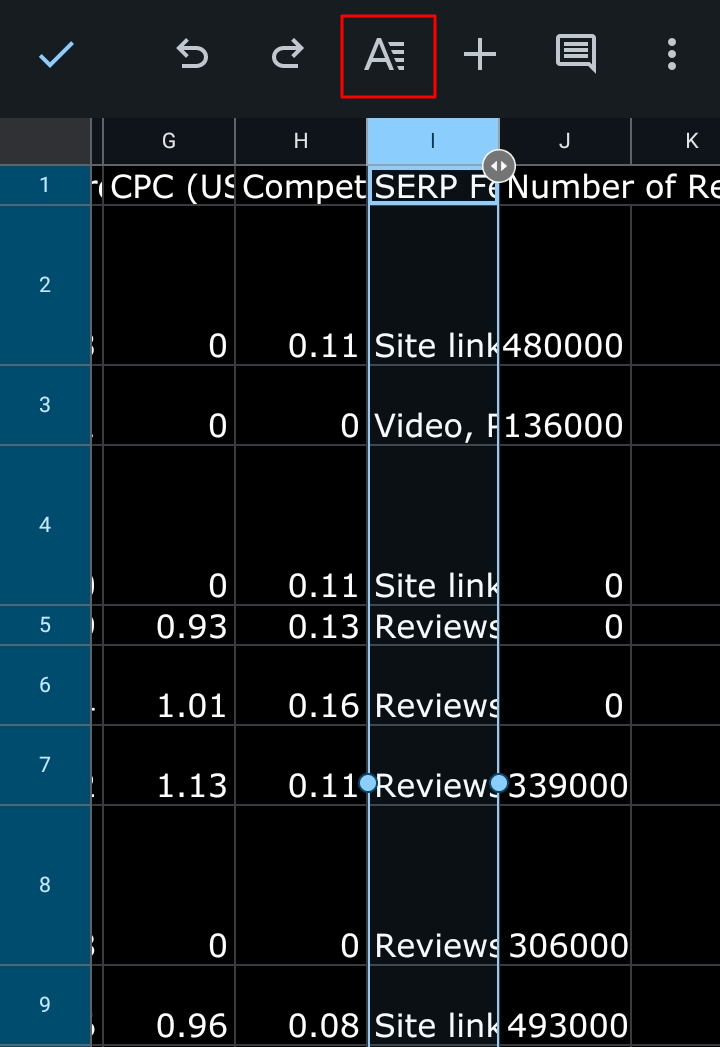
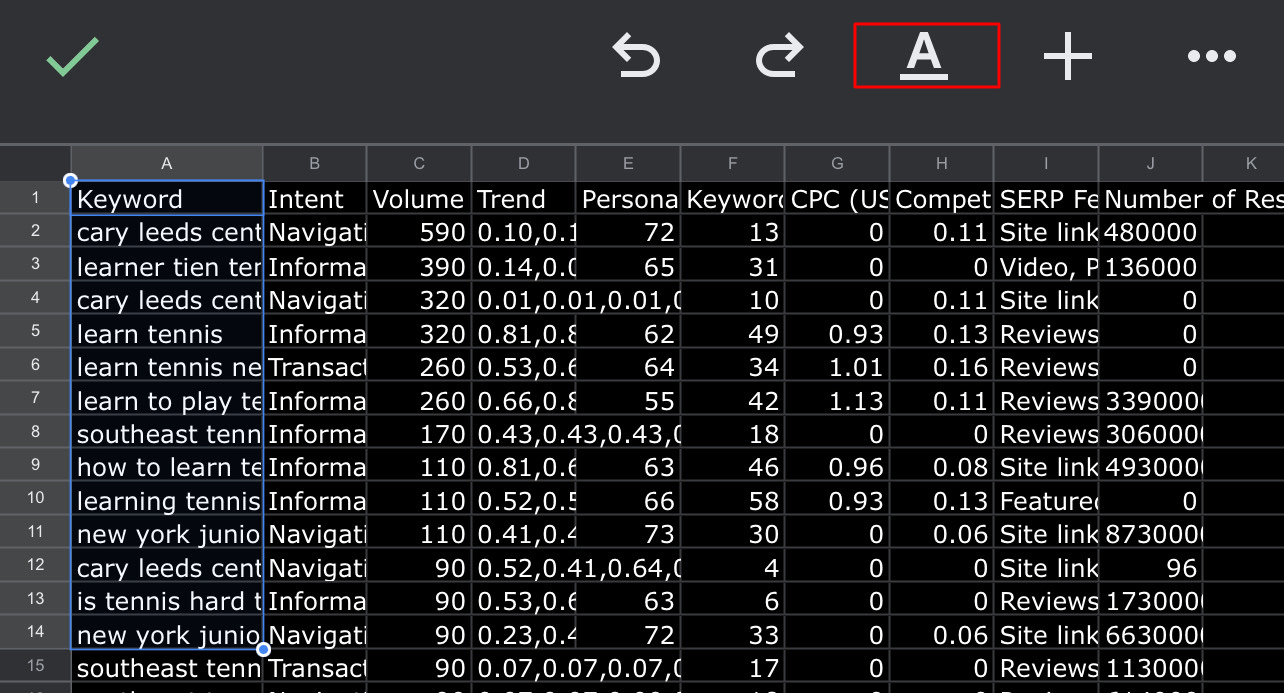
2. Select the cell or range of cells you want to wrap.
3. Tap the format icon (A) in the top toolbar.
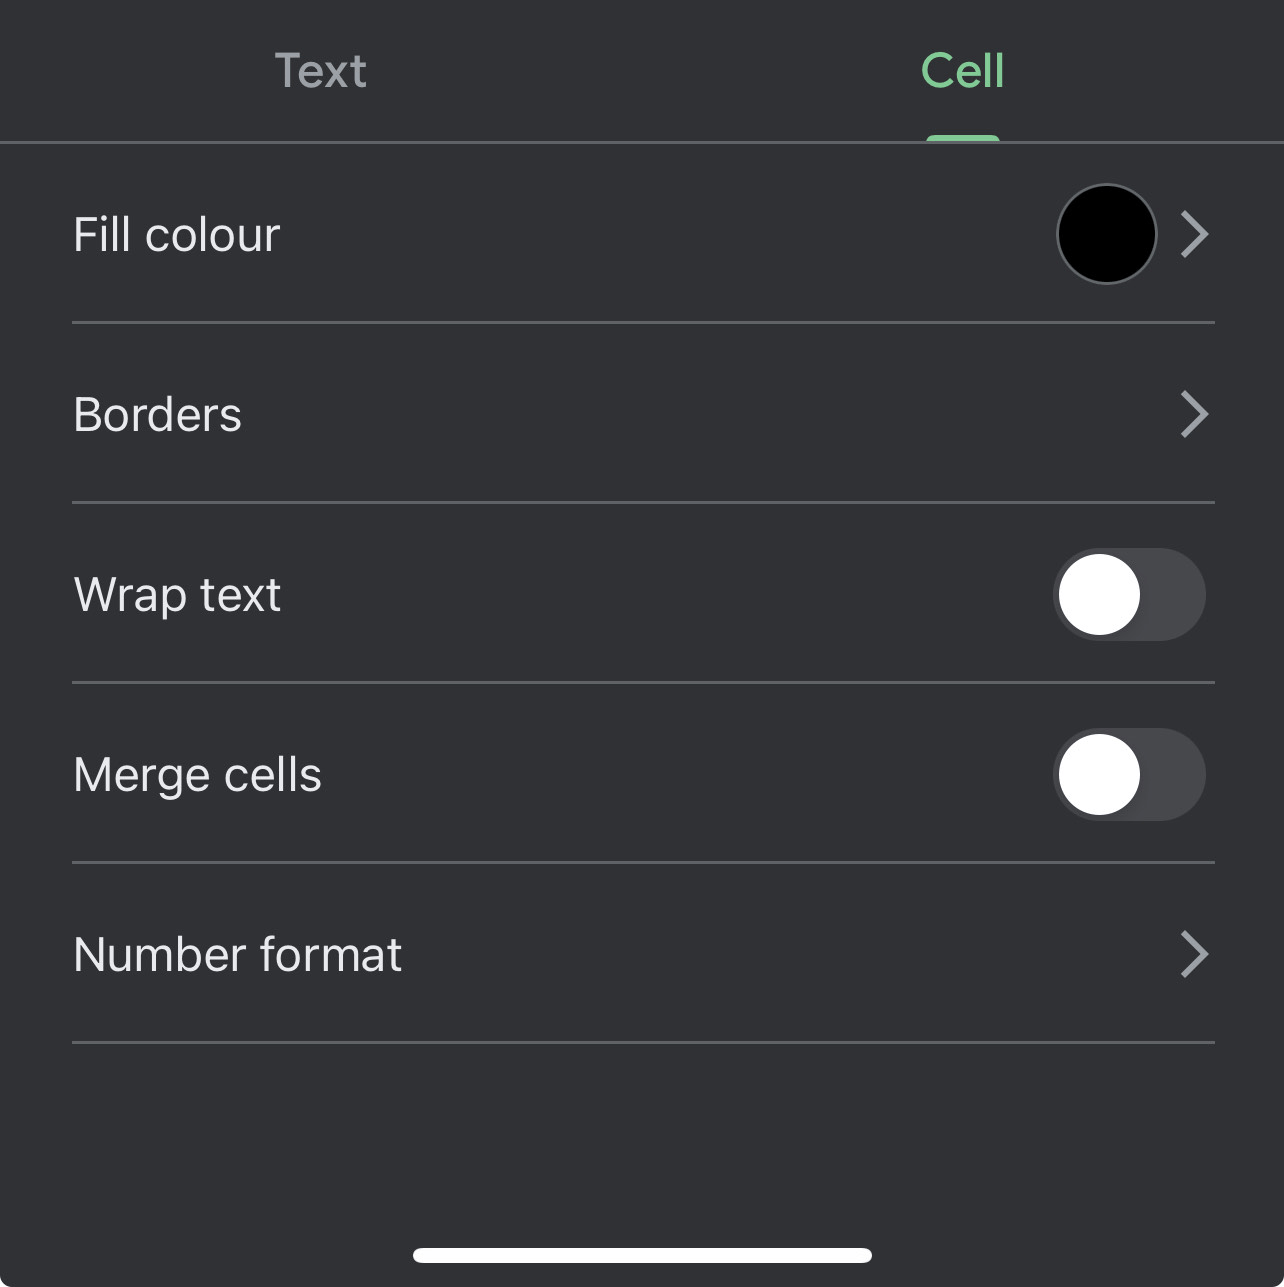
4. Scroll down and tap "Cell" in the format menu.
5. Toggle on the "Wrap text" option.
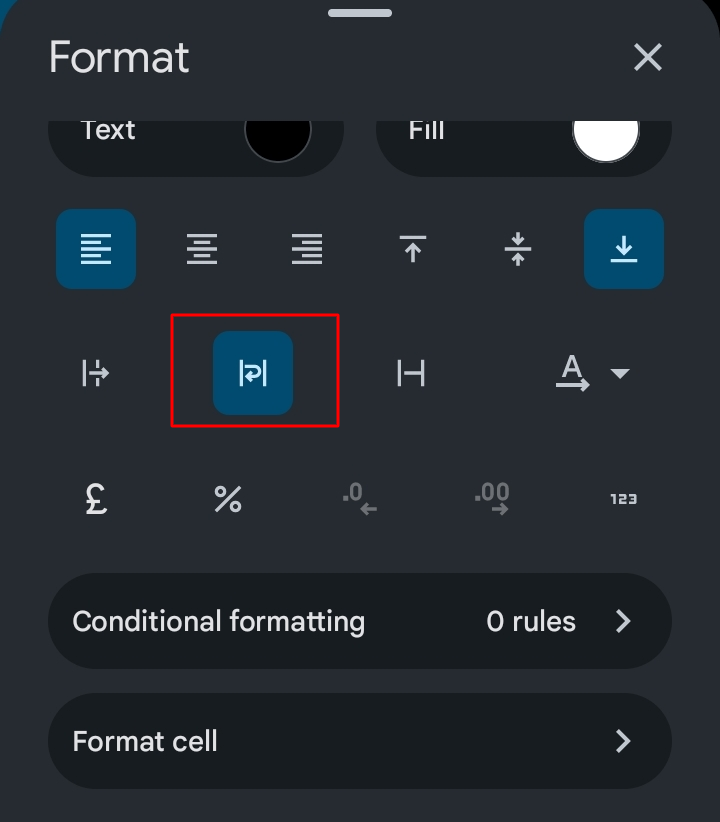
6. The text in the selected cells will now wrap to fit within the cell boundaries.
How to Wrap Text in Google Sheets on iPhones
Steps:
1. Launch the Google Sheets app on your iPhone and open your desired document.
2. Tap to select the cell or range of cells where you want to wrap text.
3. Find and tap the format icon (stylized 'A' with a pencil) in the top right corner of the screen.
4. Scroll through the formatting options and select the "Cell" option. This will reveal additional formatting choices.
5. Locate and turn on the "Wrap text" toggle switch.
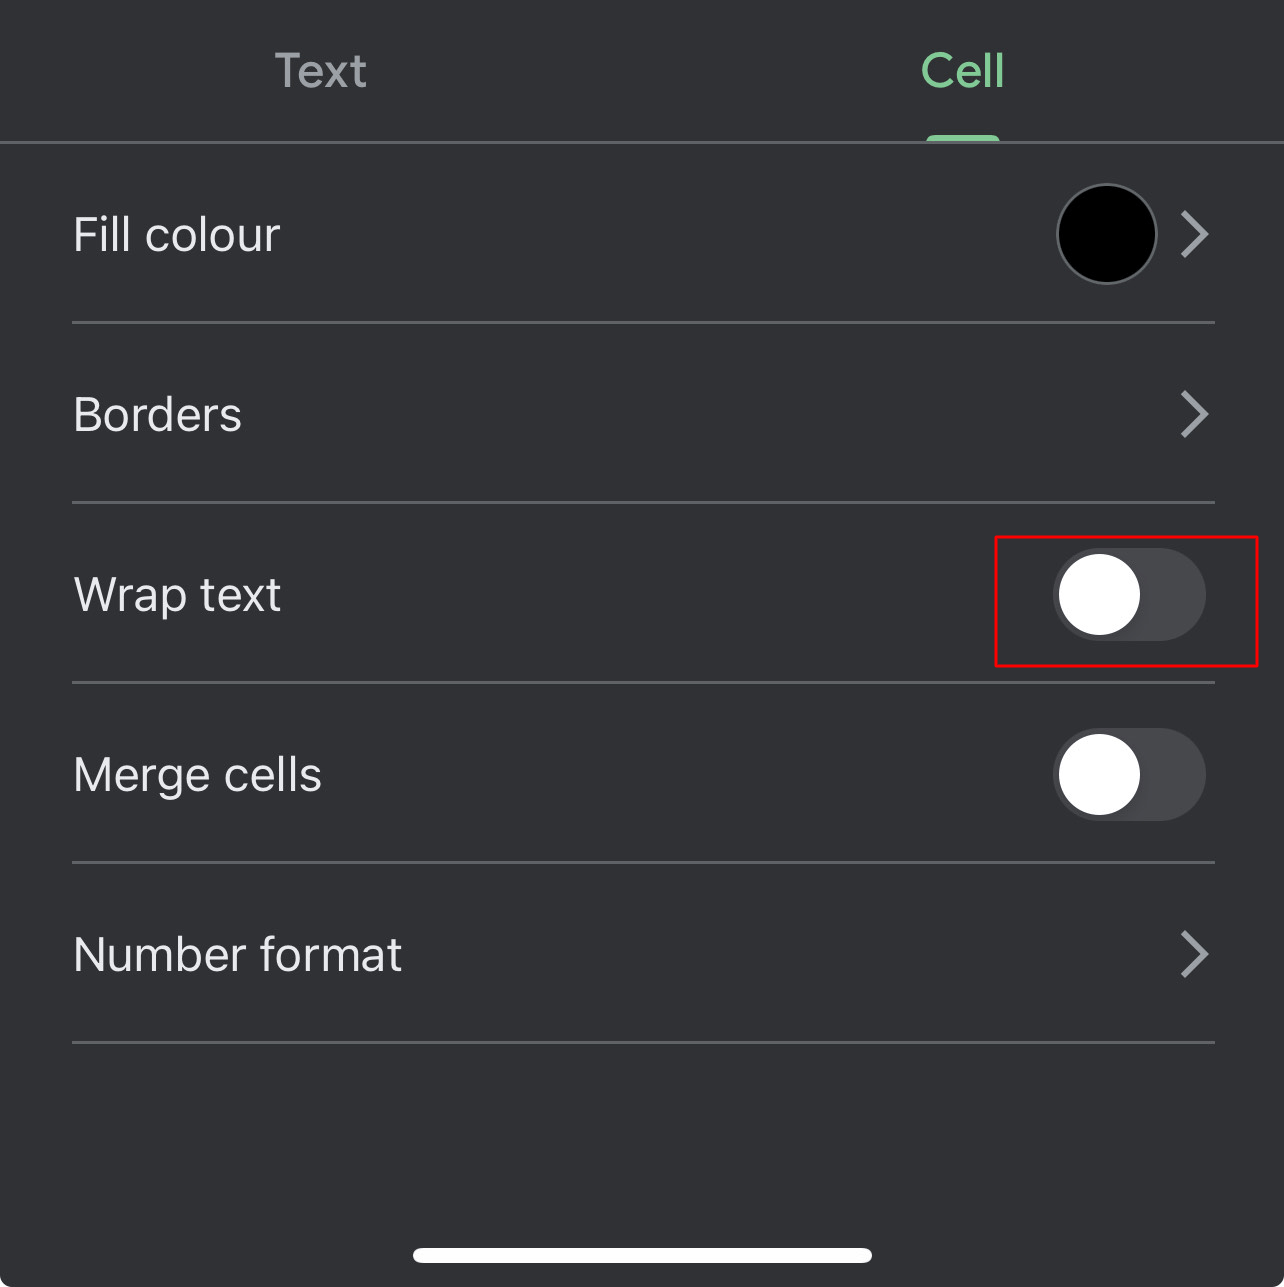
6. This action will wrap the text within the cell boundaries.
Troubleshooting Tips For Both Android and iPhone
If a text doesn't wrap, check for hidden spaces or line breaks
Ensure you're not in "frozen" rows or columns
Update the app if the feature is missing
Remember: Wrapped cells may impact sheet layout and printing. Always preview your changes before printing.
Read more: How to remove gridlines from mobile devices.
Benefits of Text Wrapping in Google Sheets
Text wrapping in Google Sheets is a simple yet effective tool. It improves the look and function of your spreadsheets, making them easier to work with and more professional. Here are five key benefits of text wrapping in Google Sheets.
Five key benefits of text wrapping in Google Sheets
Improved readability
Text wrapping makes your spreadsheets much easier to read. Instead of long strings of text running off the edge of cells, wrapped text fits neatly within the cell boundaries.
Better use of space
By wrapping text, you can reduce the width of columns, allowing you to fit more information on the screen or printed page. This is especially handy when working with large datasets.
Easier data entry and editing
When text is wrapped, you can see all the content in a cell without scrolling horizontally. This makes entering and editing data much more accessible, especially for longer text entries.
Improved printing results
Text wrapping ensures that all your content is visible when you print your spreadsheet. Without it, you might lose important information that extends beyond the print area.
Enhanced aesthetics
Let's face it: a well-formatted spreadsheet looks more professional. Text wrapping contributes to a cleaner, more organized appearance.
Related: How to create a table in Google Sheets [2025]
Things to Consider Before Using Text Wrapping on Google Sheet
Impact on Formulas
When wrapping text, be aware that it might affect formulas referencing those cells, especially if they rely on specific cell positioning.
Printing Considerations
Wrapped text may print differently than it appears on the screen. Always preview before printing to ensure readability.
Mobile App Limitations
Some wrapping features may be limited or function differently in the Google Sheets mobile app compared to the desktop version.
Performance
Excessive text wrapping, especially with formulas, can slow down large spreadsheets.
Collaboration
When sharing spreadsheets, be aware that others may have different display settings, which could affect how wrapped text appears on their devices.
Accessibility
While text wrapping can improve visual readability, it may impact screen reader functionality for users with visual impairments.
How to wrap text in Rows
Rows is a comprehensive spreadsheet for modern teams that offers a better interface, built-in integrations for data ingestion and has native AI capabilities (AI analyst, AI-generated subtitles, native AI functions).
Wrapping text in Rows is faster and more straightforward when compared to other methods in Sheets apart from the grid line method.
To wrap text in Rows, do these:
Method #1: Using Wrap Text button
With the Wrap Text button, you can wrap a long text in the selected cell string in seconds.
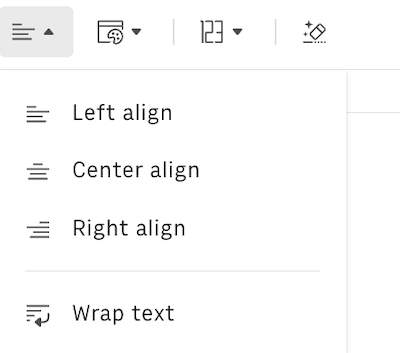
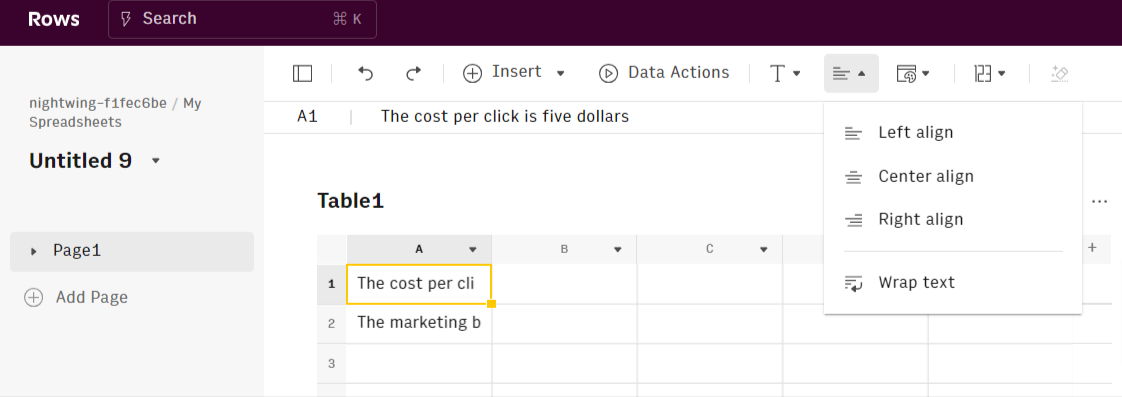
Step 1 : Highlight the cell you want to wrap. Click on the alignment icon on the top middle corner of Rows workspace, click wrap text afterwards.
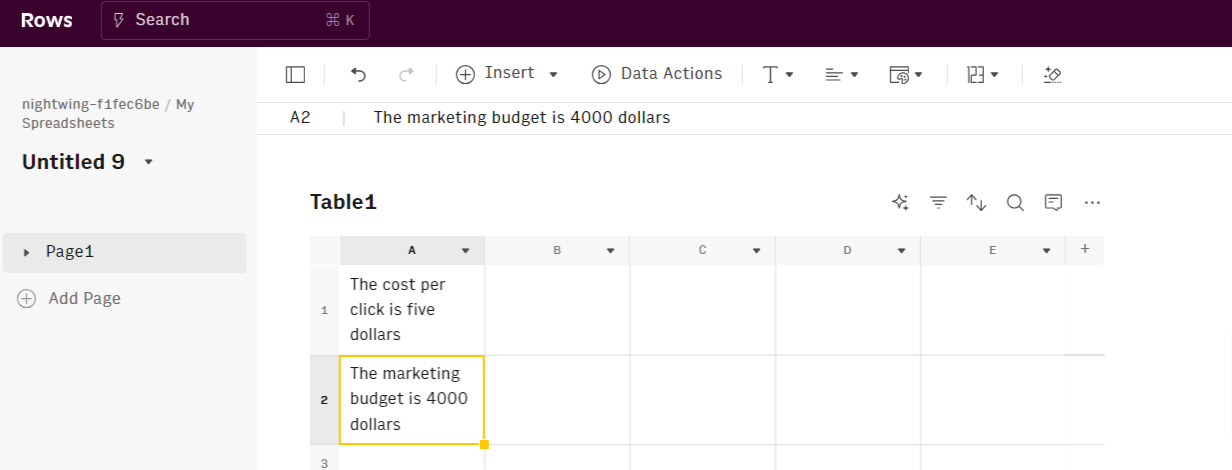
Here’s the result – it makes your text clean and organized.
Method #2: Using fit to data
Step 1: Take a look at the texts you want to wrap. And do well to highlight every cell that is looking unkempt and spilling over.
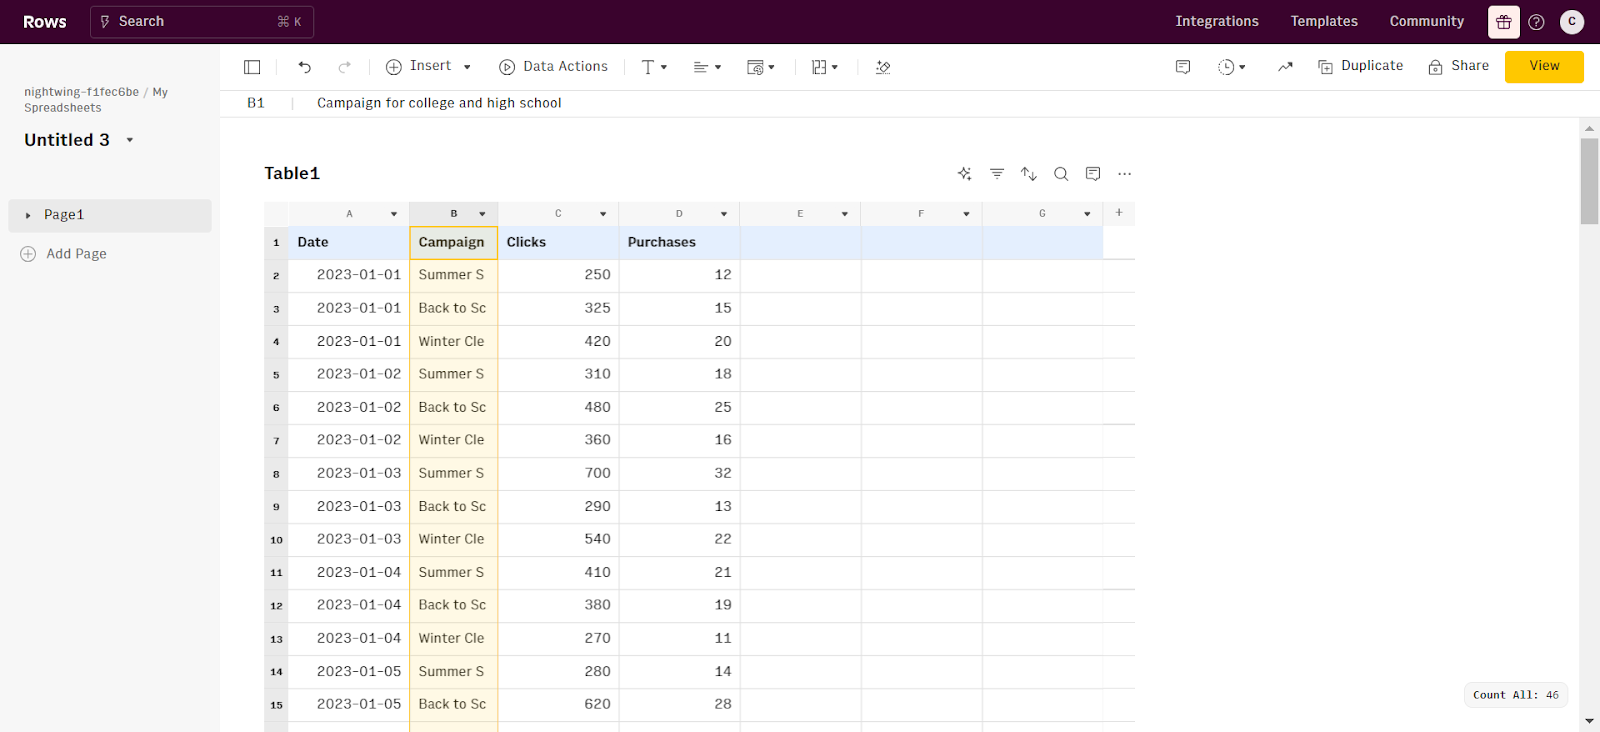
Step 2: Click on the dropdown menu icon on the column you want to wrap.
This dropdown menu shows various options for manipulating the data in the spreadsheet, including:
- Sort A -> Z
- Filter
- Insert column left
- Insert column right
- Hide column
- Fit to data
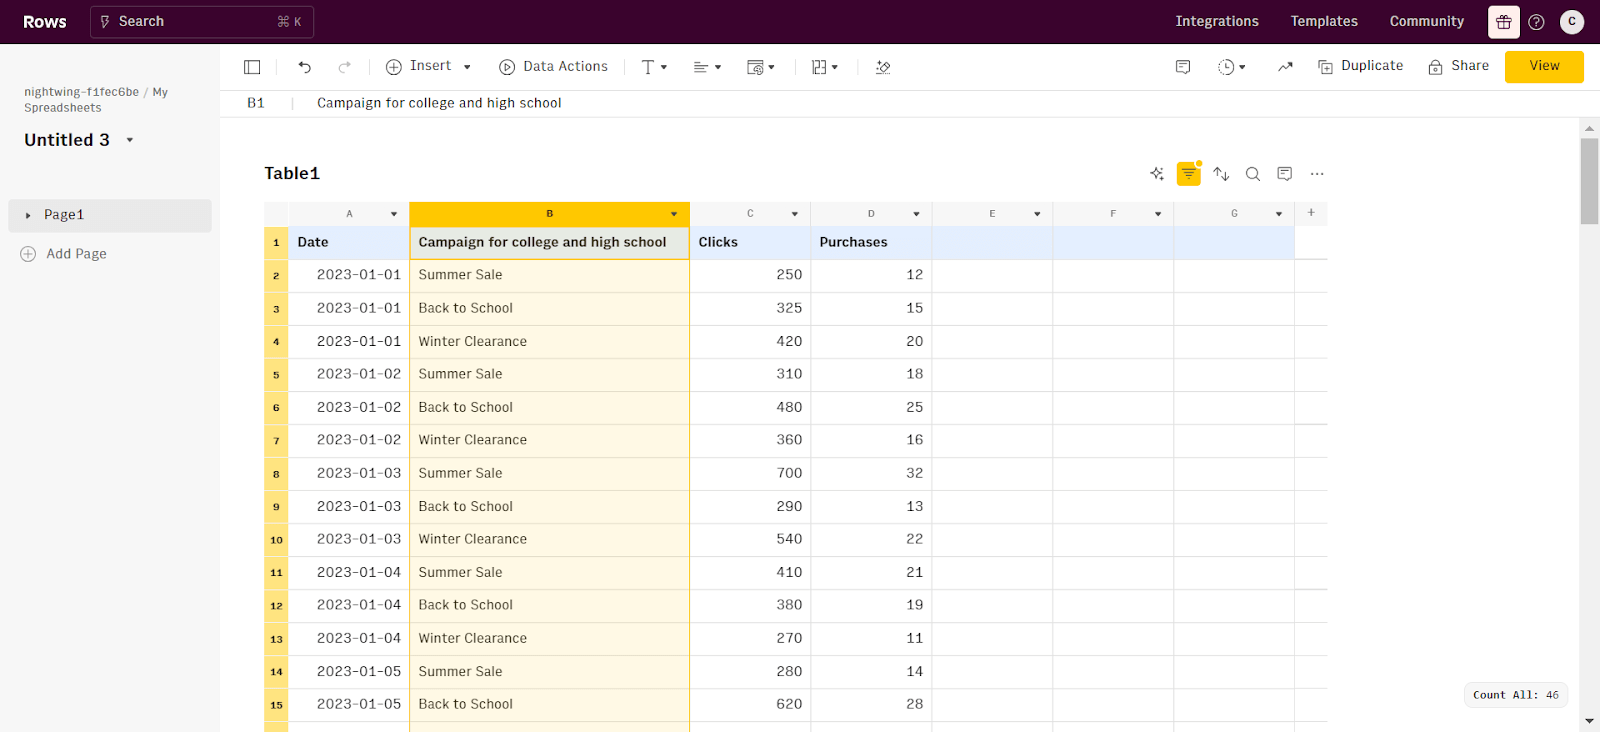
Click “Fit to data”.
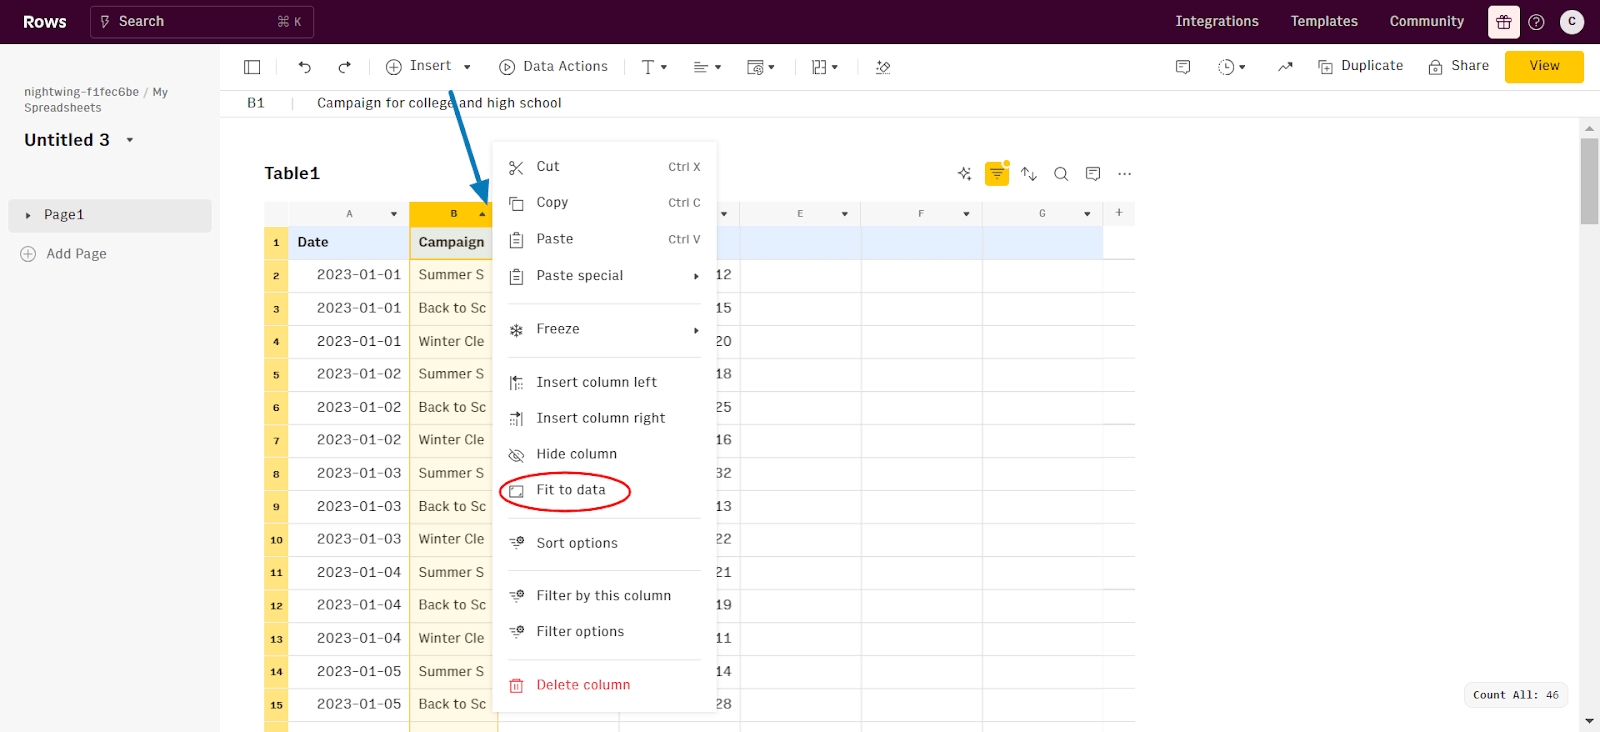
Once done, each text no matter how long fits into each cell of the column.
Method #3 Using SPLIT function
One of the methods I mentioned earlier for wrapping text in Google Sheets is the 'Text to Column' option. The equivalent function in Rows is called 'SPLIT', which can be used directly in the grid to separate text based on a delimiter (e.g., a space or a comma). This function outputs each segment into individual cells within the same row or column.
See how SPLIT works in the following demo:
Rows top features
Below are some Row tops features that makes it unique for wrapping text and for general spreadsheet purposes —
Data aggregation
You can aggregate live data from 50+ sources in a very simple manner, thanks to built-in data integrations in various domains:
Marketing: GA4, GSC, Facebook, Instagram, TikTok, etc
Productivity software: OpenAI, Notion, Slack, Email, Translate
Data Warehouse: MySQL, BigQuery, PostgreSQL, Snowflake, Amazon Redshift
And many more.
In the following use cases, we use Rows built-in data integrations to fetch data from popular analytics, productivity and social platforms.
Using the Google Analytics 4 integration, you can build reports in seconds, e.g. by choosing one of the recommended report (Landing Page (last 30 days):
Or build a custom one, that counts the number of events in a given period and breaks down data by landing page and event name
Read more: Best data aggregation tools in 2025
AI-powered automation
With the AI Analyst, you can ask AI to analyze, summarize, transform, and enrich your analysis. Click on the ✨ icon, at the top right corner of any table.
A chat interface will open on the right: you can ask a broad range of questions, from basic spreadsheet commands - plotting a chart or adding or formatting columns - to more complex tasks, such as slicing, pivoting, or computing metrics about your data.
For example, given a dataset with daily revenue and costs of various marketing campaigns, you can ask the Analyst to add a column with the profit margin. Watch the video below:
In addition, our AI Analyst is instructed to use our native OpenAI functions to perform data enrichment or extraction tasks.
For example, you can ask the AI analyst to run a sentiment analysis on a column with product reviews, or add a column that categorizes addresses into regions, see below:
Want to know more about how our Analyst works? Check out our guide or watch our demo.
Related: Do you want to learn how to create pivot tables? If yes, click the link!
Modern UI
Spreadsheets in Rows present a document-like layout with standalone tables and charts that are stacked vertically and horizontally.
WYSIWYG: the spreadsheet IS the dashboard. All data is rendered as regular spreadsheet tables. And you can move elements vertically and horizontally with drag&drop. And if something breaks, you can intervene on that table or chart very flexibly, without the need to dive into complex workflows. See the example below
View Mode: View mode makes your spreadsheets work like web applications. With input fields, you can help anyone understand how to use your spreadsheet by highlighting the cells that need an input by the user.
Your new AI Data Analyst
Extract from PDFs, import your business data, and analyze it using plain language.
Try Rows (no signup)Supercharge your sheets with Rows
With Rows, you get access to 50+ built-in data source integrations in various domains.
This makes it easy to ingest data into your table quickly and reduces your team's stress. With Rows, you can gather data from various sources in your system. This allows for more detailed analyses and helps your team uncover insights they might miss.
Ready to get started with Rows.com? Start using the product right away for free.