Introduction
You can now directly fetch and update their HubSpot contacts, companies, and deals from within Rows.com. The integration's features include:
- Search companies, deals, and contacts with multiple criteria.
- Retrieve up to ten thousand results in search actions.
- Add new contacts, companies, or deals to HubSpot.
- Update contacts, companies, or deals on HubSpot.
Requirements
- An active HubSpot account with one or more contacts, deals, or companies.
- A Rows.com account.
Connecting the HubSpot Integration
- Navigate to the HubSpot integration page.
- Click on “Connect”.
- Fill in your HubSpot credentials.
- Select the HubSpot account.
HubSpot functions
The HubSpot comes with seven functions. Let’s check each of them.
Search functions
These functions allow you to search for companies, deals, or contacts. You can decide which information and properties you want to pull from the CRM. In addition, it's possible to use multiple criteria to filter your data.
These functions are meant to help you build reports, hence these are natural Data Sources of Data Tables.
List function
This function helps you to import contacts from a pre-defined list on HubSpot.
Add or update functions
Add or update functions power you to export data to HubSpot. The functions add new companies, deals, or deals when those do not exist on HubSpot. Otherwise, the information is just updated.
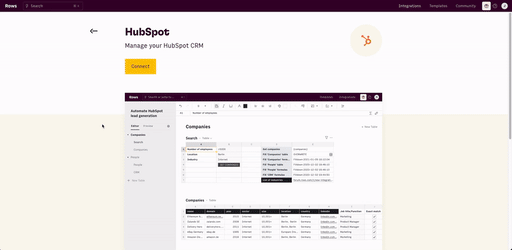
How to import a table from HubSpot
Connect the integration
- With any spreadsheet open, click on the Action button in the top menu bar.
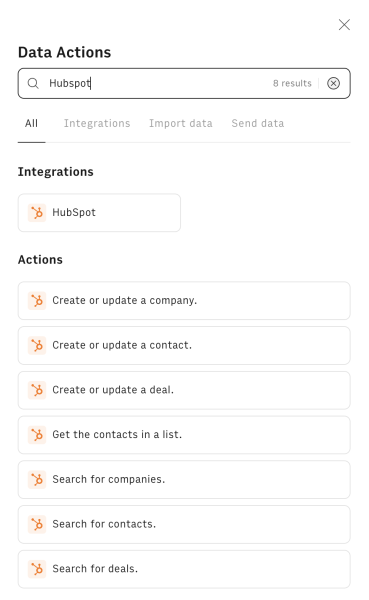
- The search input field is automatically in focus so you can immediately start typing "HubSpot" and the integration will show up in the results as well as the available actions.
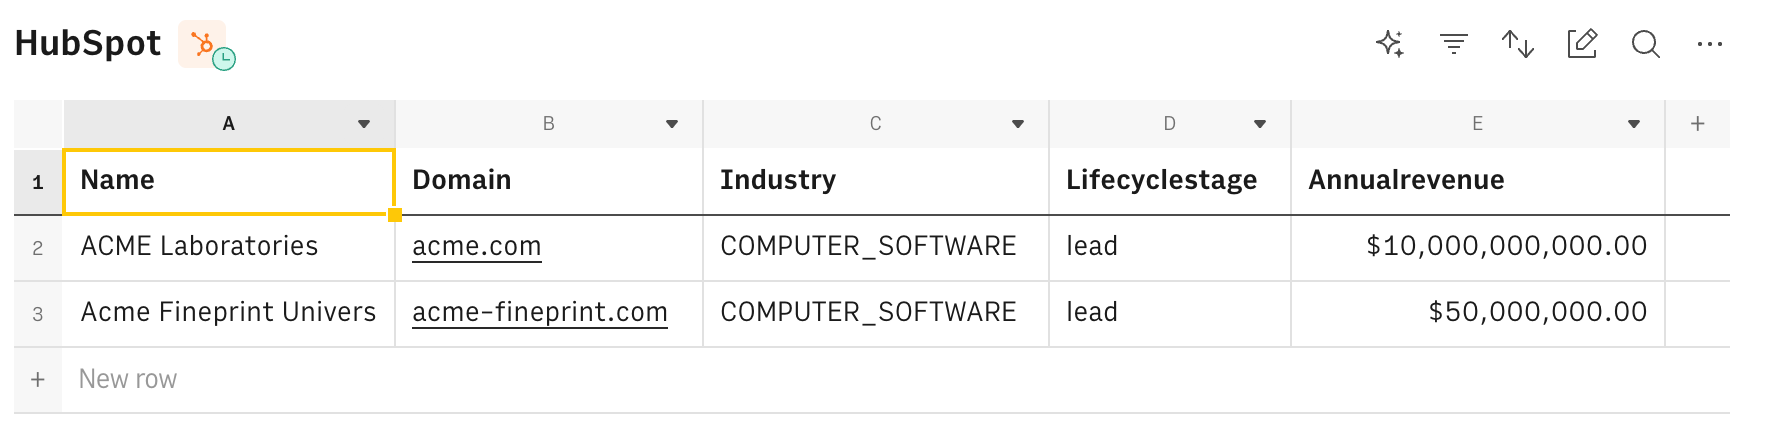
- Click on "Search for companies" in the Actions section.
- We automatically pull in all Properties that are available on your HubSpot account and list them in the dropdown menu for "Properties". Go ahead and select the ones that are more important for you.
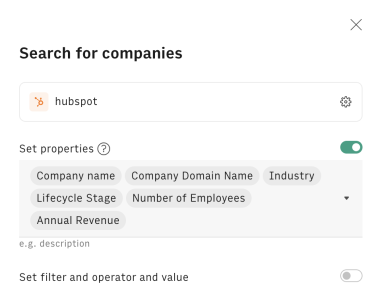
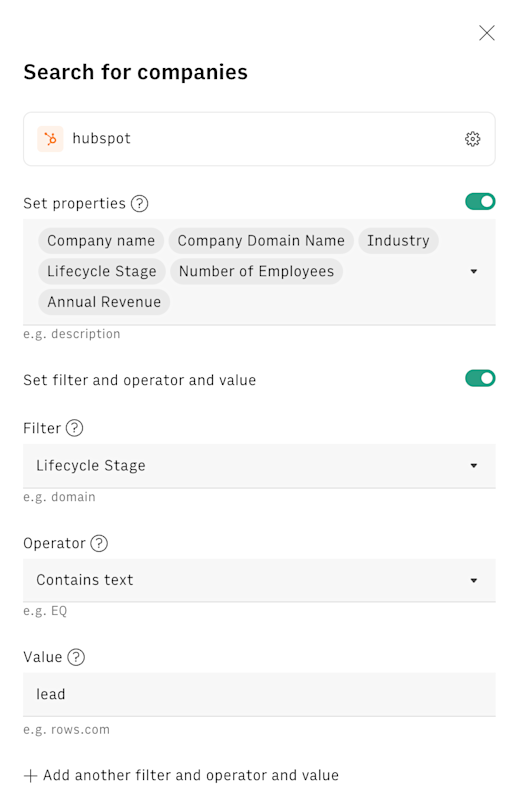
- Enable the filter section. You can refine the results through filters.
- For example, to list only companies in the lead stage will be displayed do the following:
- Select a filter such as “Lifecycle Stage”.
- Set the operator as “Contains text”.
- Set the value as “lead”.
- Click on “Next Step”. We automatically load the data from HubSpot in your current spreadsheet as a new Data Table.
- You can now customize this by adding or removing the Table columns. You can also change the table orientation and how the data in this table should behave. To do that, click on the options menu of the Data Table > Edit Data Table.
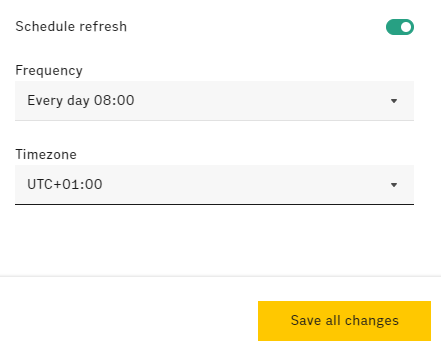
- You can also toggle on the "Schedule Refresh" automation where you can automatically refresh the data at a time or frequency of your choosing.
- Now, just repeat the same steps for contacts and deals.

Click here to watch a video with the full use case.
How to send data to HubSpot
Connect the integration
- With any spreadsheet open, click on the Action button in the top menu bar.
- The search input field is automatically in focus so you can immediately start typing "HubSpot" and the integration will show up in the results as well as the available actions.
- Click on "Create or update a contact" in the Actions section.
- Bear in mind the result of this operation will be added to a cell. Therefore, set this cell in the "Data source location" input field.
- Type or reference a cell with the following values: First Name, Last Name, and Email.
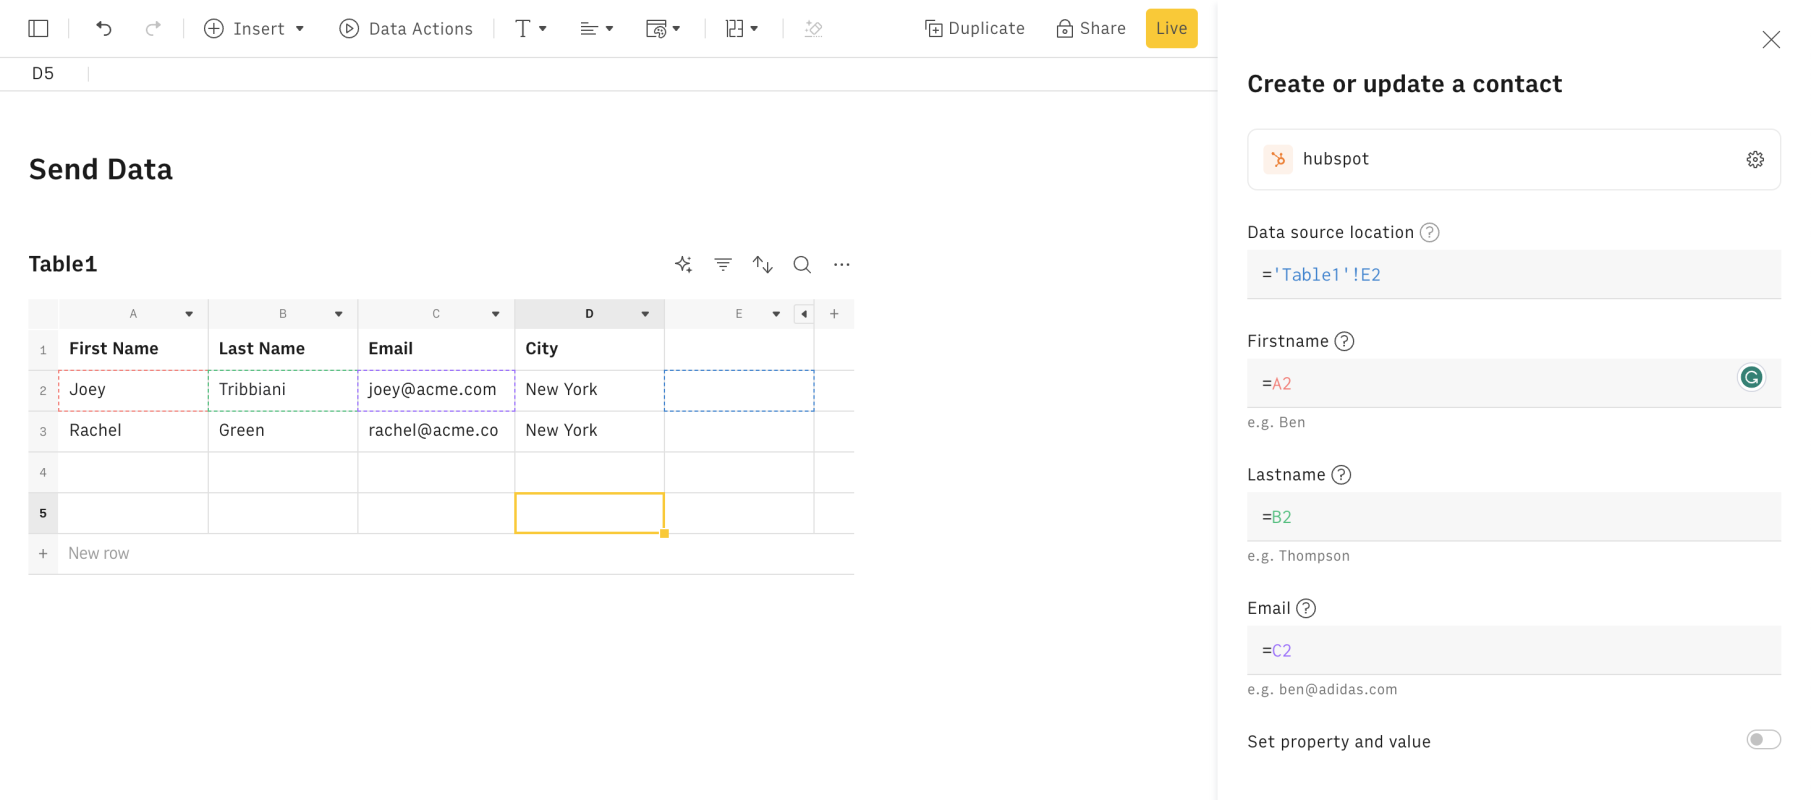
- Enable the Property and Value section.
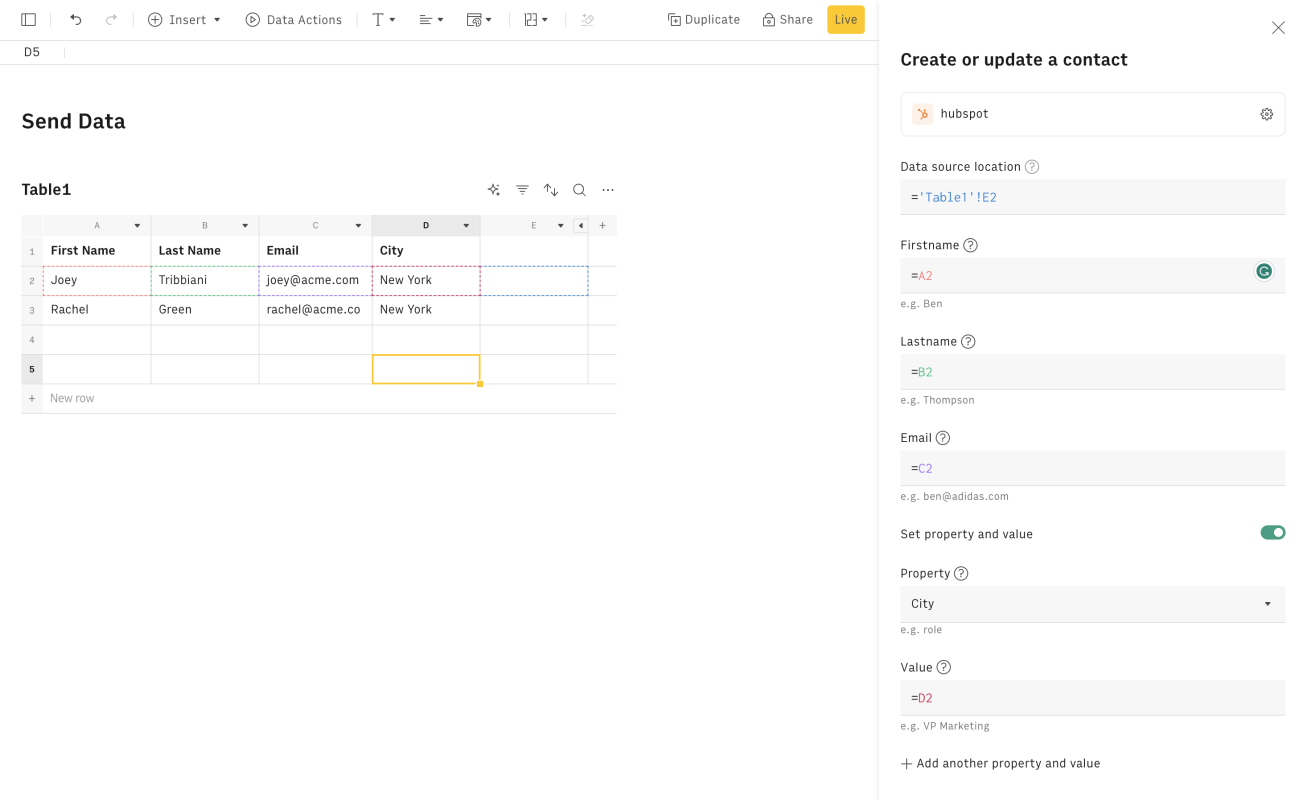
- Select any properties from the dropdown. You can add as many properties and values as needed.
Click here to watch a video with the full use case.
Conclusion
These functions give you the power to integrate your data into Rows spreadsheets, enabling you to build great CRM reports. By following the steps and best practices outlined in this article, you can effectively utilize our functions to unlock the full potential of your HubSpot data within Rows.
Take it a step further by using Rows's Charts to bring your data to life!