Using the Rows integration with Zapier, You can build a Zap to send data into a Rows spreadsheet. For example, sending Typeform replies to a spreadsheet or tracking new customers on Shopify and logging them in a spreadsheet. Follow the next steps to understand what you need to do to ensure Zapier can interact with your spreadsheet properly.
Setting up Zapier
Zapier is an automation platform that lets you build automations to your business, for example, sending the output from one service to another service as an input. At the Zapier platform this is called a Zap.
Each Zapier integration can contain Triggers and Actions. Triggers are how your app’s users can start automated workflows whenever they add or update something in your app. New emails, messages, blog posts, subscribers, form entries, commits, and much more are the initial data that underpin every Zap. Actions push or put new data into apps through API calls that pass data from user customized input fields. (An API is a means for software to talk to each other.)
At this moment, Rows integration with Zapier can be used as an Action, i.e. if a Trigger happens, you create a new row in your spreadsheet.
To connect to Rows, you'll need an API Key, which you can learn how to do here. Optionally, if you want to learn everything about the Rows API, follow this link.
First, lets outline some rules to ensure everything runs smoothly!
Create a new spreadsheet & add headers
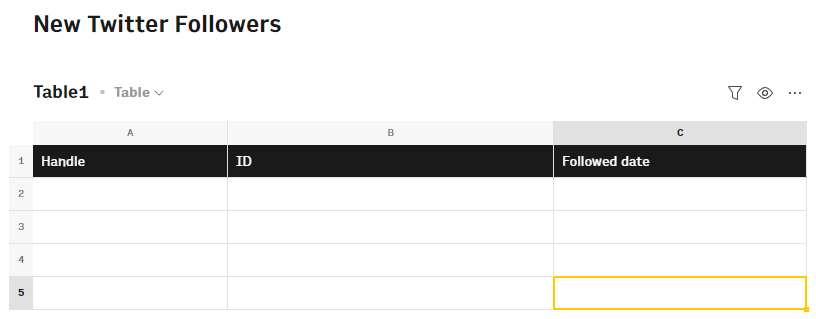
First, let’s create a new spreadsheet that we can use for this Zap.
Make sure the first row is the header row with column names. We recommend all your columns have text in the first row (known as the header row), but you must have text in the first column header. Without any text there, we will display a warning message and you'll not be able to continue.
Don't include blank rows between the header and table content
Your spreadsheet table should have no blank rows in between rows with content. Otherwise, the information appended to the table will be added in the first free row and it will produce unexpected results.

Additionally, it's very important to have only one row as a header.
Don't delete rows
Do not delete rows in your spreadsheet table while your Zap is on, and don't add new rows manually too. This can cause errors with your Zap. If you need to delete data on the spreadsheet table, you should disable the Zap temporarily first and then delete the data. Don't forget to enable the Zap again, once you're done.
Don't delete the structure of the tables
You shouldn't delete the table you're using for Zapier integration. Otherwise, the zap will stop working. If you need to change/delete/rename the table's and page's structure, first you should disable the Zap and enable it once you're done.
You need to refresh the Zap page to see the new spreadsheet structure because it isn't updated automatically.
Spreadsheet structure changes
Keep in mind that when you change the spreadsheet structure (for example, add a new table or rename a table), these changes don't reflect immediately to the Zap page. You need to refresh the page to see the updated spreadsheet structure.
On the other hand, if you change the row header, you need to hit the "Refresh fields" to see the new changes. This is useful when you add or remove columns to the row header.
Create a new Zap
Trigger
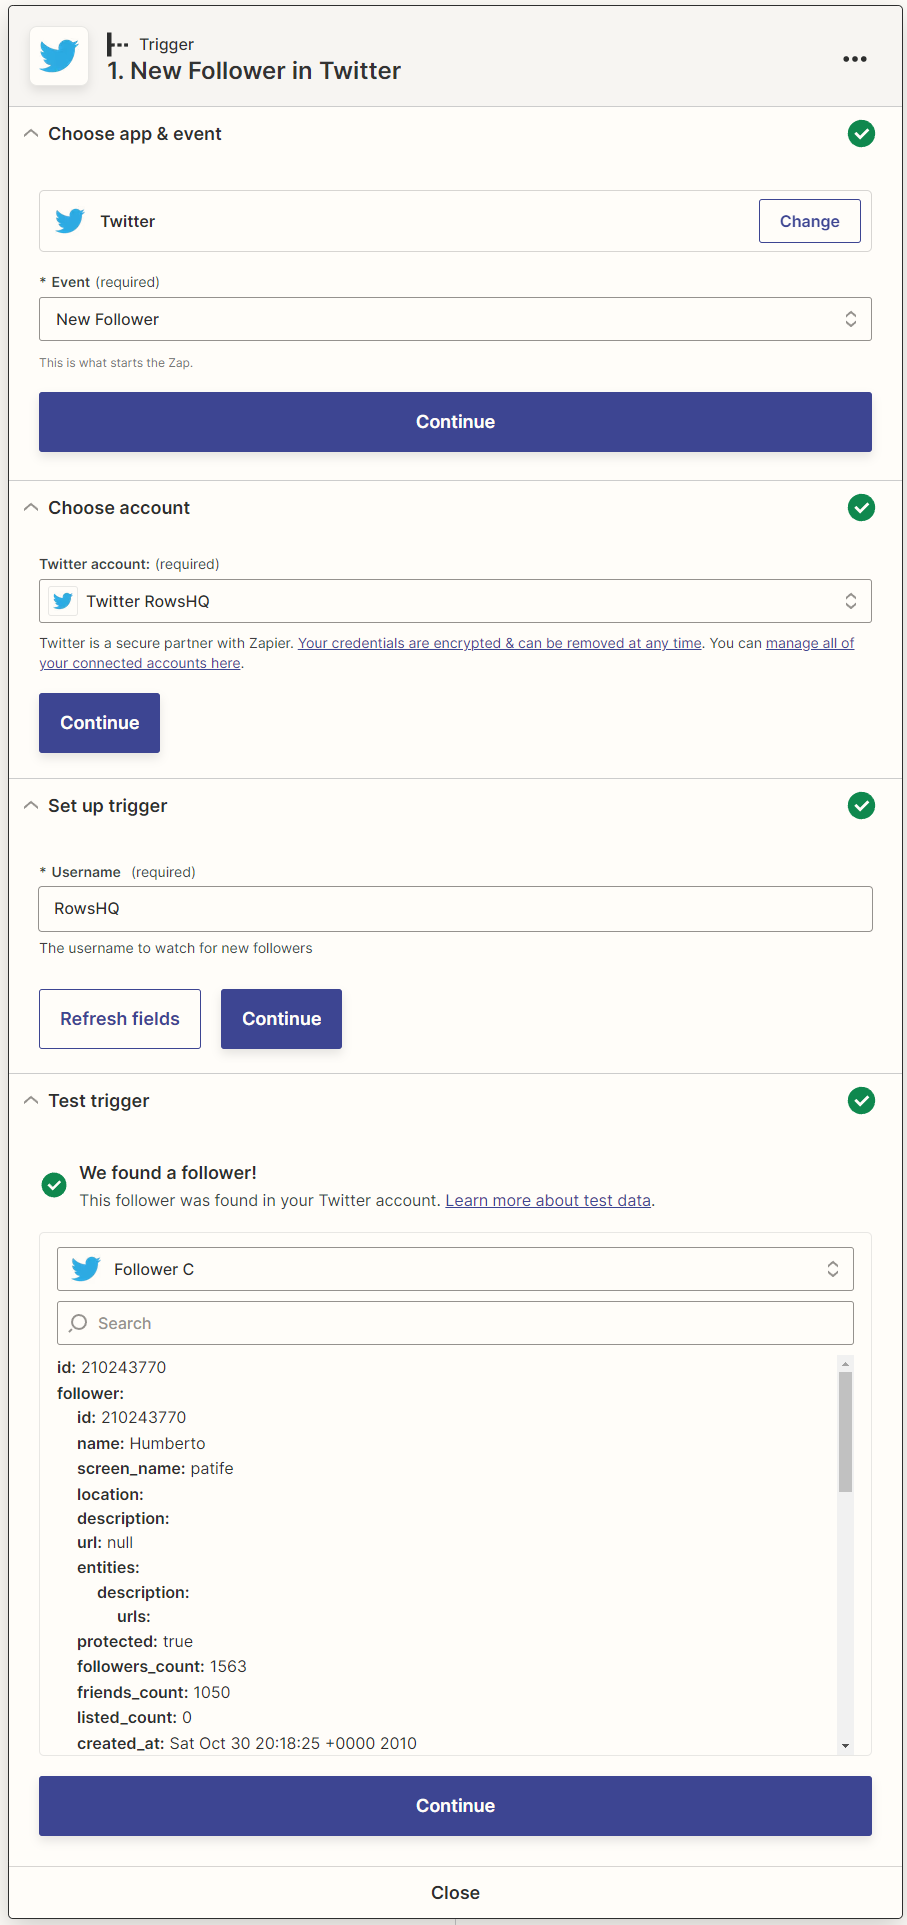
- I’m going to select one of the recommended popular triggers. Twitter.
- Select
New Followeras the trigger event and hitContinue. - Select your Twitter account (or connect it if you haven’t already) and then hit
Continue. - Type the name of the Twitter handle you want to check for New followers for. In this example, we will type RowsHQ and hit “Refresh fields” and then “Continue”.
- Click
Test trigger - If all went as planned, you should be presented with some example data. Simply hit
Continueagain.
Your trigger should look something like this
Action
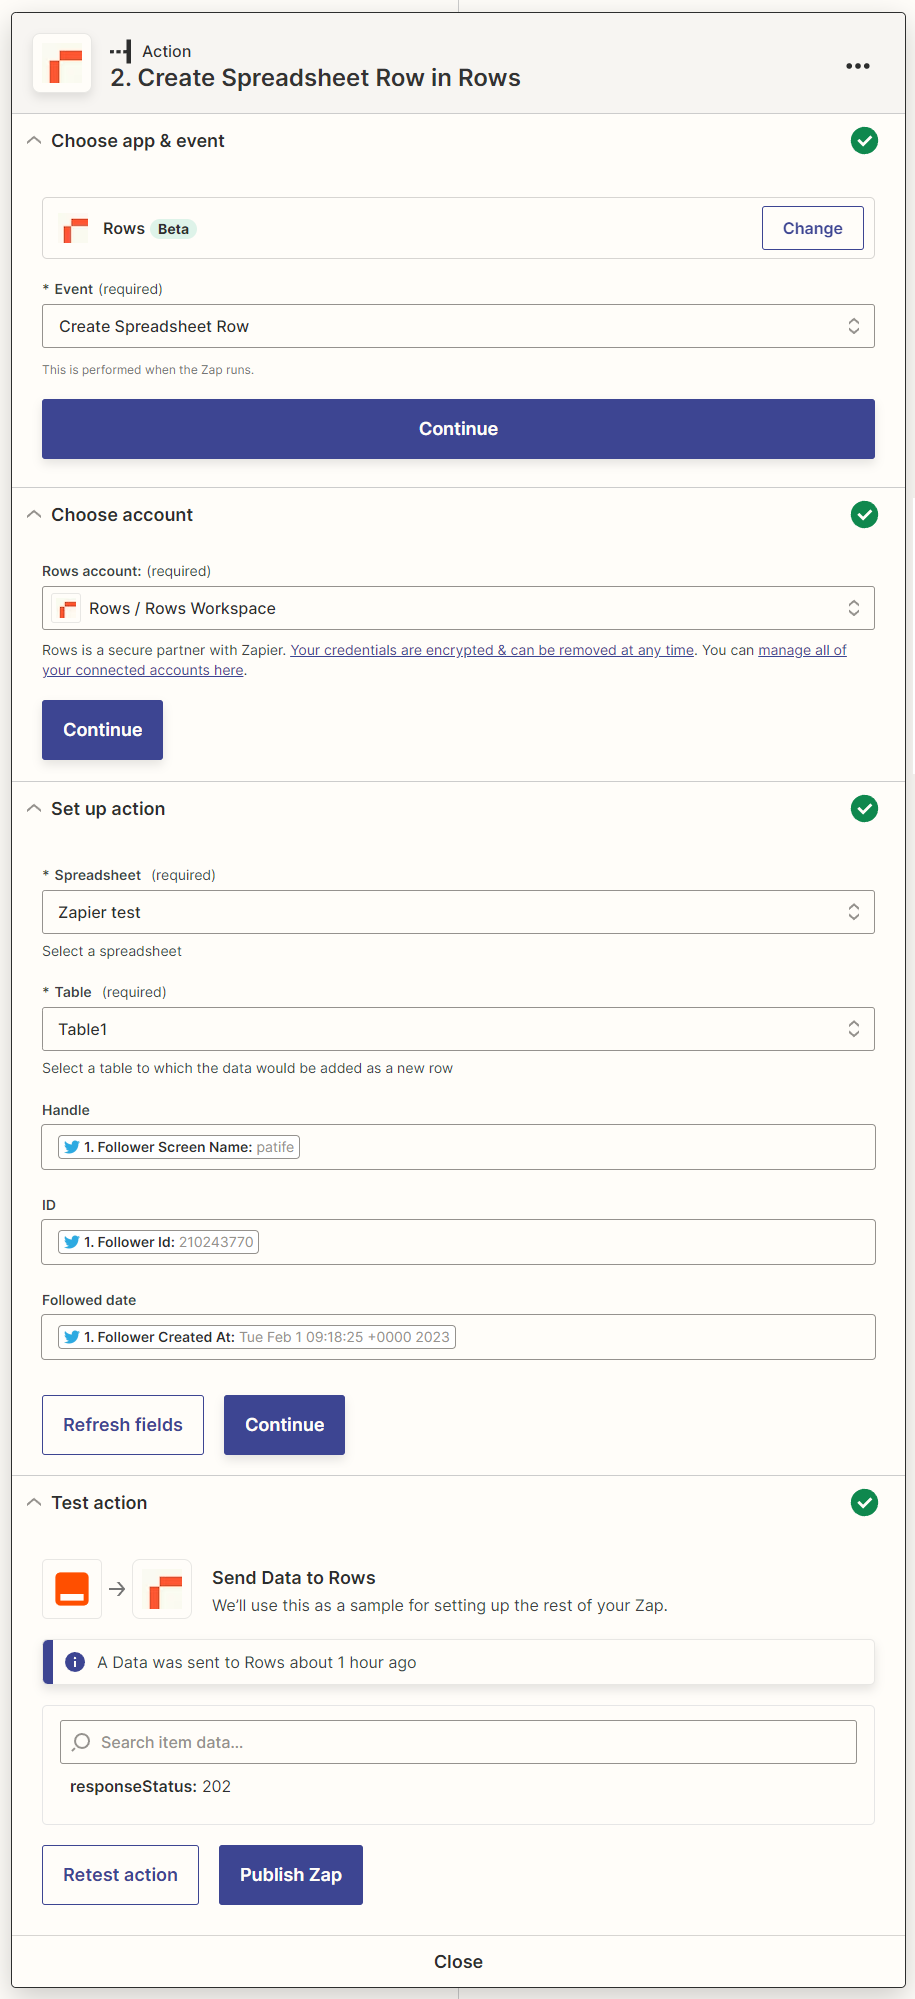
- We want to use Rows for the action, so in the search box we will simply type “Rows” and then select it from the results.
- Select
Create Spreadsheet Rowfrom the list of events - You will then be asked to authenticate your Rows account to Zapier. Click the
Sign inbutton. - A new window will appear and ask you for your API key. Enter your API key and click
Continue. (Note: How to find your api key) - Your default Rows account should auto populate. Click
Continueagain. - Click on the dropdown for “Spreadsheet” and type Zapier in the search box. This should reveal the spreadsheet you just created for testing this automation. Select the spreadsheet from the list.
- Click on the dropdown for
Tableand selectTable1(unless you renamed the table - then choose that name). You should then be presented with new fields based on the headers of that table that we created in the spreadsheet. - For the Handle, we will select
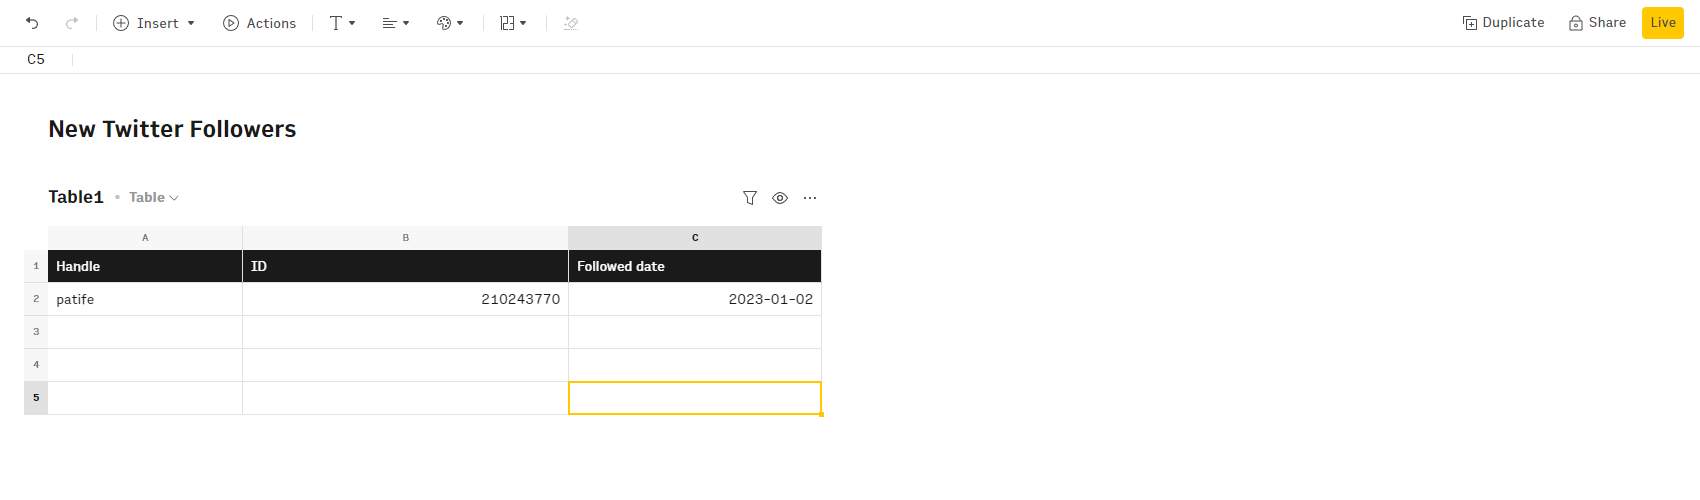
Follower Screen Name. For the ID, we will selectFollower Idand for Follower date we will selectFollower Created At. When ready, clickContinue. - We now have the option to test the action by sending some test data to Rows. This step is optional but advisable because you will soon see if something has gone wrong. Click
Test action, wait a few seconds and then check your Rows spreadsheet to see if the data has been added.
- If the test worked, simply click
Publish Zap, then again for “Publish & Turn On”
Your trigger should look something like this
Congratulations! 🥳
You just created your first Zap with Rows! Now, every time you get a new follower on Twitter, a new row inside your Rows spreadsheet will be added with that data!
Now you can use the power of Rows to take this to the next level. Here are some thoughts on what you could do next:
- Create a report on how many new followers you got each day and email that report to yourself using the
SEND_EMAIL()function. - Create a beautiful graph showing the number of new followers over time split by day or week or month and embed that chart anywhere you want.
Useful links
- Rows API technical documentation.
- Learn How to Manage your API Keys.
- Learn about the differences between Google Sheets API and Rows API.
If you have any questions or feedback about Rows API beta, please contact our support team at support@rows.com.
Zap templates
- To start collecting new Typeform responses on Rows, click here.
- Adding new Airtable records to Rows spreadsheet is now super easy. Follow this link to use our template.
- Use this link to add new Mailchimp subscribers to Rows spreadsheets.
- Click here to add new Trello cards as a row inside a Rows spreadsheet.
- You can use this template to sync your Trello board activity with a Rows spreadsheet.
- Add new paid orders from Shopify to Rows spreadsheet rows by clicking here.
- Convert an ActiveCampaign list into a row inside a Rows spreadsheet by using this link.
- To add new Stripe payments as rows inside a Rows spreadsheet, use this template.
- Add new Google Forms responses to Rows spreadsheet rows by clicking here.