Rows Connector on Looker Studio
Looker Studio (formerly Google Data Studio) is a free tool that turns your data into informative, easy to read, easy to share, and fully customizable dashboards and reports.
Data sources provide the structure (schema) of the fields you or other report editors can use to create your reports. The data source is where you model your data: for example, by creating calculated fields, adding parameters, and adjusting data types.
Data sources use connectors to fetch your data from a specific platform, system, or product. You can use free connectors built by Google to access data such as Google Ads, Google Analytics, and other Google Marketing Platform products, and more.
Now you can connect to your data inside Rows spreadsheets too.
Below you can find a few guidelines you should follow to ensure everything runs smoothly.
Create a new spreadsheet & add headers
First, let’s create a new spreadsheet that we can use for this data connector. You can also use an existing spreadsheet.
Make sure the first row is the header row with column names. We recommend all your columns have text in the first row (known as the header row), but the most important is that the range you'll use to create the connector contains headers.
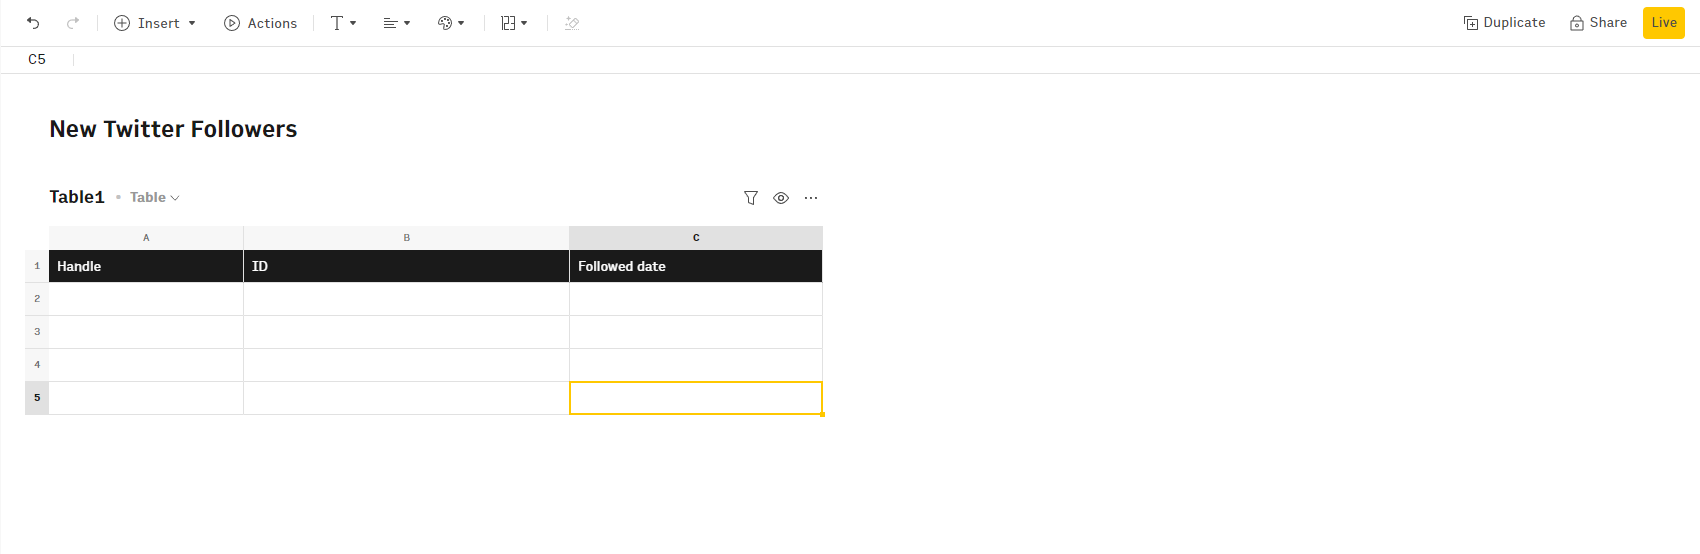
It's also very important to have unique column name headers. These headers will be used to create the keys for the data source and Looker Studio requires them to be unique. Otherwise, you'll get an error when creating the data source.
Create a Looker Data Source
Using the Rows Connector, you can create a new data source that uses the data inside a spreadsheet or range, so that you can use it to build a Looker Report.
Before you start, ensure you have a Rows API Key. You can learn how to create it here. Optionally, if you want to learn everything about the Rows API, follow this link.
To create a Looker data source using a Rows Spreadsheet or range, follow these steps:
- Sign in to Looker Studio.
- Using this link, you'll be redirected to the data source creation page.
- Click
Authorize. - Fill in the
keytextbox with yourRows API Key. And then, clickSubmit.
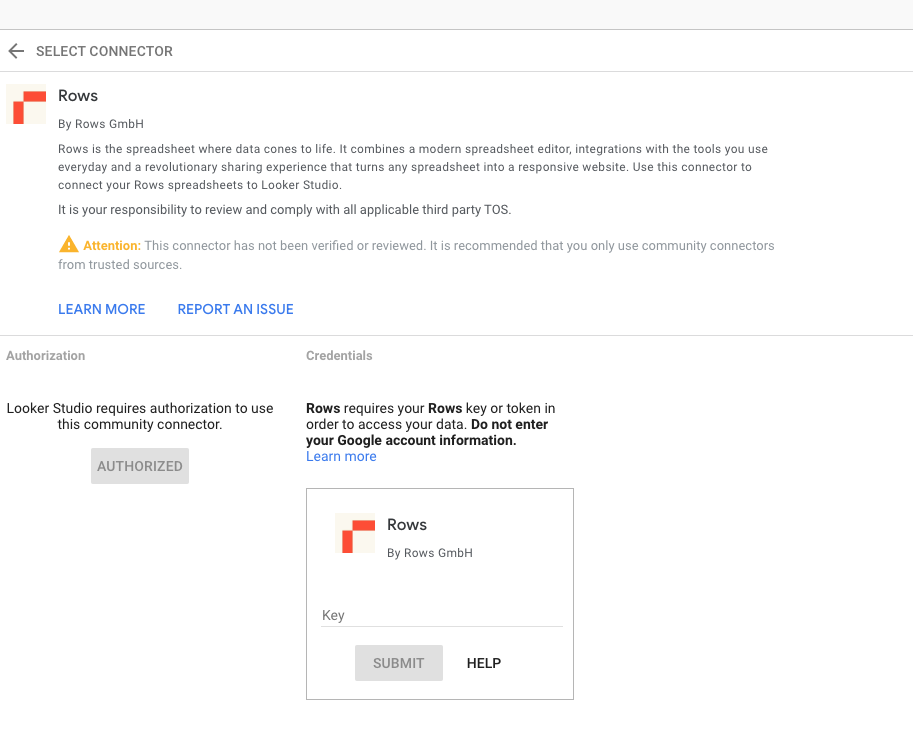
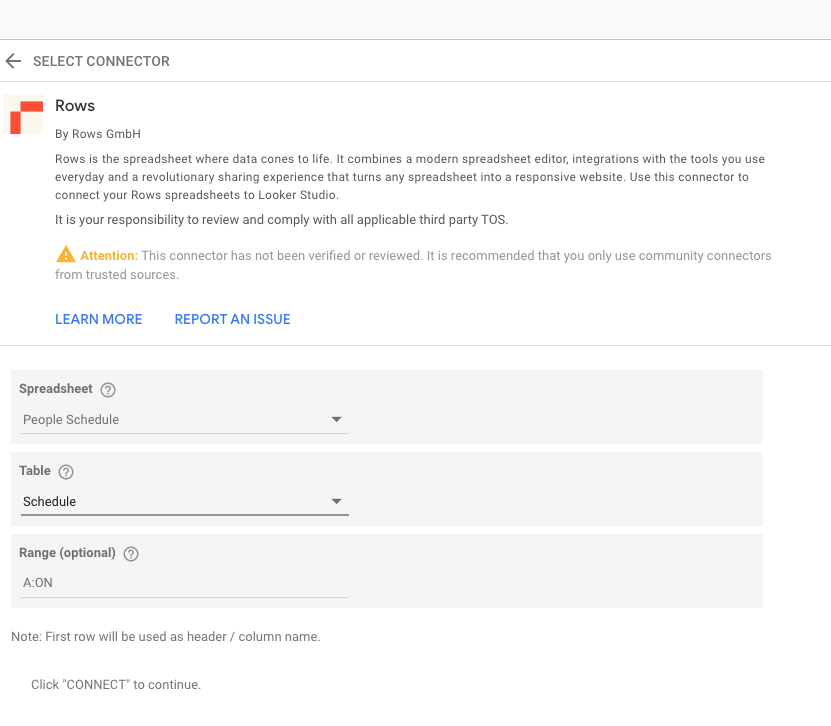
- If the API Key is valid, you'll be prompted to select the spreadsheet you want to use as a data source. Select the spredsheet and then click
Next. - Next you'll need to select the spreadsheet table you want to use.
- Optionally, you'll need to select the range. By default, the
A:ONwill be used.- Keep in mind that the first row should contain the header names and they should be unique.
- Click
Connect. If the data source is created successfully, you'll be redirected to the data source details. Then, you can click onCreate Report.
Great success! 🥳
You just created a Looker Data Source that uses a Rows Spreadsheet. Now, everytime you build a report using this data source, the data inside your spreadsheet will be used to display the information.
Now you can use the power of Rows to take this to the next level.
Useful links
- Rows API technical documentation.
- Learn How to Manage your API Keys.
- Learn about the differences between Google Sheets API and Rows API
If you have any questions or feedback about Rows API beta, please contact our support team at support@rows.com.