You can share just the View mode of your spreadsheet or give people edit access too. The View mode is like a little web app that others can use without changing the underlying spreadsheet.
Here, we assume that you already understand the difference between Edit and View mode and what these views are for. We're going to focus on how to share these views with others.
There are several ways you can share a spreadsheet:
| SHARING METHOD | DESCRIPTION |
|---|---|
| Spreadsheet invite | Sends an invitation email to another Rows user to collaborate on your spreadsheet and open it in the Editor. |
| Sharing a Private link | Generates a link that anyone can use to open the View mode of your spreadsheet. You can also preview how your spreadsheet will look in View mode before you share it with others. |
| Sharing with the Community | Displays your spreadsheet on the Rows Community page and generates a link to the View mode of your spreadsheet. |
Inviting Others to Collaborate on a Spreadsheet
When you invite users to collaborate on a spreadsheet, you can choose to give them edit access or restrict their access to the View mode. Before they can edit your spreadsheet, they must be a Rows user and logged into Rows.
To invite a user to collaborate on a specific spreadsheet, follow these steps:
- Open a spreadsheet that you want to share.
- In the right-top corner, click on the Share option.
- In the dialog box that appears, enter the email address of the person who you want to share your spreadsheet with.
- By default, the invitee gets Editor permissions, but you can change this in the permissions dropdown.
- For example, you can restrict their permissions so that they can only open the View mode of your spreadsheet.
- By default, the invitee gets Editor permissions, but you can change this in the permissions dropdown.
- If you decide that they should be able to access all the spreadsheets in your workspace, you can also enable the option to Invite as a workspace member. For more information about workspaces, see Using workspaces to collaborate.
- Click Invite to send the person an invite via email.
- The invited user is then listed as a Guest user —this is the term for users who can access just one specific spreadsheet.
Sharing with a private link
A private link allows anyone with the link to open your spreadsheet's Viewmode—even people who don't yet have a Rows account. This is a great way to introduce Rows to your colleagues. Private links are also useful when you want to share a spreadsheet's View mode but don't want people to create copies of it (for example, because it contains hidden Tables with sensitive data).
To create a private link to your spreadsheet's View mode, follow these steps:
- Open a spreadsheet that you want to share.
- In the right-top corner, click Share (next to the View option) enable the option to Share privately.
- Click Copy to copy the Private Link to your clipboard and paste it into an email or chat message.
Now anyone with the link can access your sheet.
Sharing to the Community Page
The Community Page allows you to share your creations with a wider audience.
For example, suppose that you're already a Rows expert and you've created some handy marketing tools in Rows. You might share your spreadsheets with the Rows community so that other people in marketing don't have to start from scratch. New users can copy your spreadsheets and adapt them to their own requirements. You can think of these spreadsheets as a supplement to our official templates.
To share your spreadsheet on the Community Page, follow these steps:
- Open a spreadsheet that you want to share.
- In the right-top corner, click Share (next to the View option).
- In the dialog that appears, enable the option to Publish to the world.
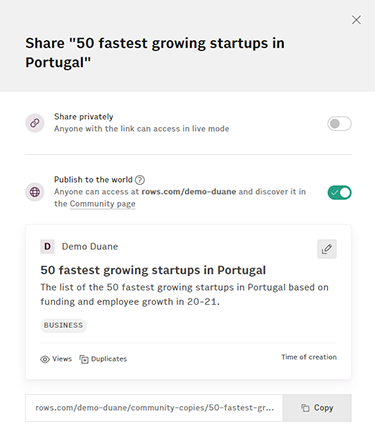
- (Optional) Update the description and category for your spreadsheet.
This information helps people find your spreadsheet and understand what it does.
- Click the Edit
 button, type a description, select a category from the category dropdown, and click Save.
- Click the Edit
- Click Copy to copy the Community Link to your clipboard
You can then share this link on social media, in a chat, or email. Anyone who clicks the link can open your spreadsheet's View mode. If they're already a Rows user, they can also make a copy of your spreadsheet that they can edit.
If you plan on sharing spreadsheets with community, we recommend putting them in a workspace with a public avatar. For more information about workspaces, see Using workspaces to collaborate.
Previewing the View mode of your Spreadsheet
Before you share your spreadsheet, it's always a good idea to preview how it will look in View mide. This allows you to correct any mistakes that you might not have noticed in Edit View.
To preview your spreadsheet's Vide mode, follow these steps:
- Open a spreadsheet that you want to share.
- In the right-top corner, click View.
Your spreadsheet will then switch to View mode so that you can make sure it looks and acts the way you expect it to before you share it with others.
Further reading
To learn more about sharing and collaborating with others, check out the following articles: