How to add a calculator to your website in 4 steps


Adding a calculator to your website can be a great way to show value to your website visitors, initiate a lead capture process, and generate virality through word of mouth.
Great examples include adding a custom price calculator for people to build a custom pricing plan, a savings calculator that highlights the value prop of your product, or a salary calculator on your career page for increased transparency and to attract new talent.
With Rows you can embed any type of calculator into your website following these 4 steps, without writing a single line of code.
1. Build the calculator in a spreadsheet
The first thing you’ll need to do is sign-in to your Rows account - or sign-up if you haven’t already. From there, create a spreadsheet and build your calculator.
In addition to the standard numbers and formulas, Rows comes with a rich list of elements that make spreadsheets interactive: input fields for text and numbers, checkboxes, dropdown lists, date pickers and even buttons.
You can use those to specify which cells will require inputs from the website visitors, give them options to pick from a list, or trigger an action when they click a button (e.g. send an email).
And when you add it to your website, only the cells formatted with these interactive elements will be editable. So that nobody can break your calculator.
Here’s a simple Body Max Index (BMI) calculator to get your started:
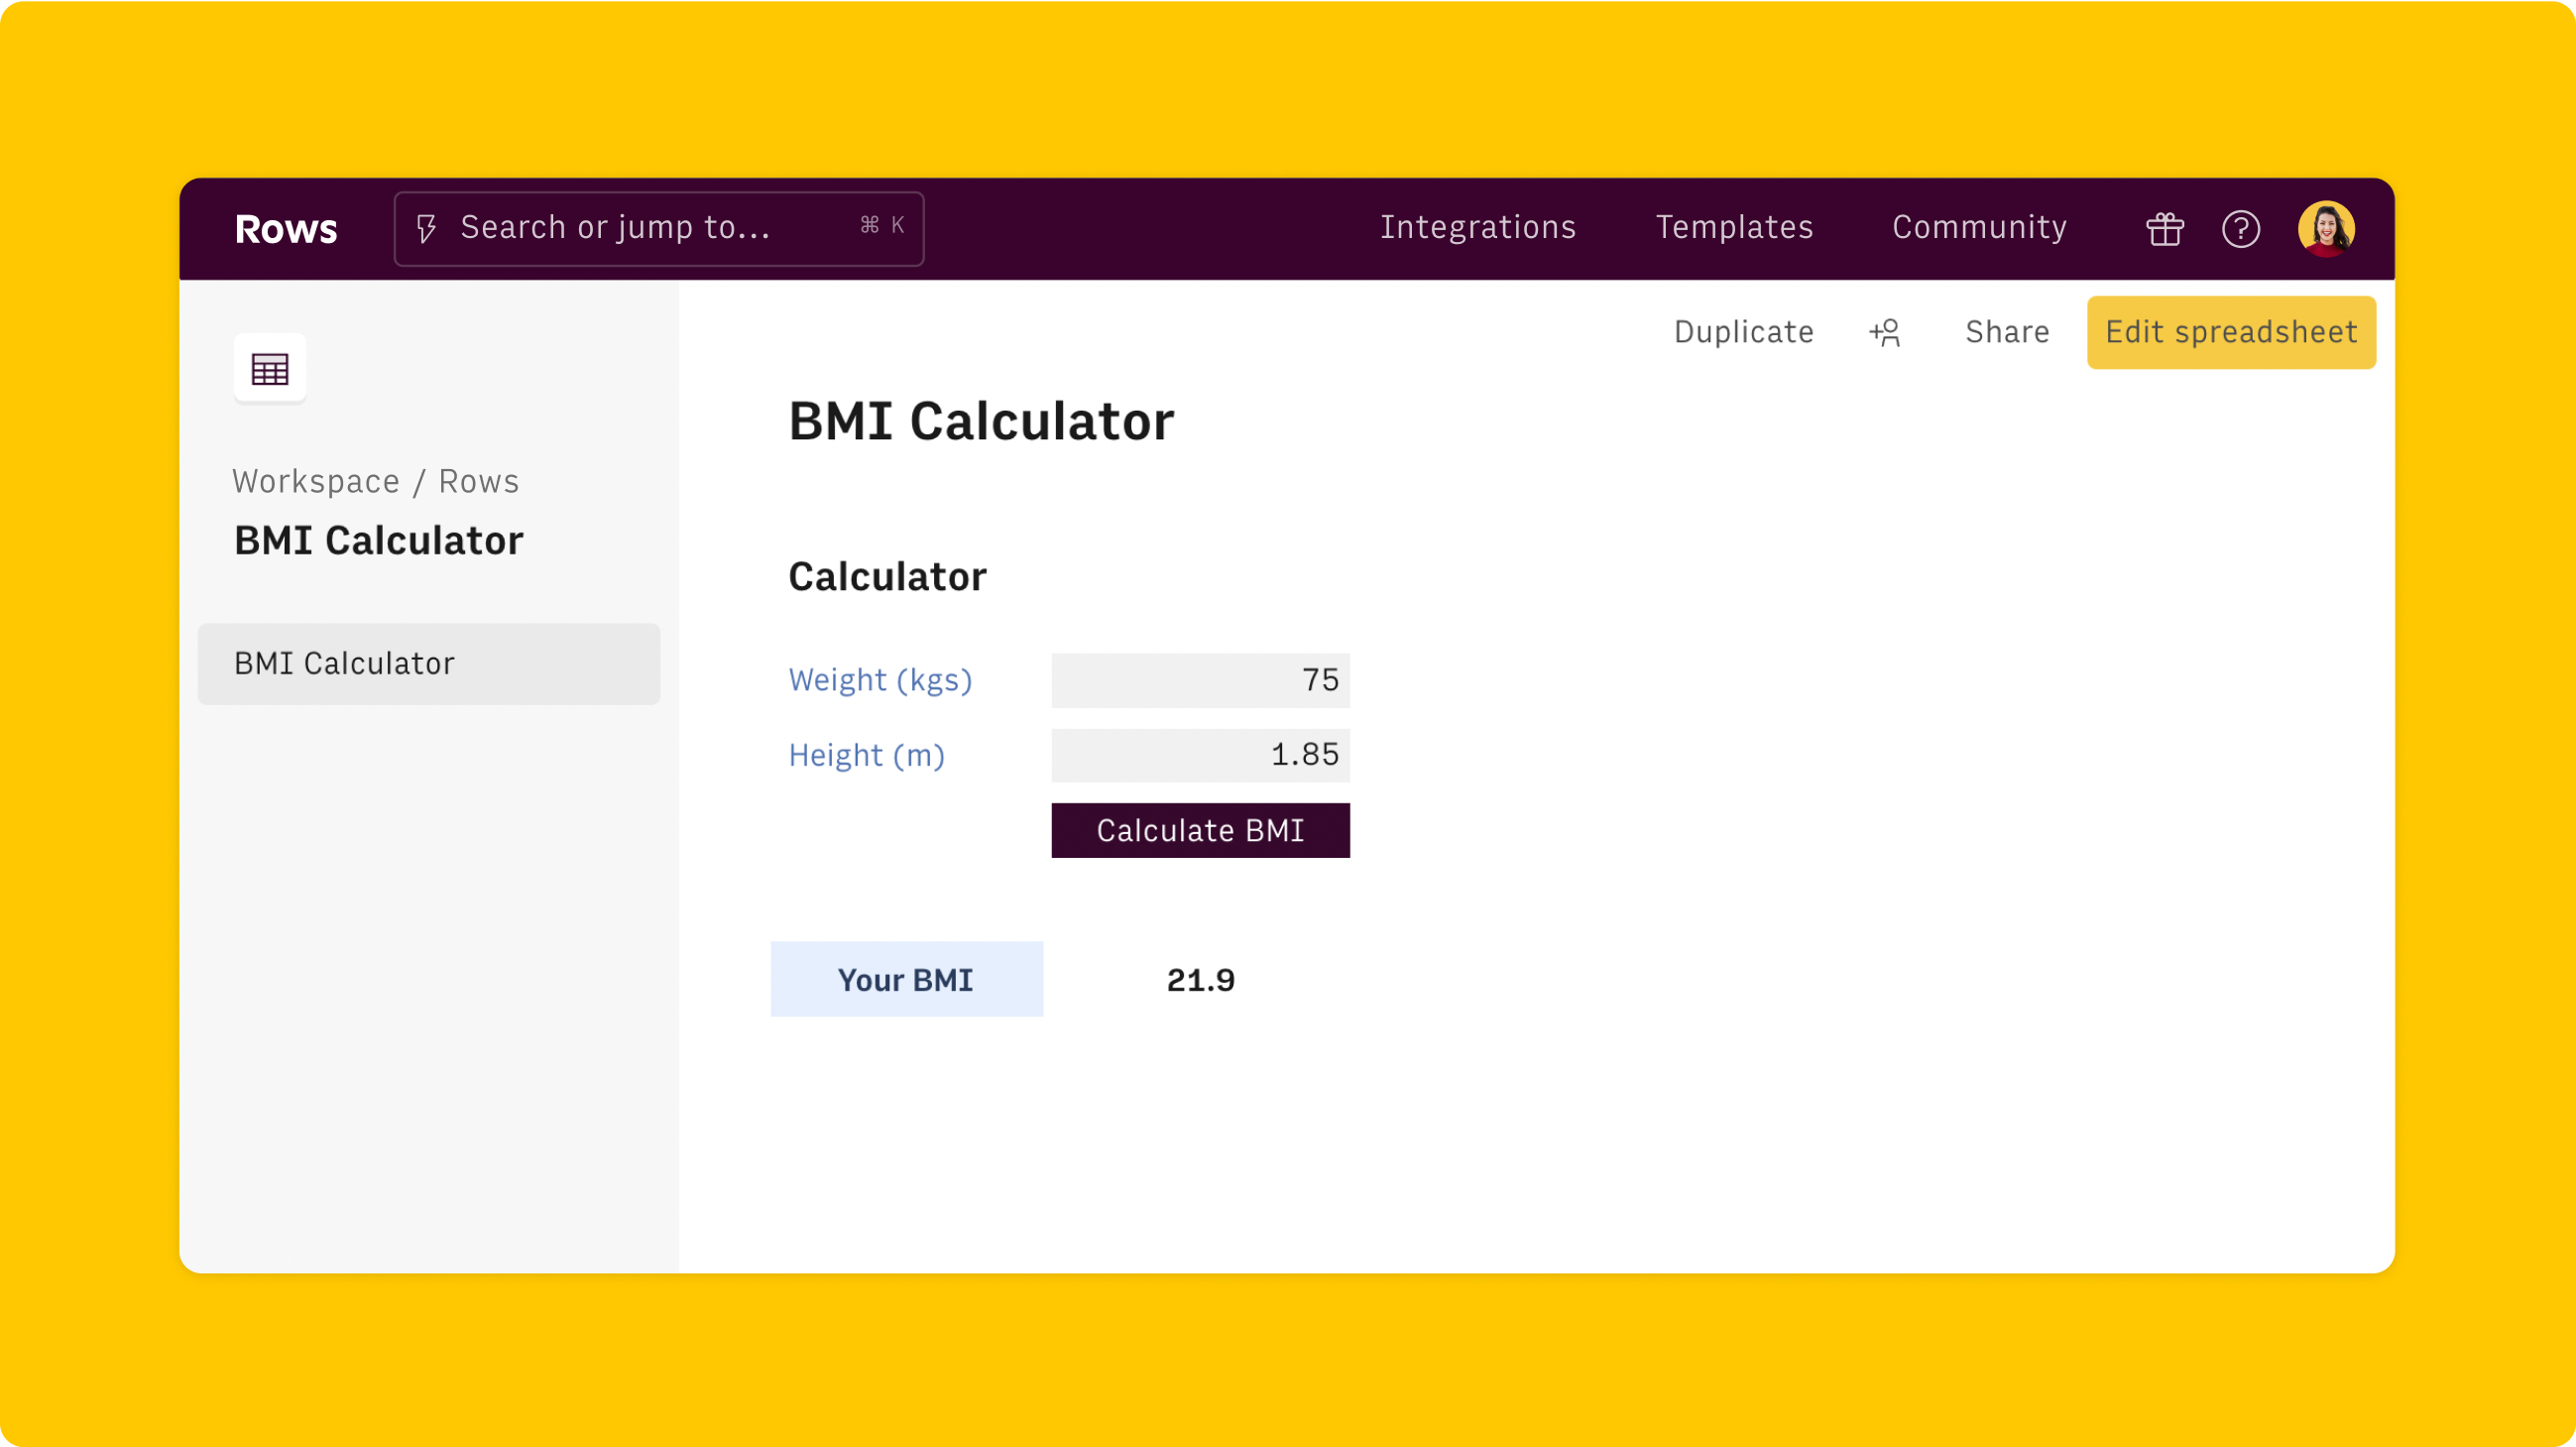 The BMI calculator in a spreadsheet
Duplicate the BMI calculator to your account →
For a more advanced example, see this SaaS pricing calculator that highlights how to use dropdowns and conditional logic to calculate the price of a custom plan.
Duplicate the SaaS pricing calculator to your account →
💡 Browse our spreadsheet gallery for hundreds of examples of public spreadsheets build by creators that you can duplicate for your account for free.
2. Turn the spreadsheet into a Form
In Rows any table can become a form. This is great when you want your spreadsheet to act as a simulator, or calculator of a financial model for others to use. With Forms everyone gets their own personal version of the table you shared and they only see the changes they make to the spreadsheet.
This means that if you embed a Form with a Pricing calculator to your website, each visitor will use its own version of the calculator, and their changes won’t be seen by anybody else. To add a Form, simply open the dropdown menu next to the title of your table, and select the appropriate option.
 How to configure a table as a form
Visit this article to learn more about when and how to use Forms in Rows.
3. Embed it on your website
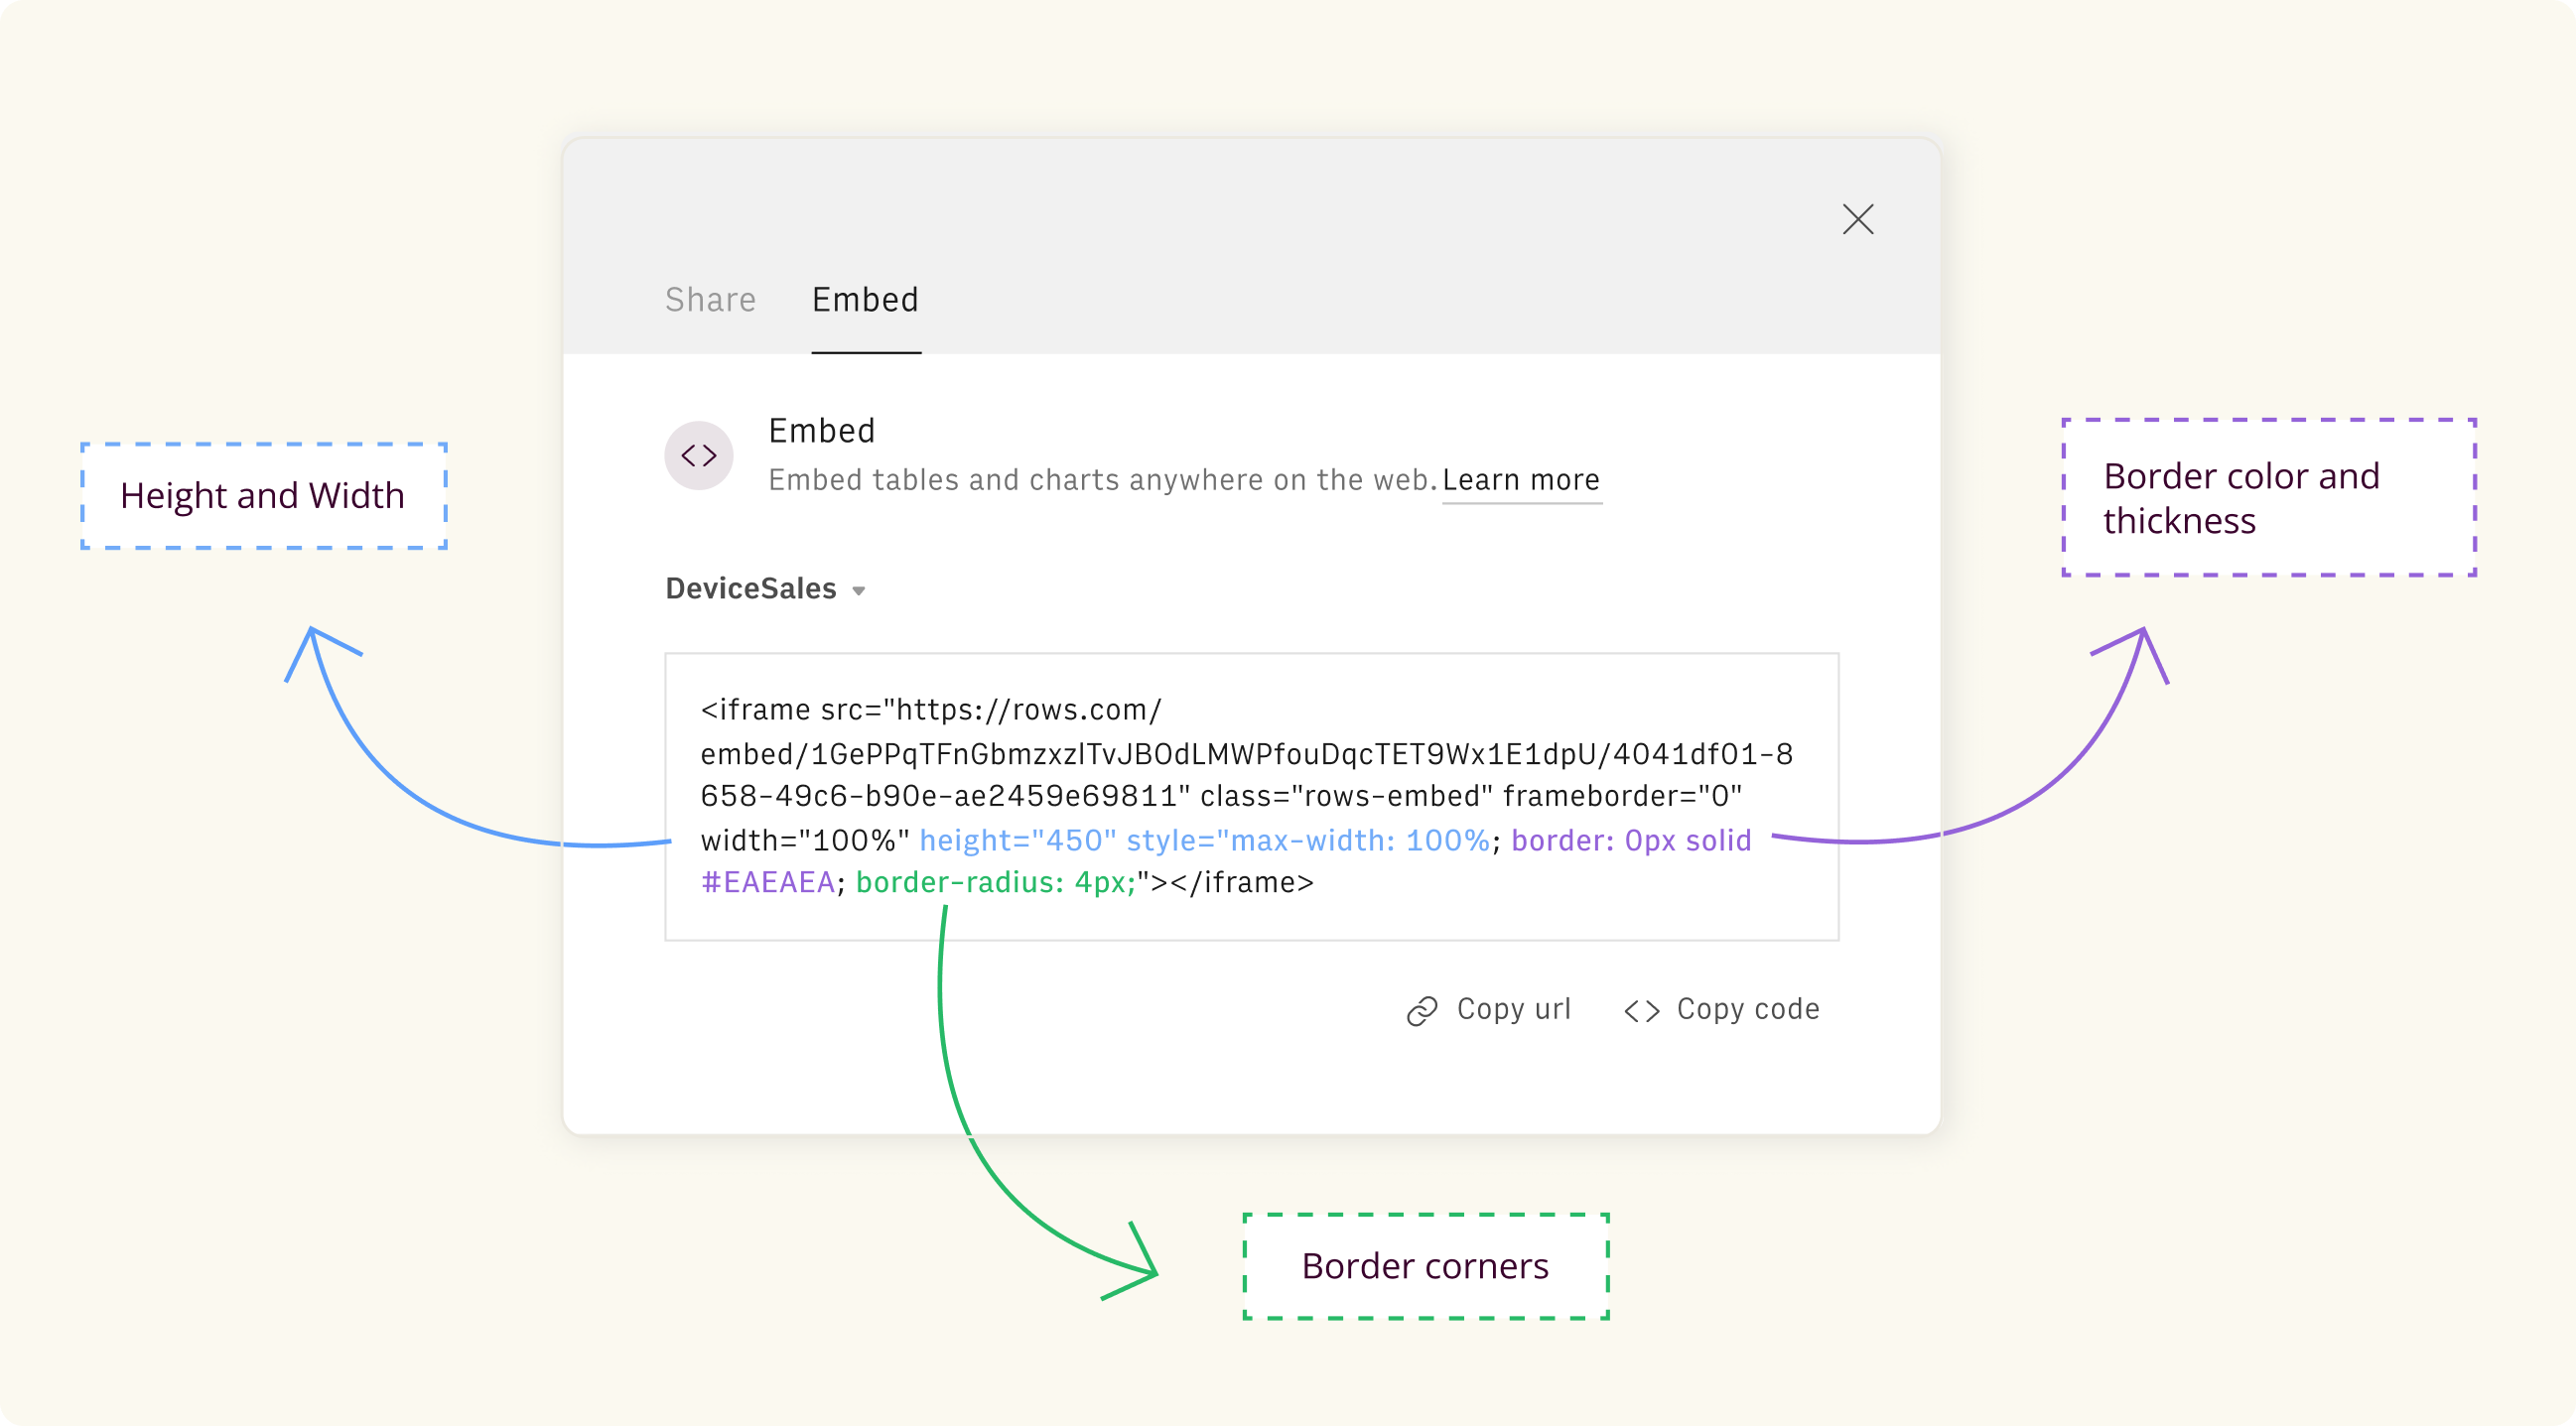
After your calculator is ready, you’ll want to embed it on your website or blog. To do it, simply click on the settings [...] icon of the table you want to embed, and choose Embed. This will show you the iFrame code you’ll need to use on your website.
Now all you have to do is copy and paste that iframe code into your website HTML source file and let your computer do the work.
 Embed any element from a spreadsheet via the settings menu
Note: Your spreadsheet needs to be shared with the link or published to the world before you can embed it. In the 'Share' tab, enable "Share privately" or "Publish to the world". Learn more about embedding your Rows spreadsheets in this article.
4. Adjust it to your style
After adding the embed to your website, you can customize it to blend into your website experience perfectly. These are the most common adjustments:
 Easily personalize the embed to match your style
Border: Add a border around your calculator by turning the `border` element to 1px. To customize the color of the border, replace the default hex code of the border (#EAEAEA) with your own color.
Width: By default the width of your embed will adapt to the width of the screen. To set a maximum width, simply replace `width = 100%` with the pixel length of want - `width = 820`
Height: Same goes for adjusting the height. The standard height is 450px.
Responsiveness: Most website publishers - like Ghost or Wordpress - will make your embed mobile responsive by design. But if you’re doing your own implementation of the page or use a service that is not responsive, use the viewport property to make your content adjustable to the width of the screen.
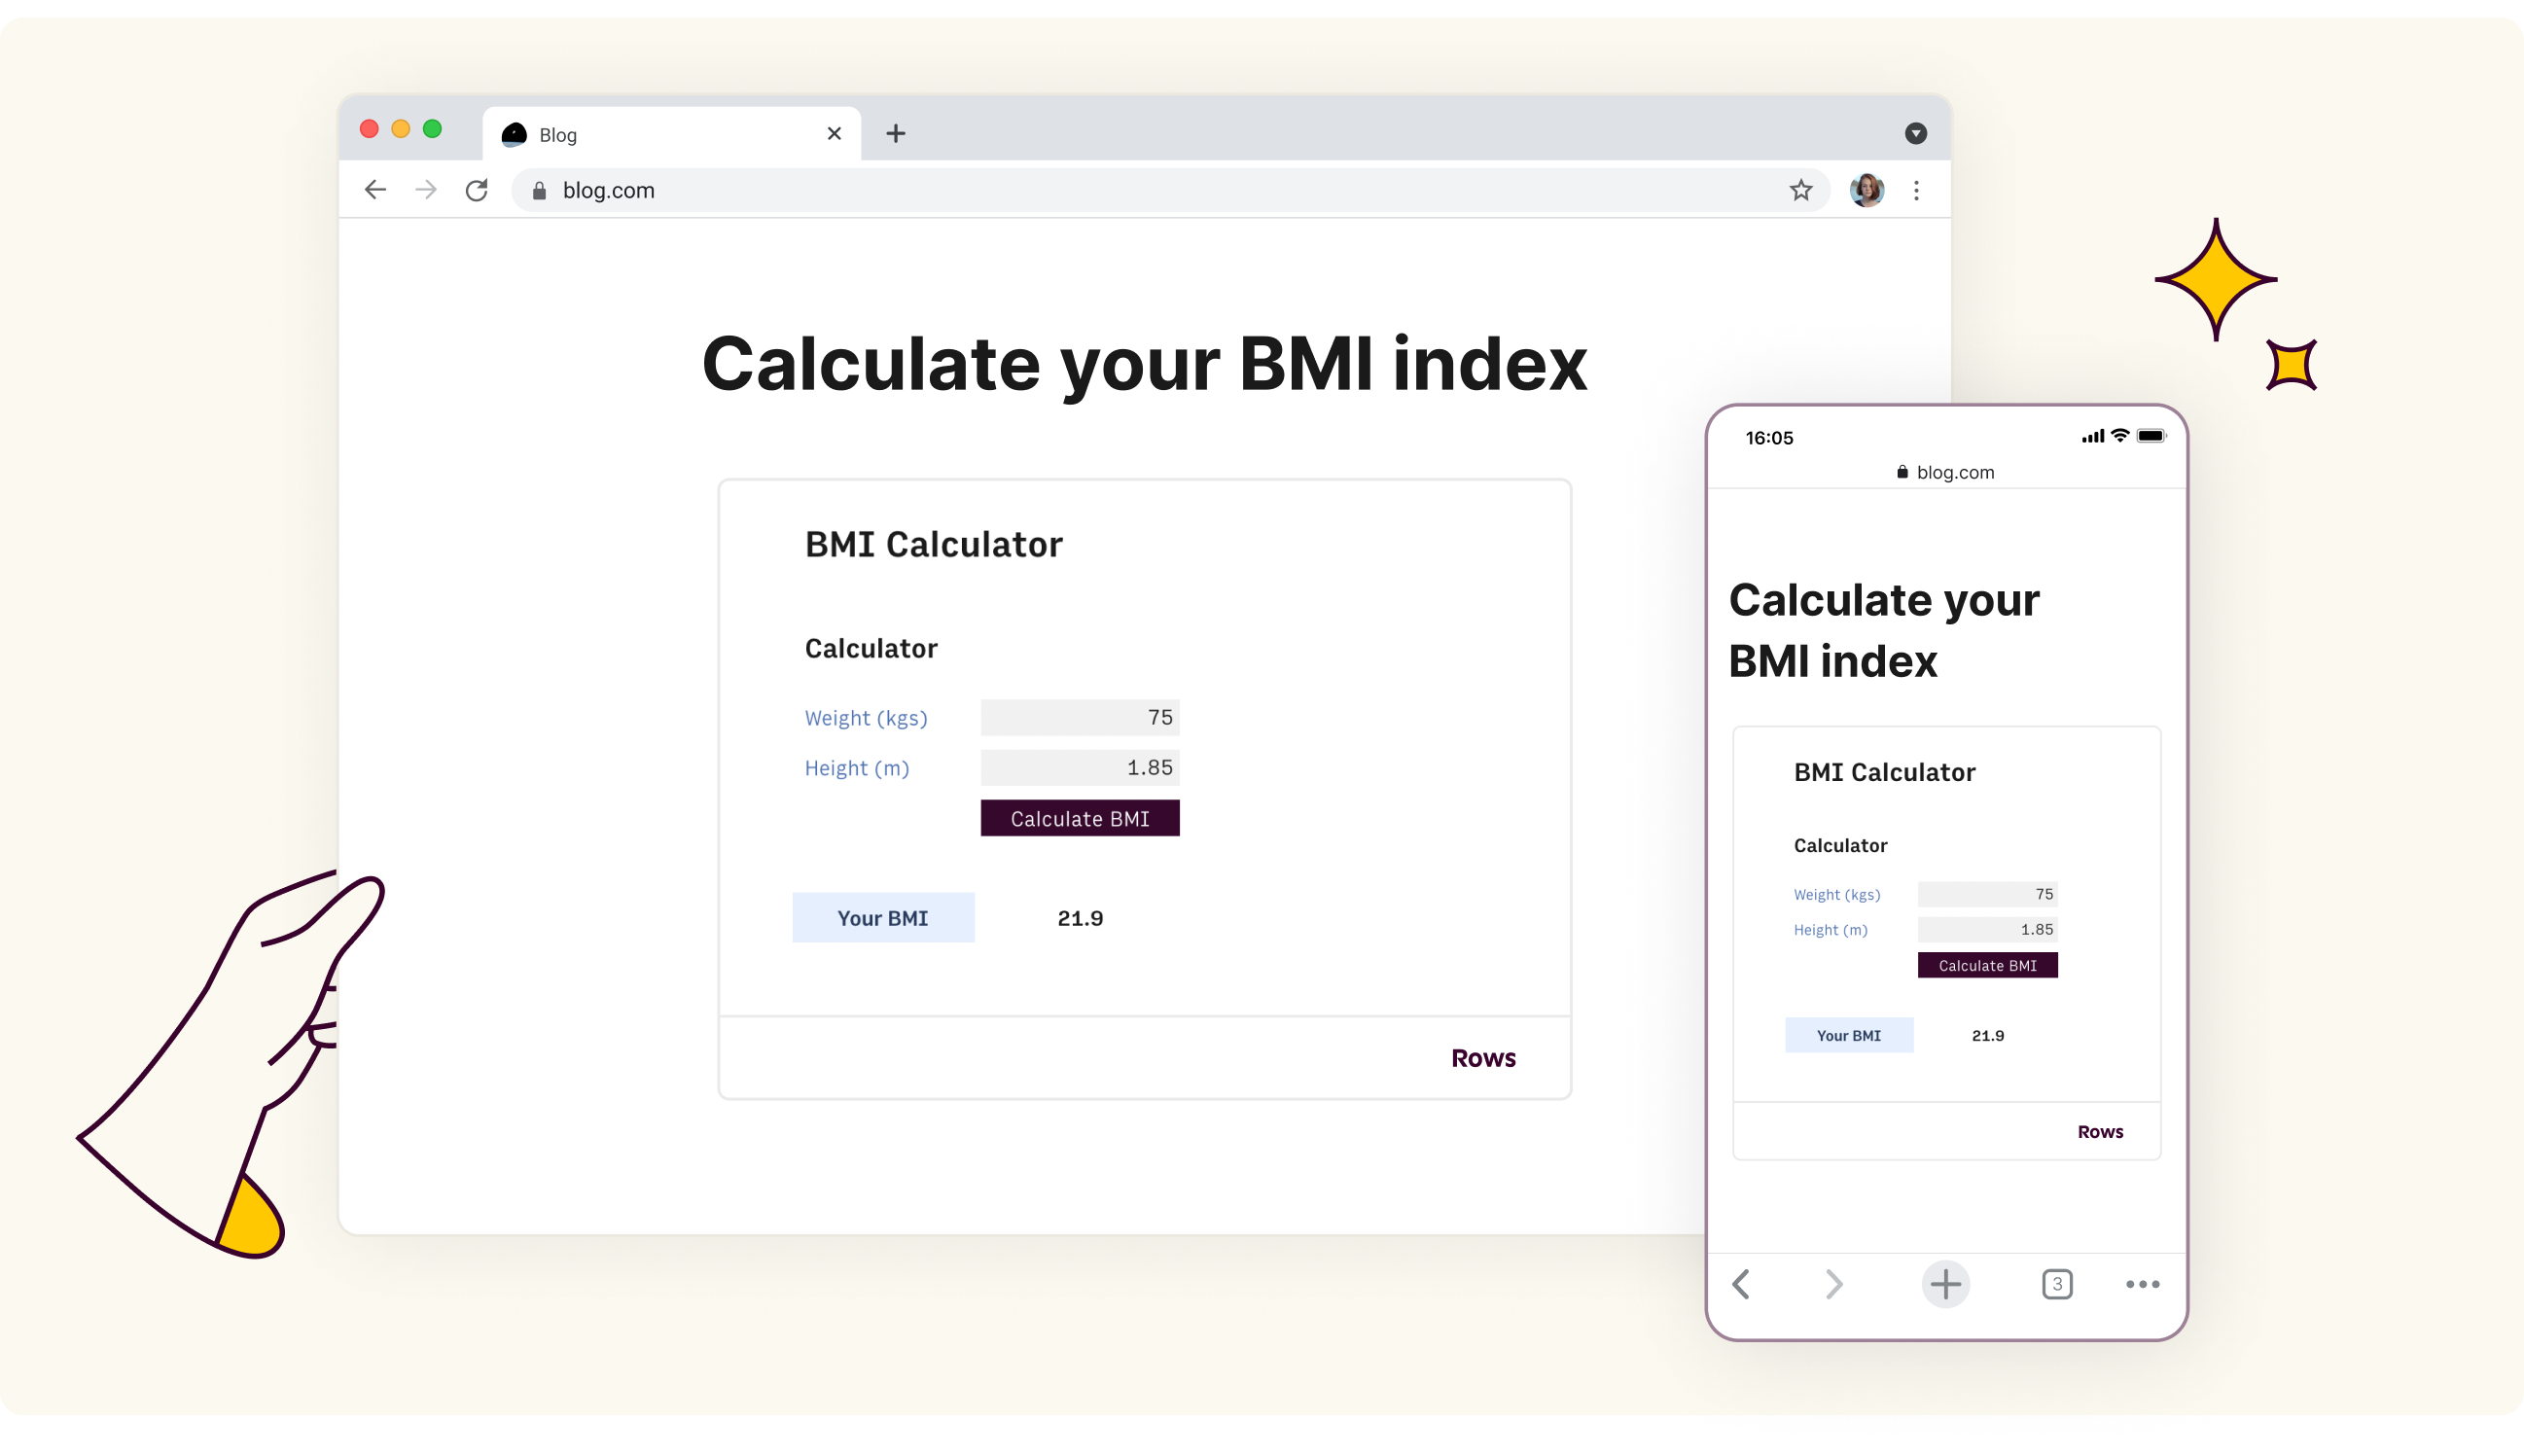 A calculator embedded in a website, on desktop and mobile.
Pro tip 💡
Follow the same steps to embed calculators, tables, or charts in multiple other tools such as Notion, Coda or Slite. See how here.
A spreadsheet with superpowers
A great spreadsheet is more than numbers and formulas. It lets you create tools to make work simpler, more enjoyable and that you’re proud to share. Use Rows embeds to take your spreadsheets to the next level and embed calculators, models or reports anywhere on the web.
If you’re curious about what we’re building, give Rows a try and sign up for free.