How to Convert Excel to Google Sheets in 2025


Want to learn how to convert Excel to Google Sheets? Then this 2025 Step-by-step guide is for you. But wait a minute, why do people ever think of converting Excel to Sheets? Here are two of the multiple reasons:
Google Sheets is cloud-based, meaning users can access their spreadsheets from any device with an internet connection.
Google Sheets allows multiple users to work on the same document simultaneously, with changes syncing in real-time. This makes it easier for teams to collaborate, share
So, sit tight as I unravel different methods you can use to convert Excel to Google Sheets without hassle.

Your new AI Data Analyst
Extract from PDFs, import your business data, and analyze it using plain language.
Try Rows (no signup)Step-by-Step Guide on How to Convert Excel to Google Sheets in 2025
There are various methods of converting Excel sheets to Google Sheets. These methods include:
Using the Google Drive upload feature
Using the import feature in Google Sheets
Below, we'll take a look at steps you can take to execute these two methods.
Method 1: How to use Google Drive upload to convert Excel sheets to Google Sheets
You can convert Excel spreadsheets to Google Sheets using the “file upload” feature in Drive.
All you have to do is get your Excel data prepared. After checking for errors, proceed to save the file (which is obviously going to be in .xlsx format.
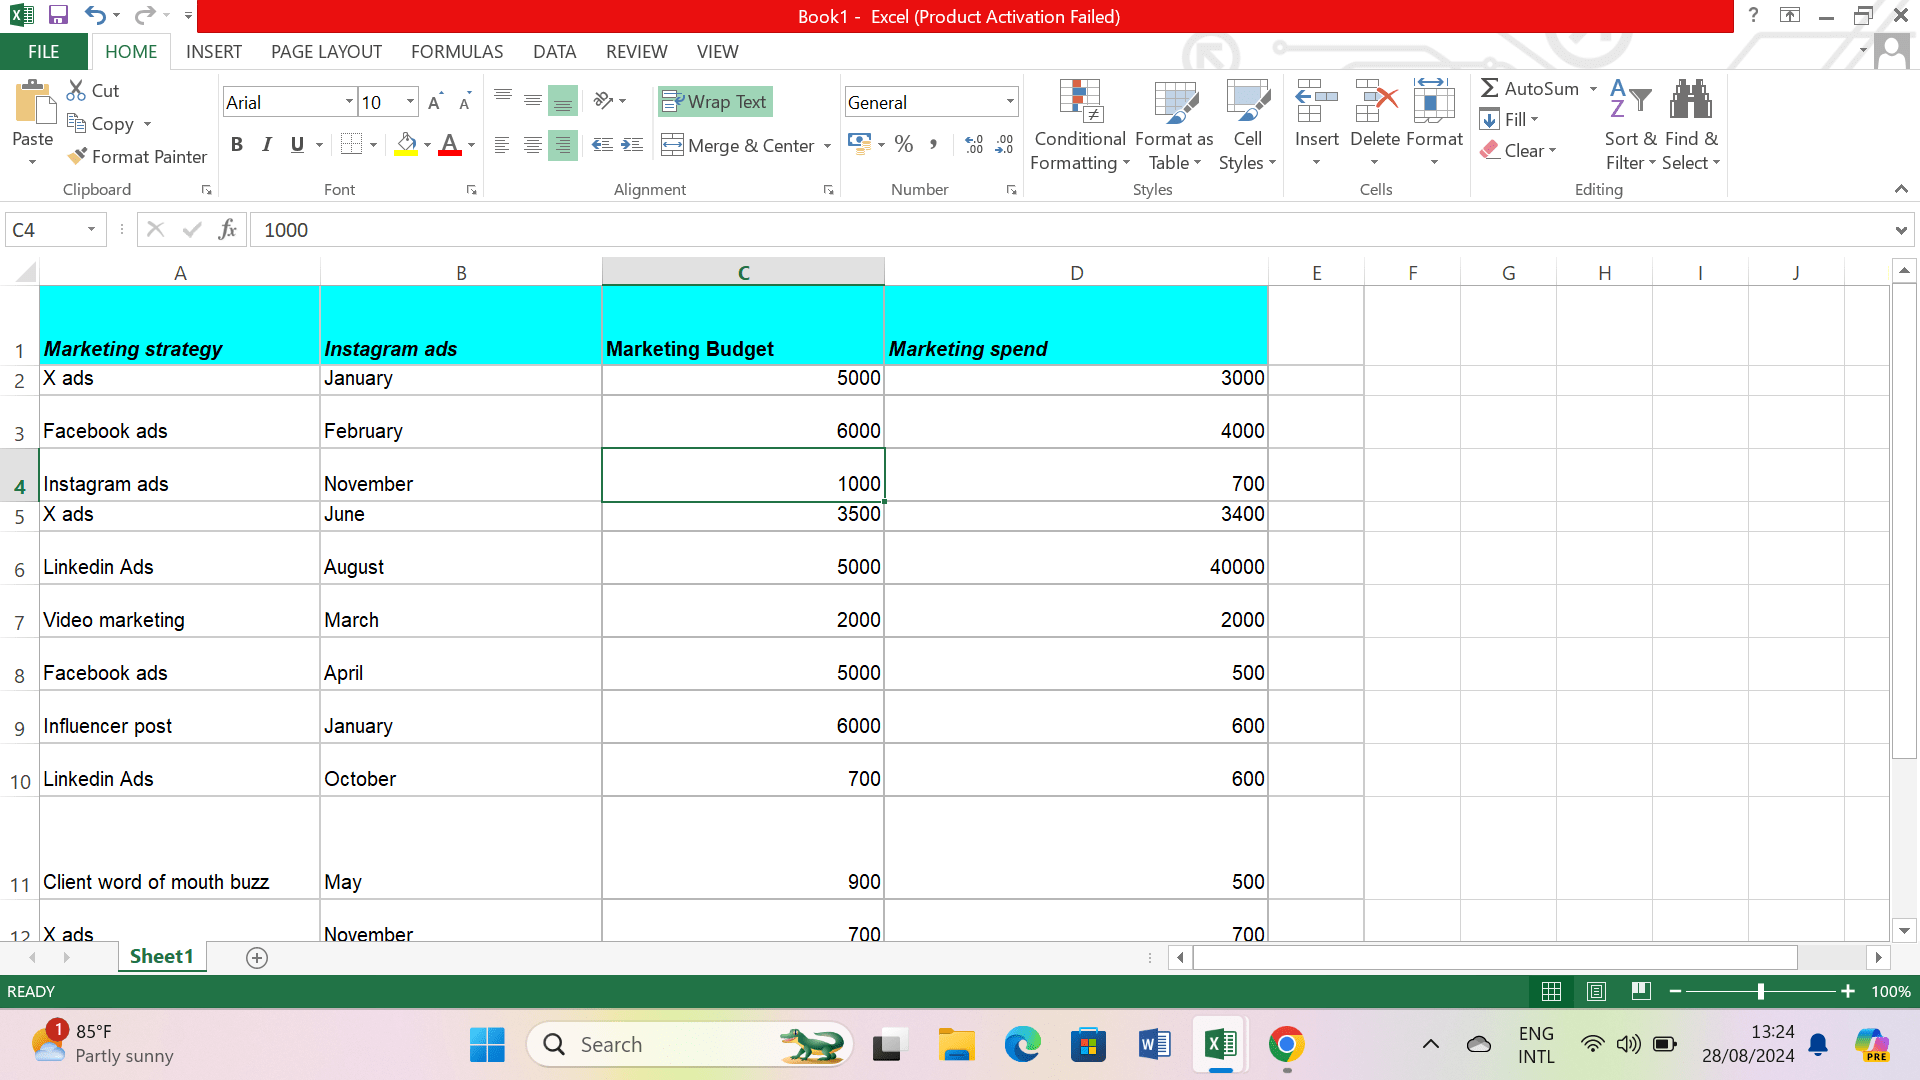
For the step-by-step guide, I'll be using the data presented in the table below —
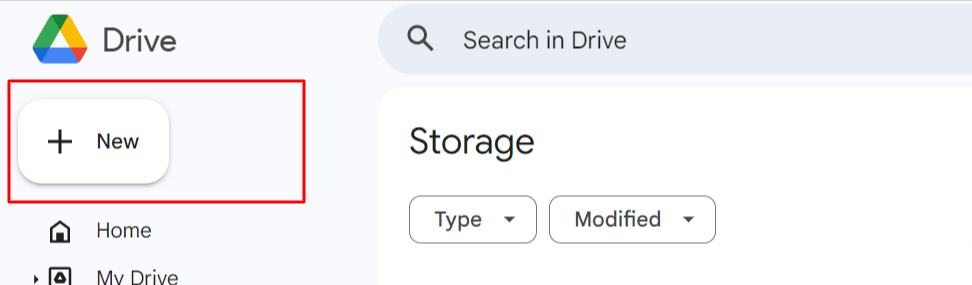
Step 1: Go to drive.google.com and sign in to your Google account. Click the "New" button in the top-left corner.
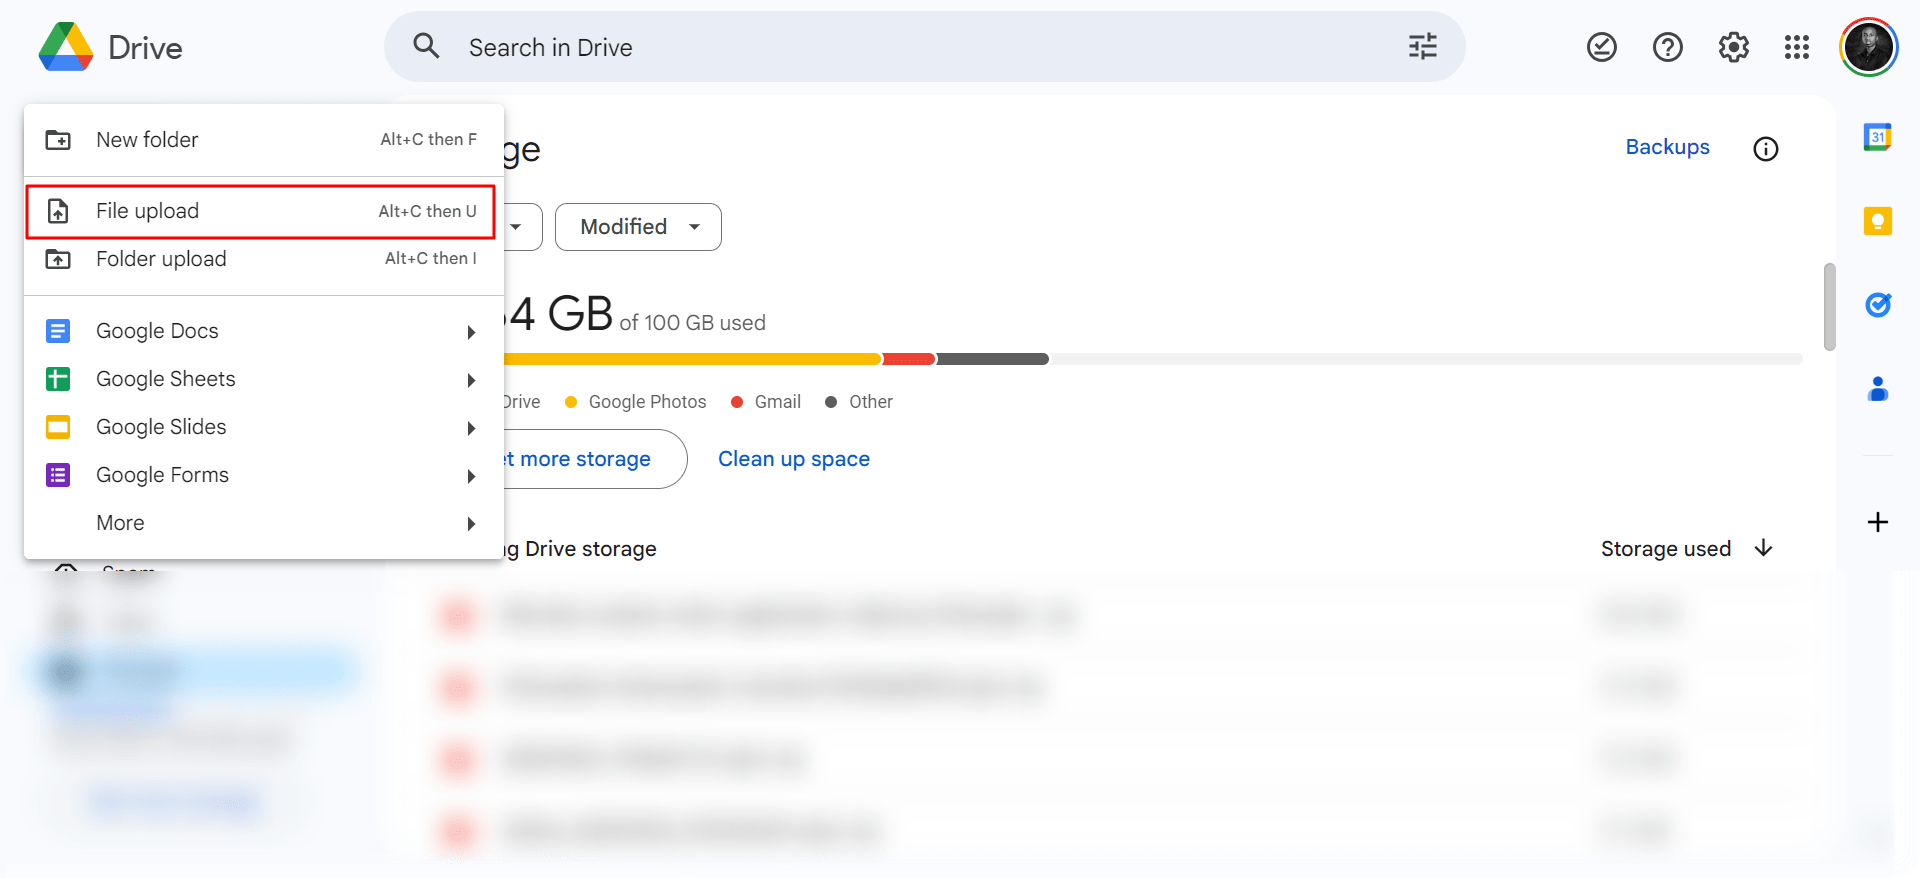
Step 2: Select "File upload" from the dropdown menu.
Step 3: Choose your Excel file from your computer and click "Open".
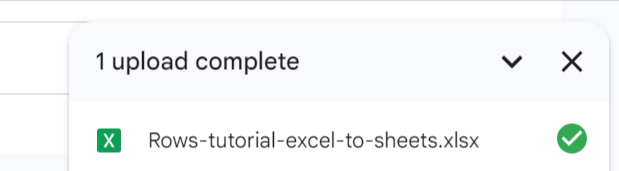
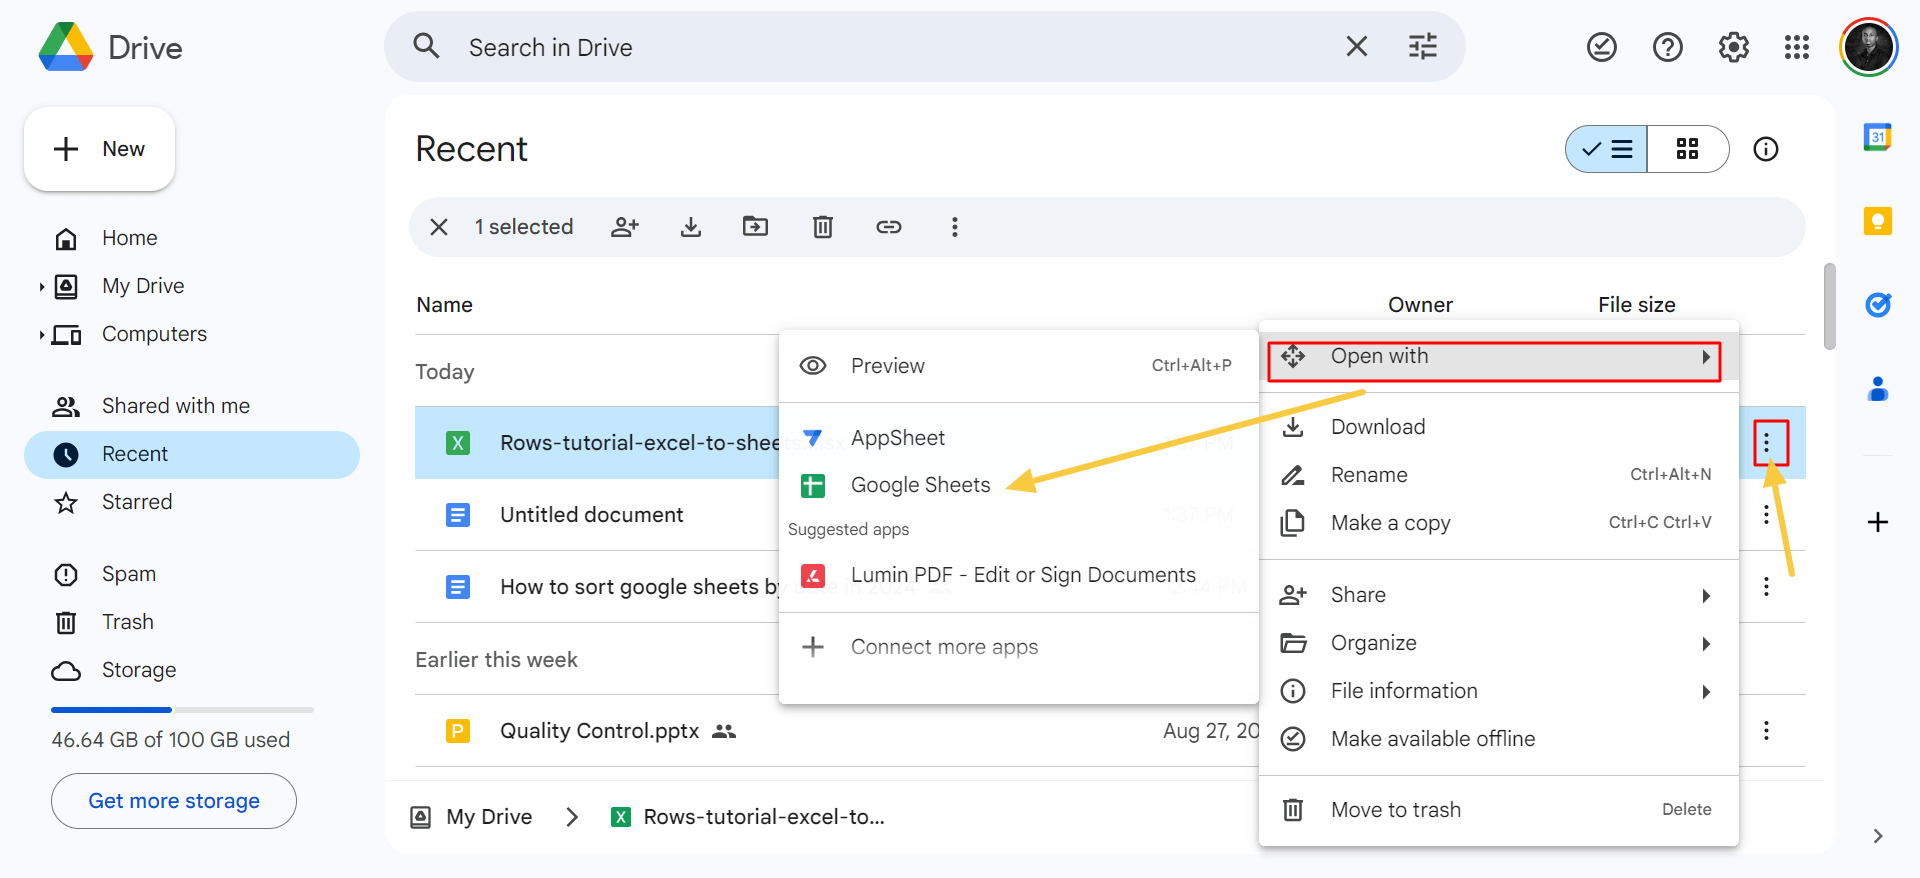
Step 4: Once the upload is complete, right-click on the file in Google Drive. Select "Open with" > "Google Sheets" from the context menu.
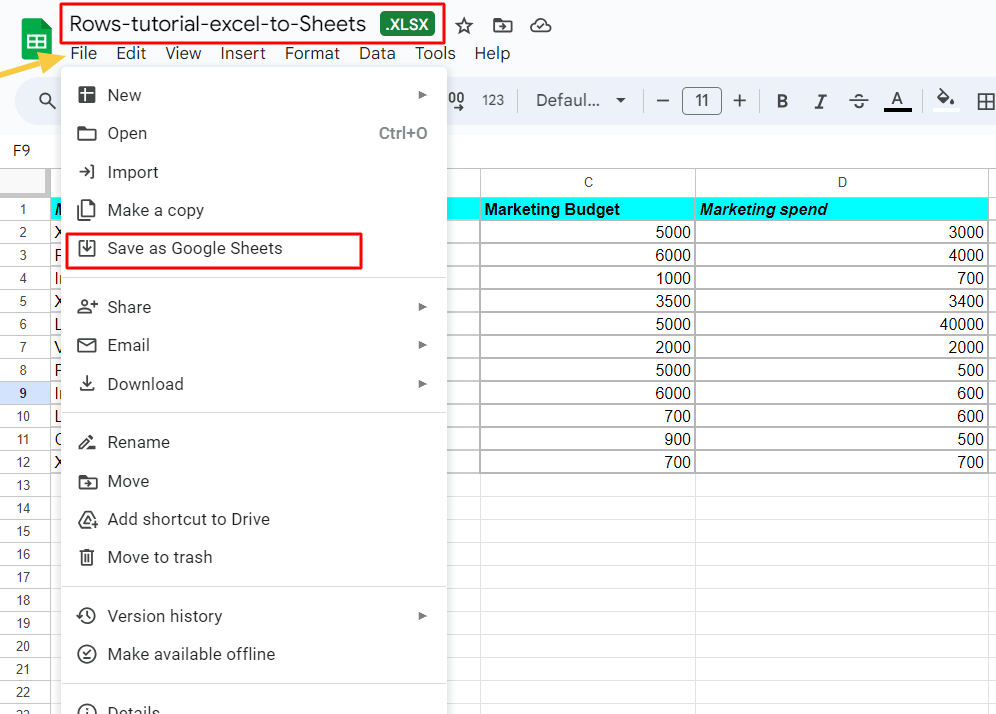
Step 5: The file will open in Google Sheets. Go to "File" > "Save as Google Sheets".
Method 2: How to use the “Import” tab in Google Sheets
Step 1: Open a new or existing Google Sheet. For this example, I'm using a new Google Sheet page.
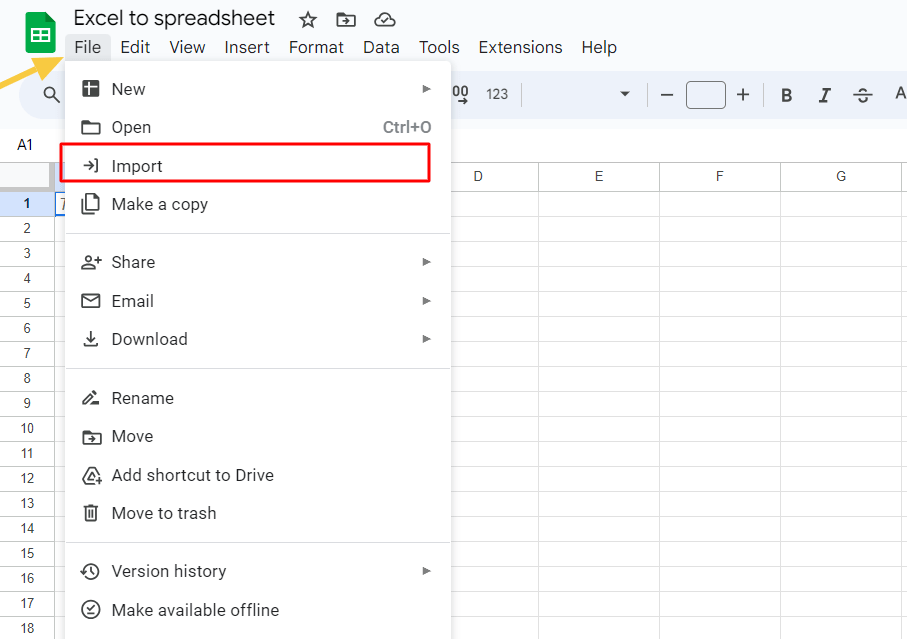
After opening a new sheet. Click on “file” in the top right corner of your workspace. You'll get a dropdown menu with various functions with icons attached. Click “import”.
Step 2: Once you've clicked Import
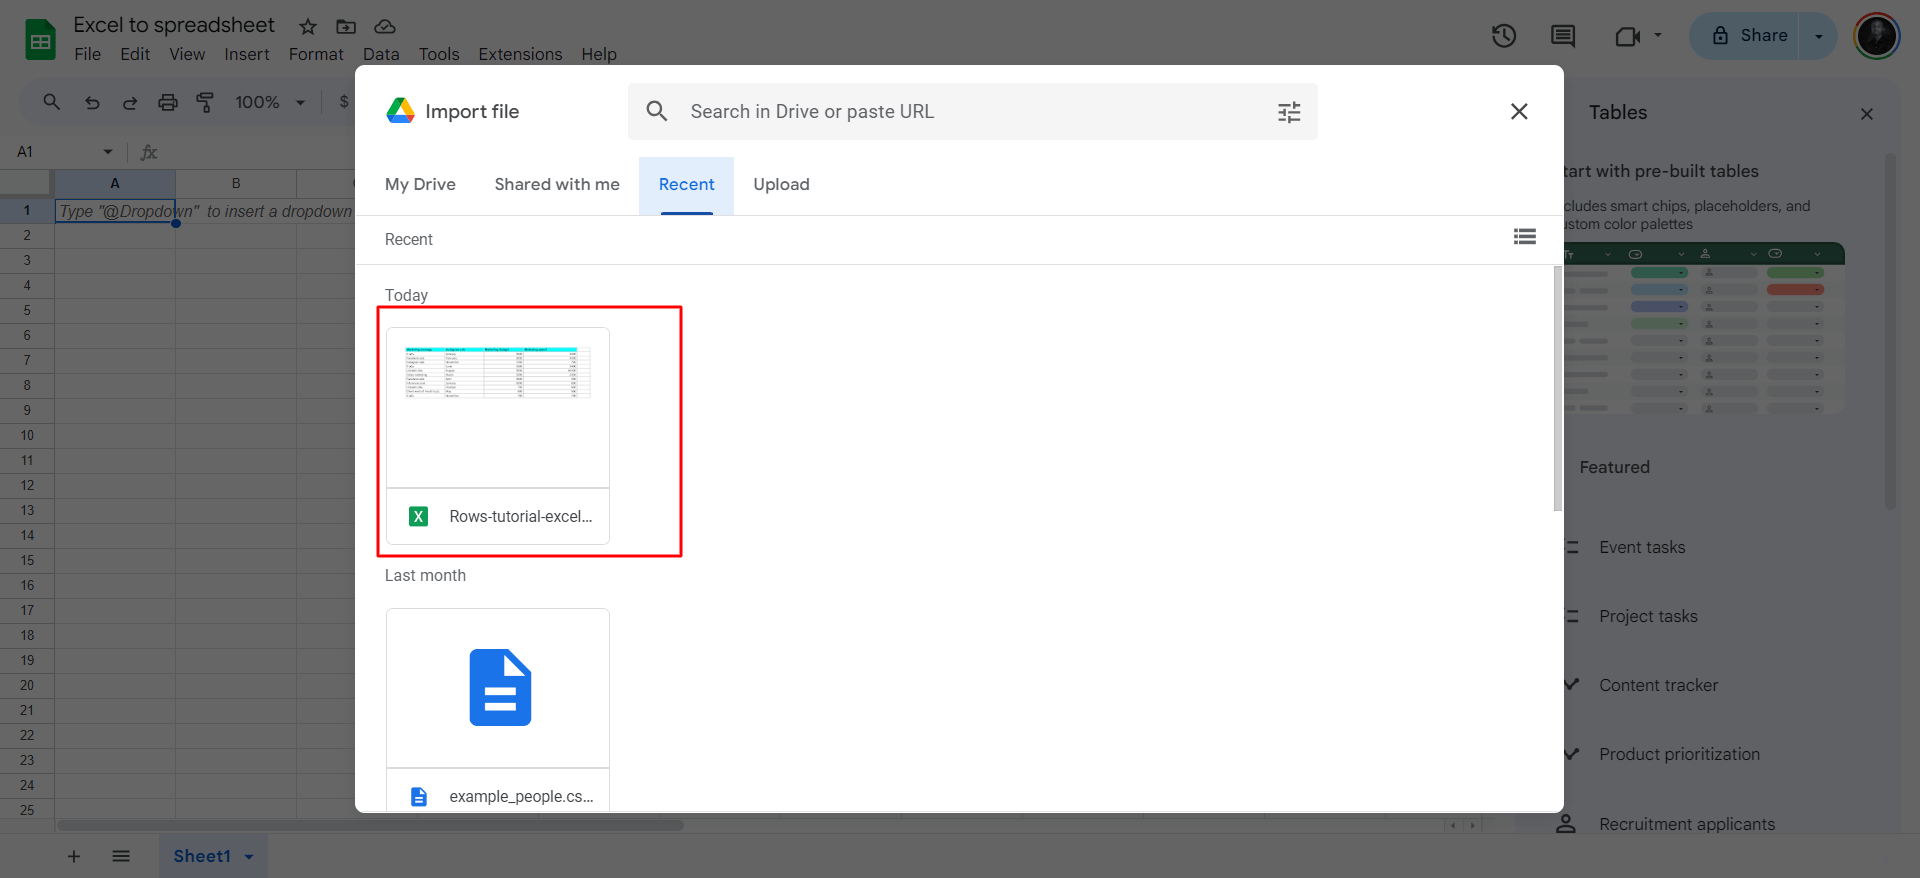
You'll see a box launch containing various sources from which you can upload data: “My Drive, Shared with me, Recent and Upload”, respectively.
Click on the Excel file.
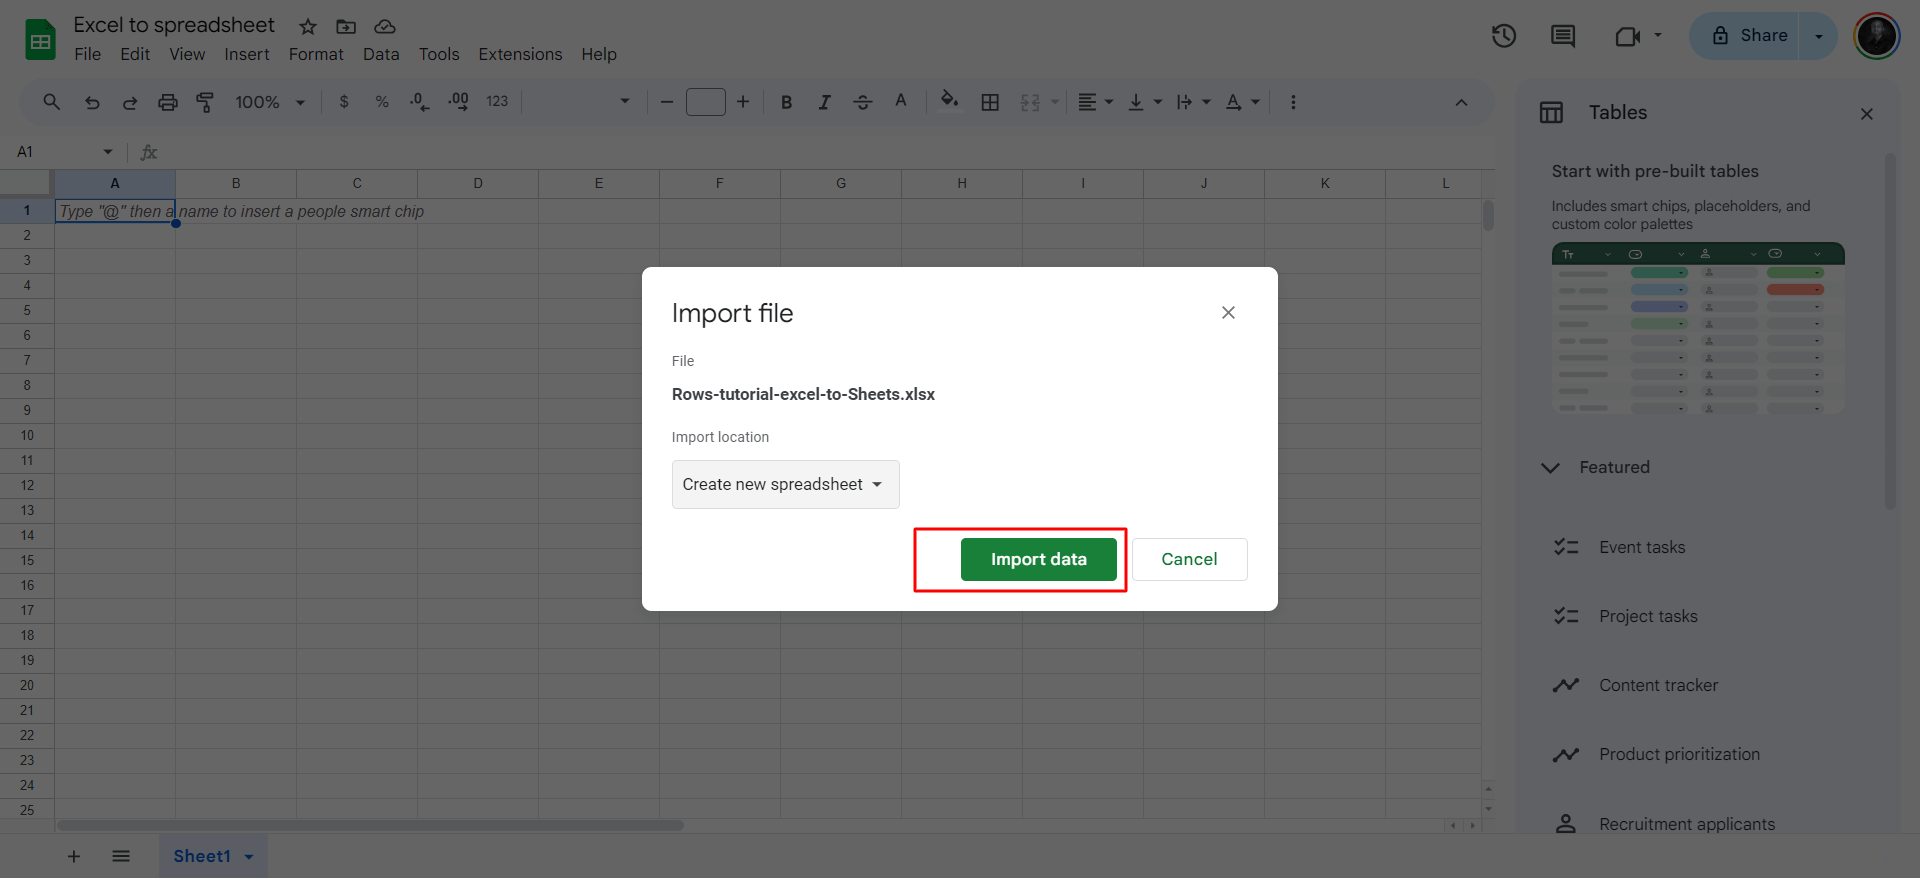
Step 3: After choosing the Excel document. Click “import data”.
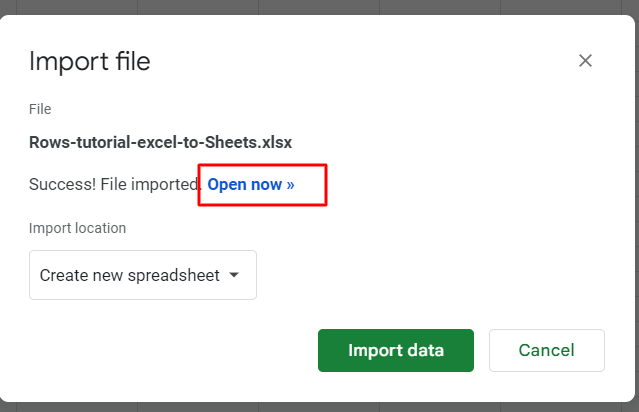
Once done, you'll see a blue text pop-up: “Open now.
Click on it.
How to convert Google Sheets back to Excel
Maybe you still want to return that spreadsheet in .xlsx format. It's not hard to do it.
All you need to do is —
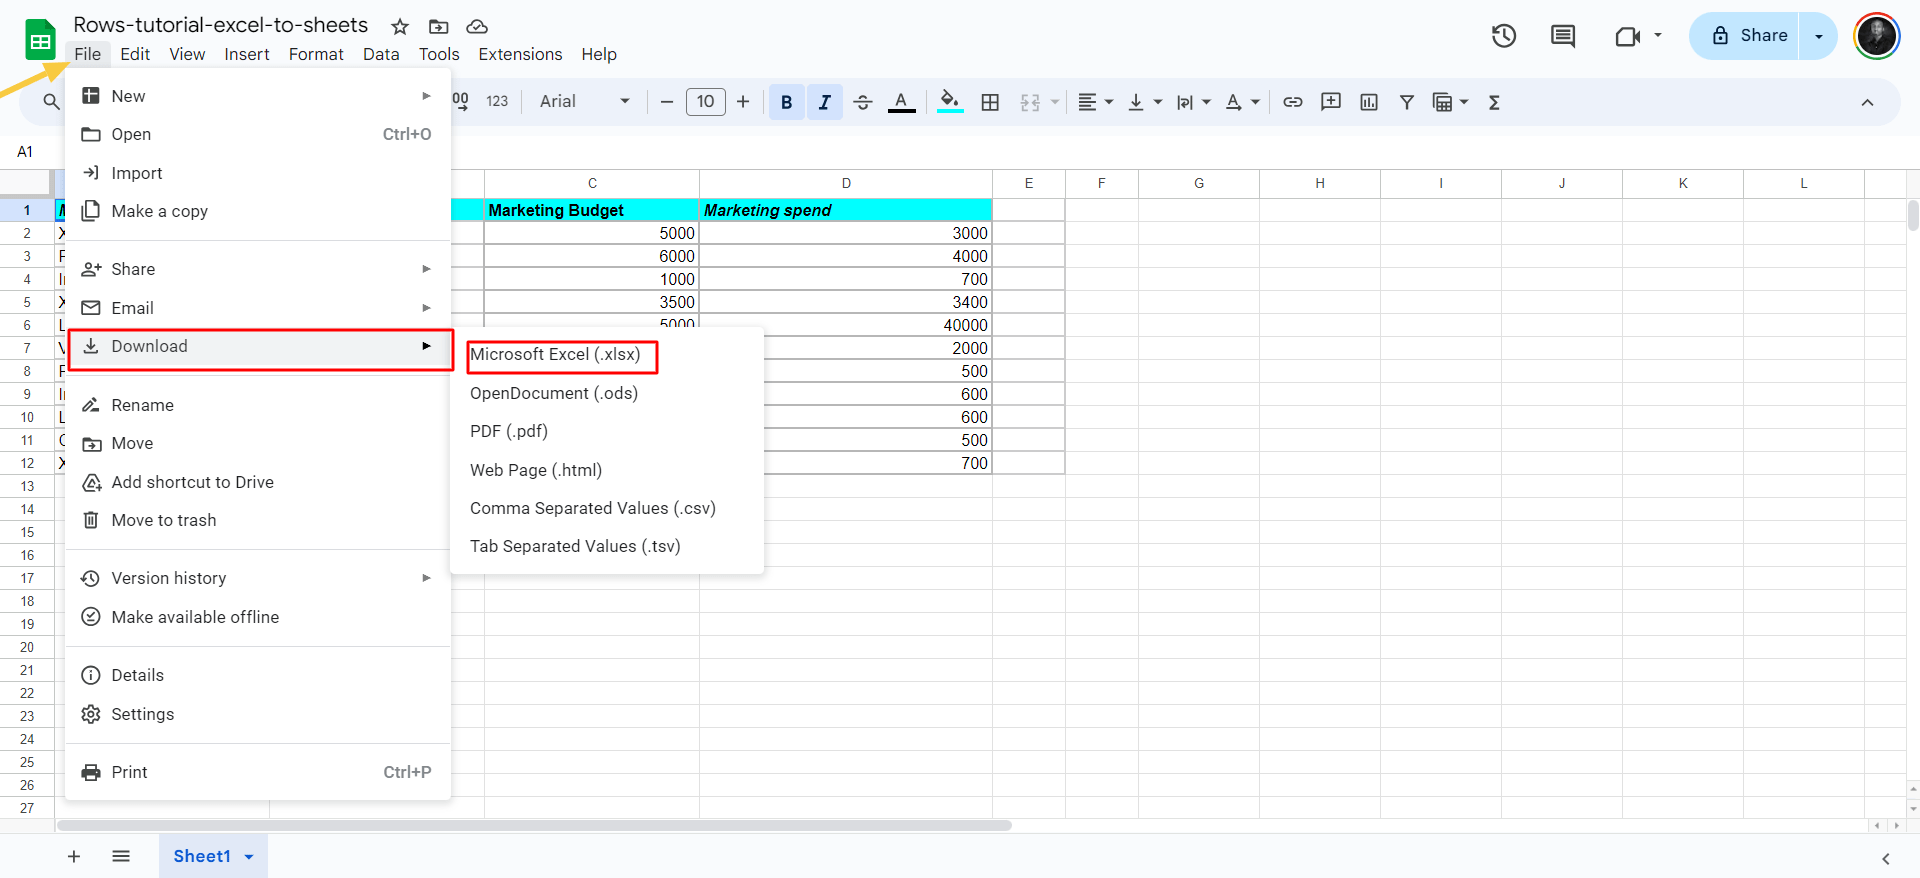
Click on “file” in the top right corner of your Google Sheets workspace.
Click “Download” to see a pop-up of 6 different formats.
Choose “Microsoft Excel (.xlsx)”
And that's all! You should have your Excel ready to preview.
Read more: How to add numbers in Google Sheets in 2025.
Your new AI Data Analyst
Extract from PDFs, import your business data, and analyze it using plain language.
Try Rows (no signup)How to import Excel (.xlsx) in Rows
Rows is a comprehensive spreadsheet for modern teams that offers a modern UI, built-in integrations for live data ingestion, and native AI capabilities (AI analyst, AI-generated subtitles, native AI functions
In Rows, you can import Excel files and export files in Excel format. Below is a brief step-by-step guide on how to import Excel files and export tables in Rows as Excel sheets.
Steps on how to convert spreadsheet in Rows to Excel
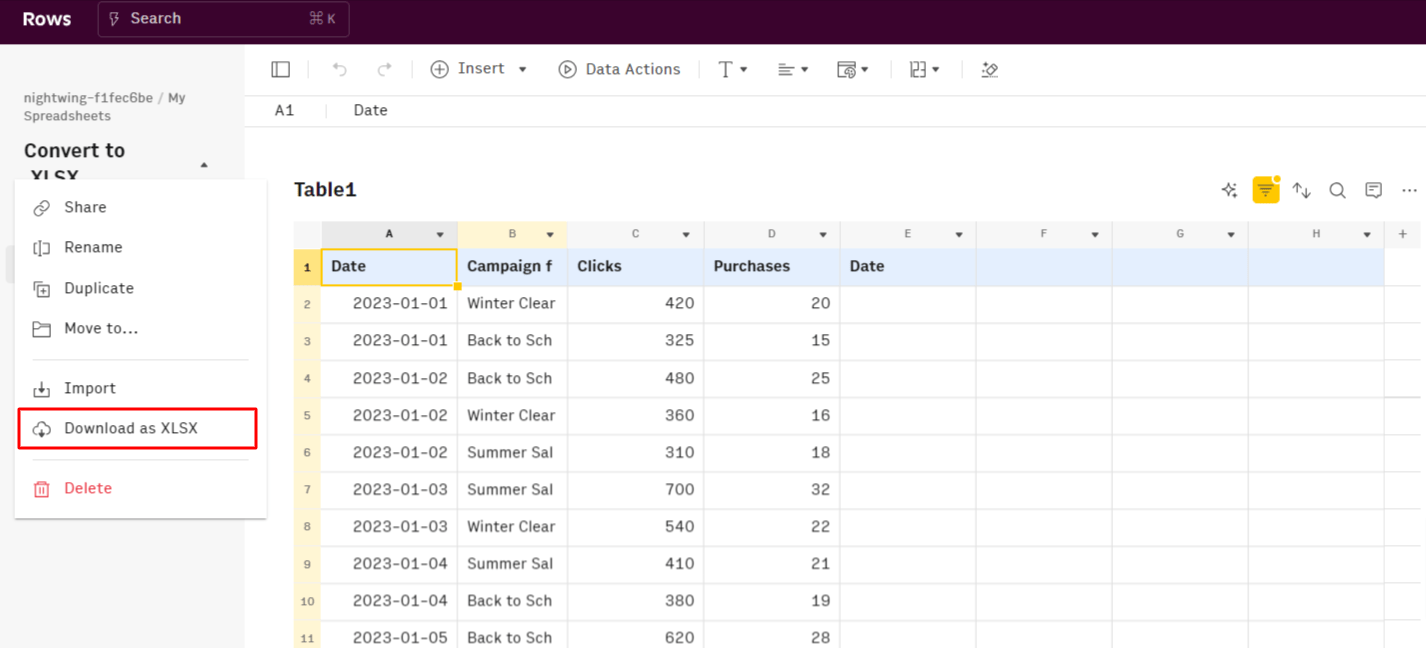
Step 1: Look to the top right corner of your table and click on the arrow toggled down close to the title of the spreadsheet.

Step 2: You'll see a drop-down menu of various functions. Click “Download as XLSX”. Afterwards, check your download history to check out the Excel document.
Steps on how to import Excel files into Rows
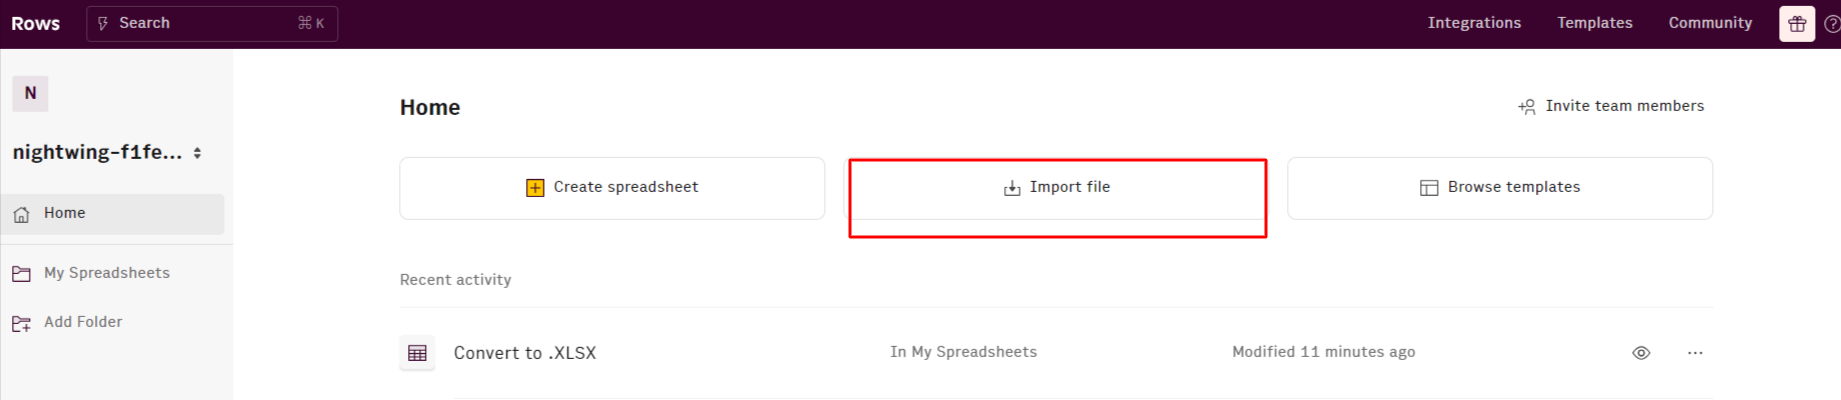
Step 1: Launch Rows on your chrome browser. On the dashboard page, you'll see three bold tabs — create spreadsheet, Import file, and Browse templates.
Click on “Import file”
You'll have two options — either to import CSV or XLSX file.
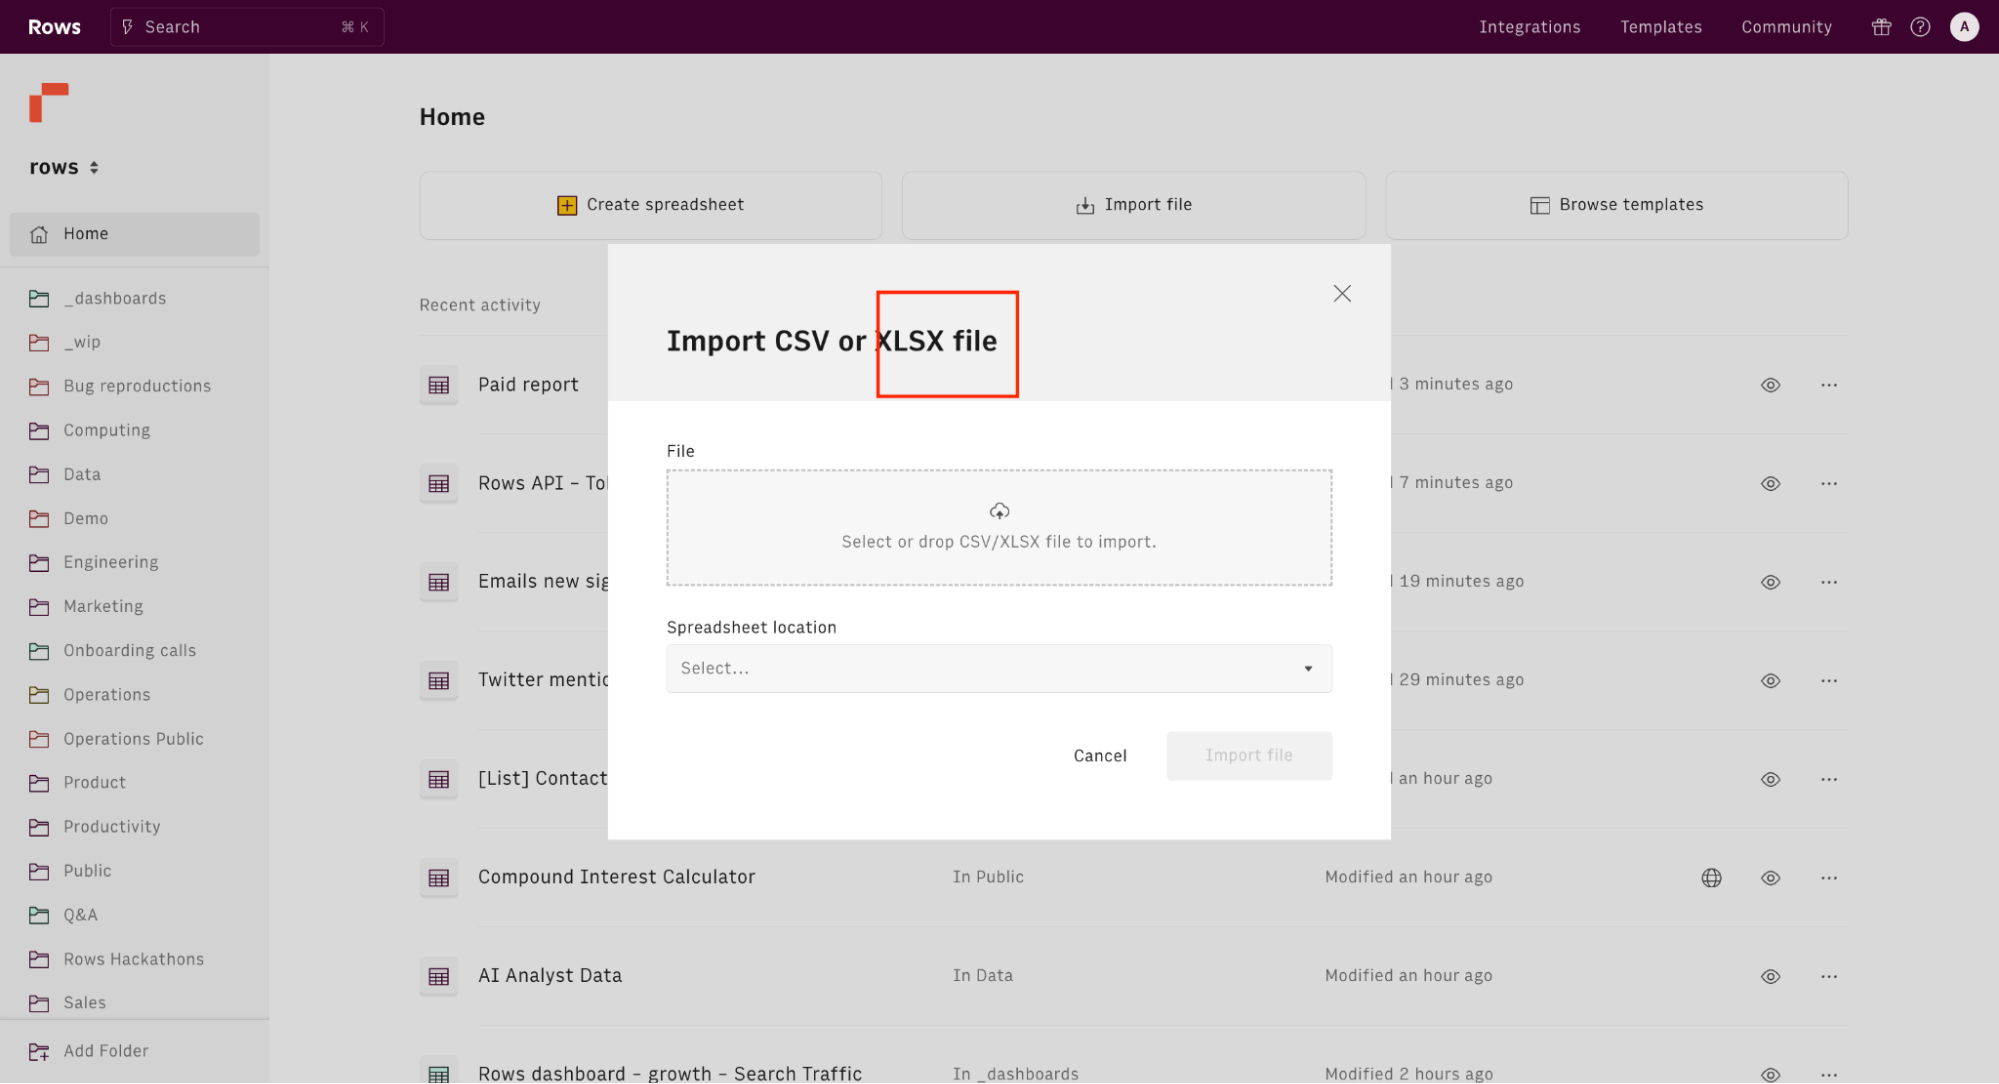
Once imported, choose the location of the spreadsheet. And click “Import file”.
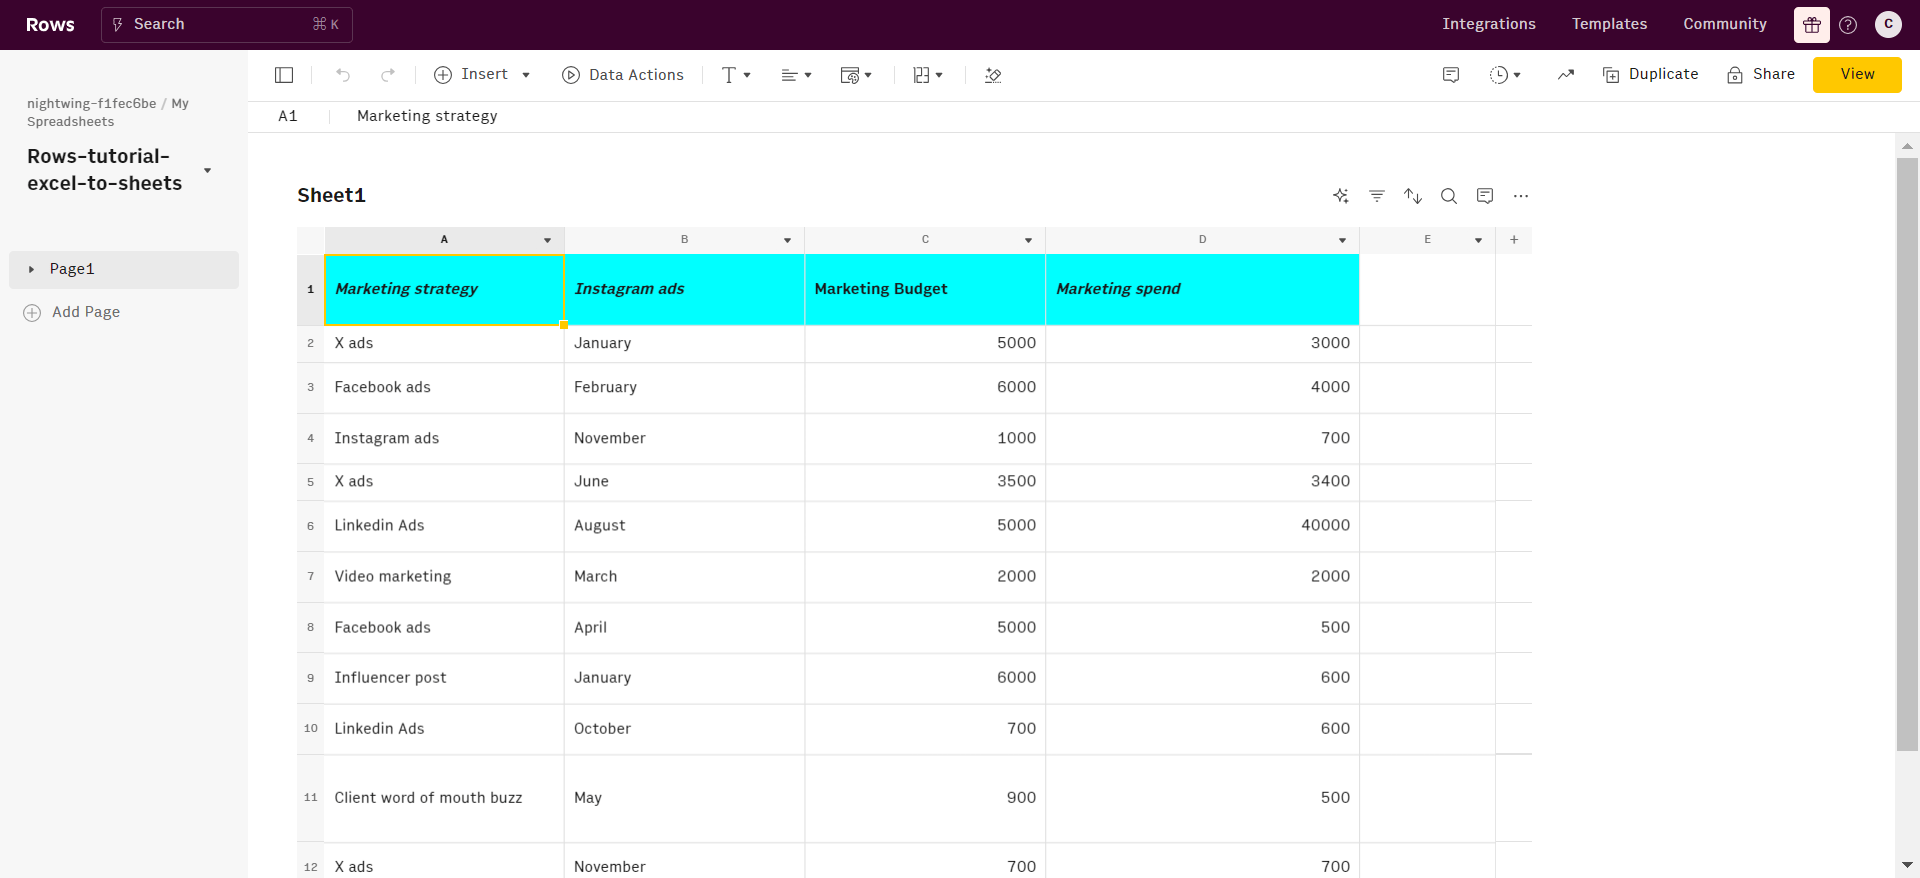
Here's what your imported data will look like based on your formatting from Excel dashboard —

The spreadsheet powered by AI
Import your files with modern UI, Data Aggregation, and Automation capabilities.
Try Rows for FreeHow does Rows compare to Google Sheets when importing files?
Rows has some unique ad advantages over Google Sheets when it comes to import Excel sheets —
Data aggregation and automation
You are a marketer, a product manager, or a data analyst, and chances are you frequently import Excel files from various data sources for analytical and reporting purposes. This process can be particularly time-consuming due to the manual tasks involved and the need to check for potential data discrepancies.
With Rows, you can import live data from 50+ sources, thanks to built-in API data integrations in various domains:
Marketing: GA4, GSC, Facebook, Instagram, TikTok e.t.c
Productivity software: OpenAI, Notion, Slack, Email, Translate
Data Warehouse: MySQL, BigQuery, PostgreSQL, Snowflake, Amazon Redshift
And many more.
See how to import a Notion database in the following example:
Modern UI
Spreadsheets in Rows present a document-like layout with standalone tables and charts stacked vertically and horizontally.
WYSIWYG: the spreadsheet IS the dashboard. All data is rendered as regular spreadsheet tables. You can move elements vertically and horizontally with drag and drop. And if something breaks, you can intervene on that table or chart flexibly, without the need to dive into complex workflows.
View Mode: View mode makes your spreadsheets work like web applications. With input fields, you can help anyone understand how to use your spreadsheet by highlighting the cells that need input by the user.
Easy manipulation
After you import .Xlsx, or live data from one of our integrations, you can manipulate it how you like without hassle.
The setup and the maintenance on Rows are easy and quick because they leverage familiar spreadsheet features and structure:
Use our AI functions, like APPLY_TASK_OPENAI and EXTRACT_OPENAI, and leverage natural language to automate complex cleansing and mining tasks, and get your table ready to be analyzed. See the example below:
If you want to plot your CSV to existing data, you can do it by just importing directly to an existing spreadsheet. Additionally, if you want to add a column in any table with a calculated metric that is not included in the data source, all you need to do is to use regular spreadsheet formulas, like VLOOKUP or SUMIFS.
If you want to apply specific (conditional) formatting, freeze a row, or in the CSV table, you do so as in any regular spreadsheet.
Your new AI Data Analyst
Extract from PDFs, import your business data, and analyze it using plain language.
Try Rows (no signup)Supercharge your sheets with Rows
With Rows, you can access 50+ built-in data source integrations in various domains.
This makes it easy to ingest data into your table quickly and reduces your team's stress.
With Rows, you can gather data from various sources in your system. This allows for more detailed analyses and helps your team uncover insights they might miss.
Ready to get started with Rows.com? Start using the product right away for free.