In this article we'll walk through how to set up the Snowflake integration in Rows.
To connect the Snowflake integration you need:
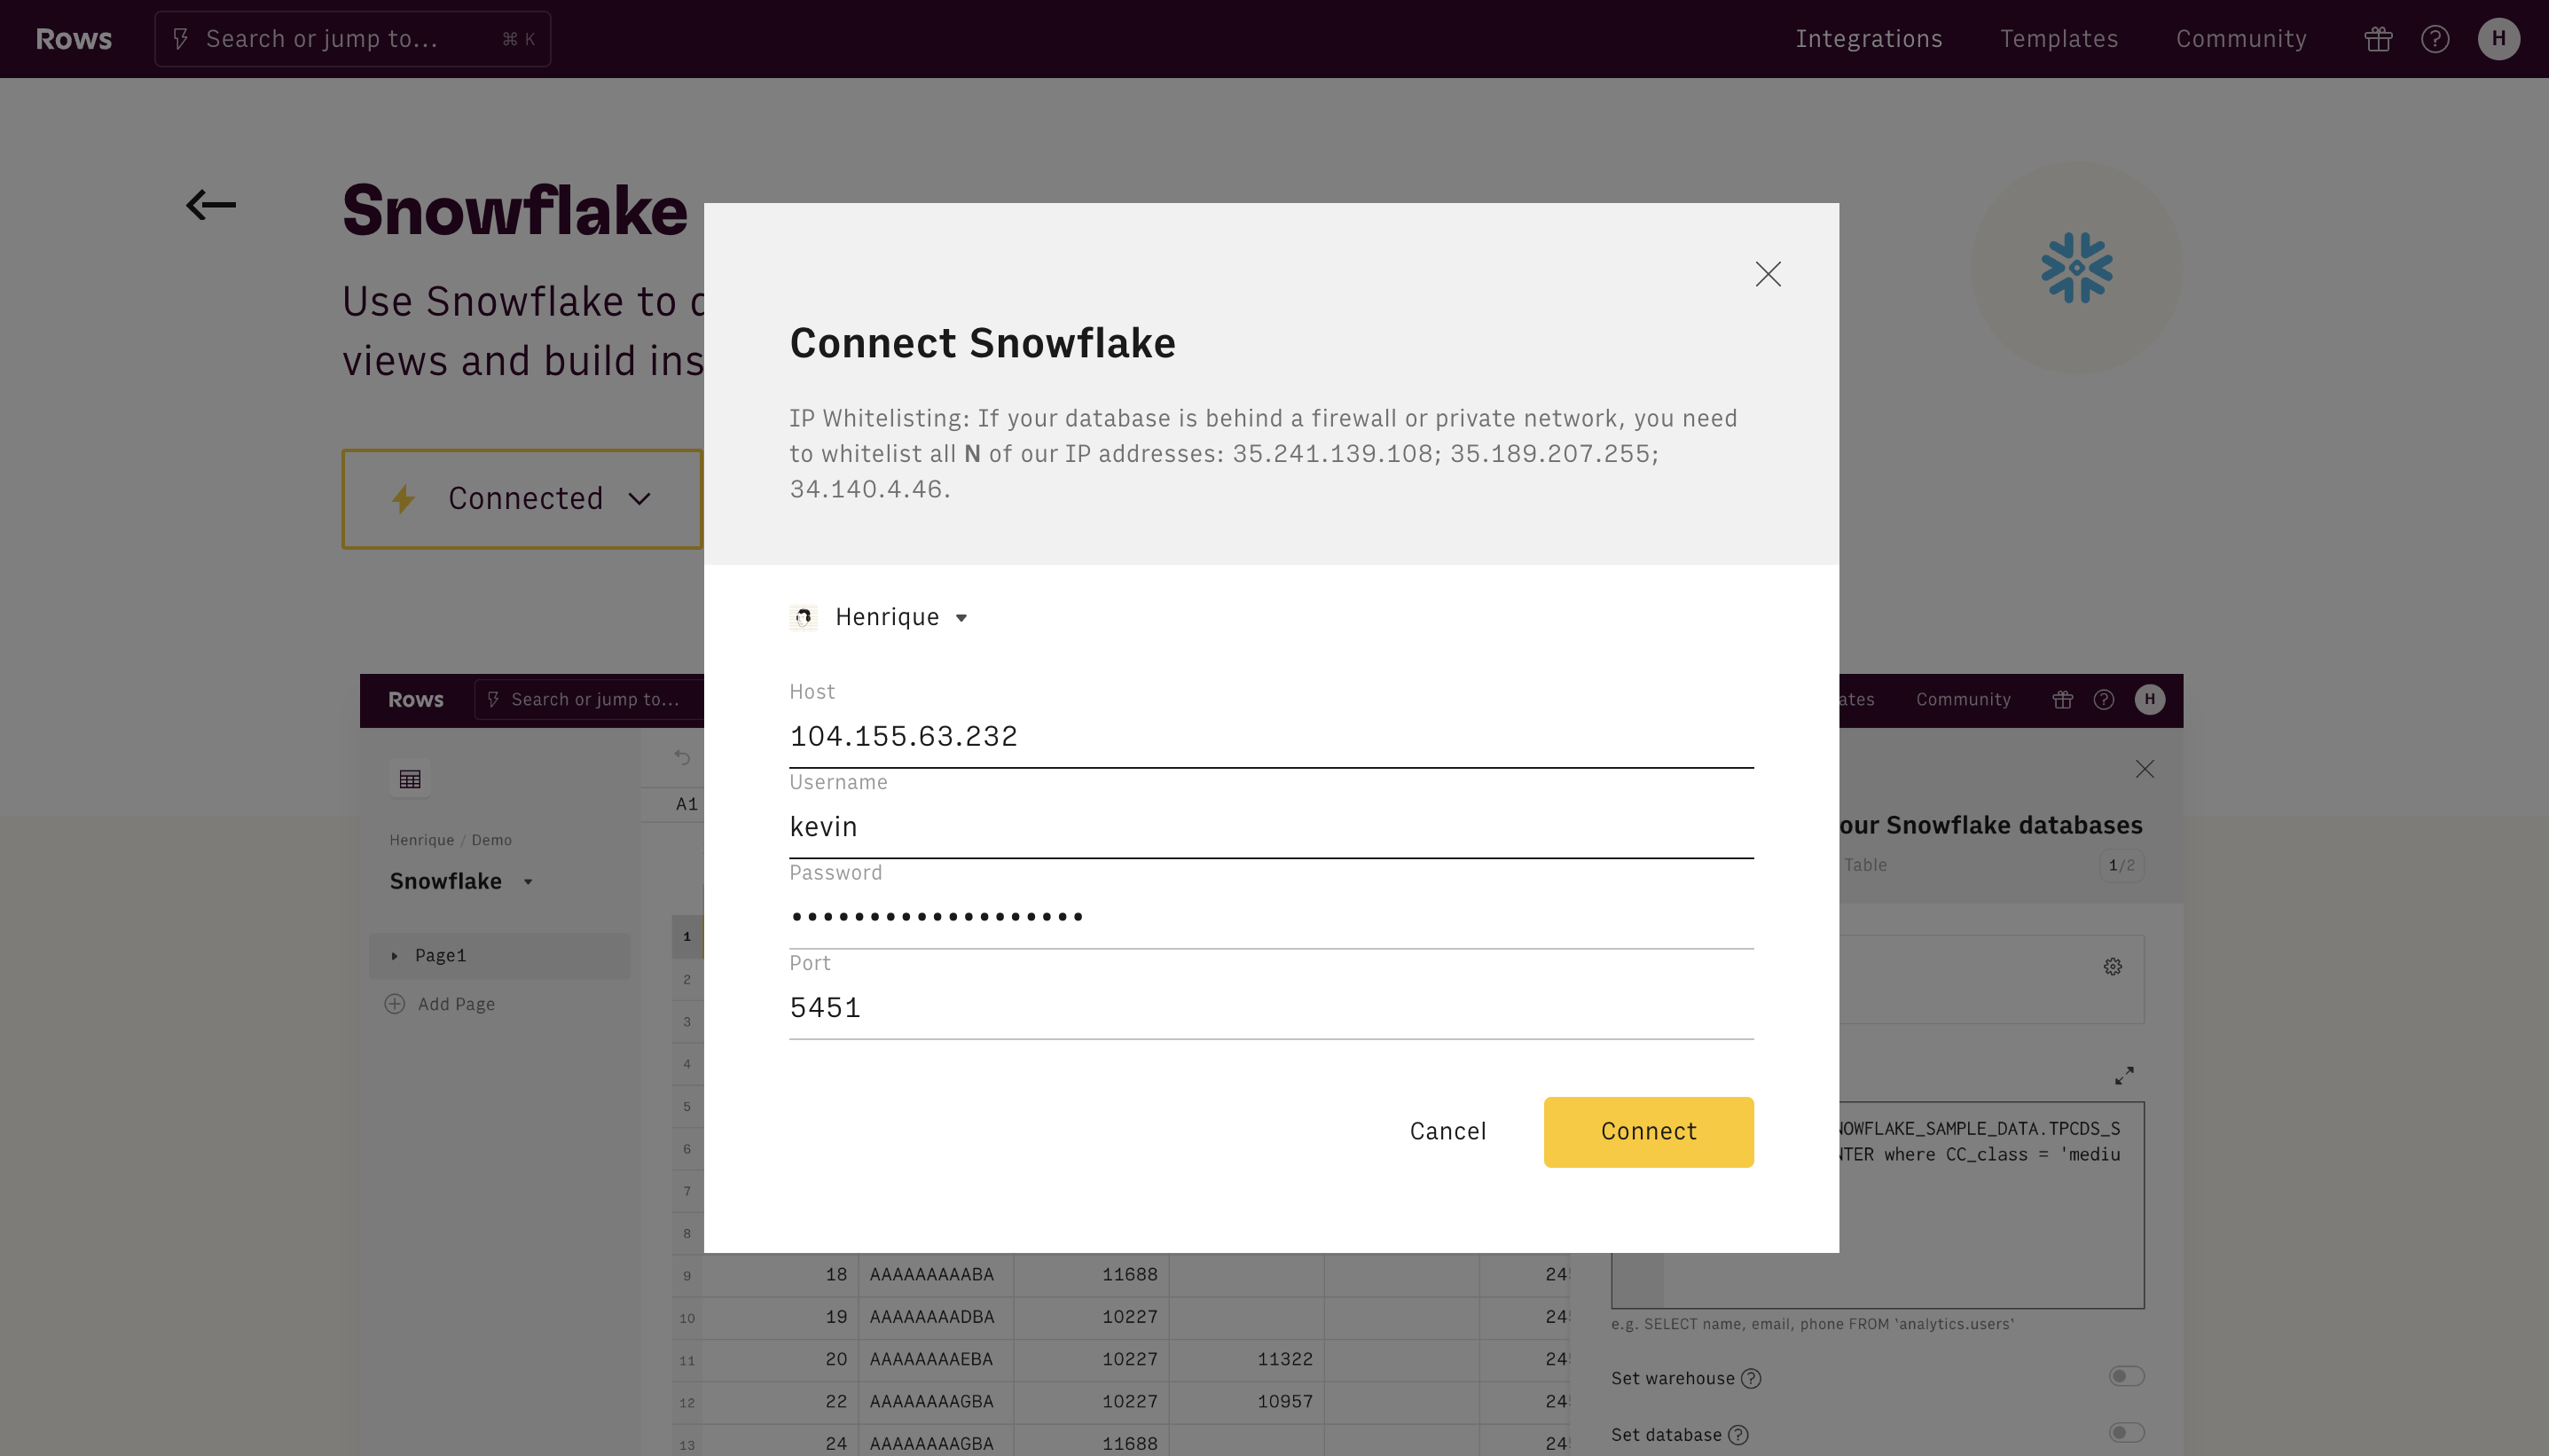
- Authentication details for the Snowflake database. This includes a username and password.
- Information needed to connect to the Snowflake database host, such as the hostname, port number, and name of the database.
- Firewall configurations permitting Rows to connect with your Snowflake host.
Username and password
You may supply a username and password for Rows to verify its identity with your Snowflake host. You can use a distinct username and password specifically for this use, instead of repurposing an existing one. This offers better control over Snowflake user management and enables you to regulate permission levels more effectively.
Whitelist IP Addresses
In case your Snowflake database is protected by a firewall/VPN, it is necessary to permit access from Rows' IP addresses.
Include these IP addresses in your firewall's Allowlist prior to establishing the resource:
- 35.241.139.108
- 35.189.207.255
- 34.140.4.46
Connecting the Snowflake integration
Once you have the necessary credentials and information, you're ready to connect the integration:
- Go to the Snowflake integration page
- Click Connect
- Enter the Host, Username, Password and Port
- Click Connect
And that's it. Snowflake is now connected to Rows and you can start using it to query your data inside the spreadsheets.
Using the Snowflake integration
Direct SQL queries
There are 2 ways to use Snowflake inside a spreadsheet:
- In the Actions menu, with our SQL editor.
- By typing the
QUERY_SNOWFLAKEformula inside a cell.
Using the Actions menu
The Actions menu is the easiest way to use Snowflake inside Rows. To query your Snowflake data:
1. Open the Actions menu located on the format bar and type Snowflake

2. Select the Action and add the query
The Snowflake action has two inputs:
- Query: The SQL query you want to perform. Use the SQL editor to paste the query you want to use.
- Database: The name of the database you want the query
Click Build Table with all data to execute the query and create a data table.
Note: You can combine the query syntax with cell references to link specific parts of the query to a cell.
As an example, you want to have the name of the database in cell A1 of Table1, you can adapt the query from select * from public.sales to ="select * from "&Table1!A1

3. Configure and automate the import

After the table is created, you can use the data table wizard to:
- Add or remove columns from the output table
- Schedule a refresh that imports the data automatically periodically (e.g. every hour, or every day)
- Decide the behavior of the table once a new query is executed. The table can be overwritten with the new data (the default behavior) or you can choose to upsert the new data based on a specific key (a column)
Wrap up
Your Snowflake connection is now ready to use. Find other data sources in the Integration gallery and inspiration on what to build from our Templates and Community.