How to sync data between Notion and a spreadsheet with the Notion API


🎉 New You can import your Notion databases directly to Rows using the new Notion integration so that you can add beautiful charts to your Notion reports, seamlessly connected to a Notion database.
Notion is the new go-to tool to create, organize, and share documents. It's API, released earlier in the year, is a platform that enables developers to integrate their applications with Notion. Among others use cases, you can use the Notion API to interact programmatically with your Notion workspaces to import, update or delete data from your databases, pages, blocks.
One of the most popular uses of the API is to import and sync data between a Notion database and a spreadsheet. This is specially helpful if you want to create reports - Notion does not support charts natively - or if you want to continue part of your workflow outside Notion.
In this blogpost we’ll cover how to use the Notion API to import and sync data from a database into a spreadsheet in Rows.

Your new AI Data Analyst
Extract from PDFs, import your business data, and analyze it using plain language.
Try Rows (no signup)How to sync data between Notion and Rows
1. Create a Notion integration
The first step is to create a private Notion integration and get the Notion API token. To do that:
Log in to Notion and click Settings & Members on the left side navigation menu
Click Connections and select Develop or manage integrations
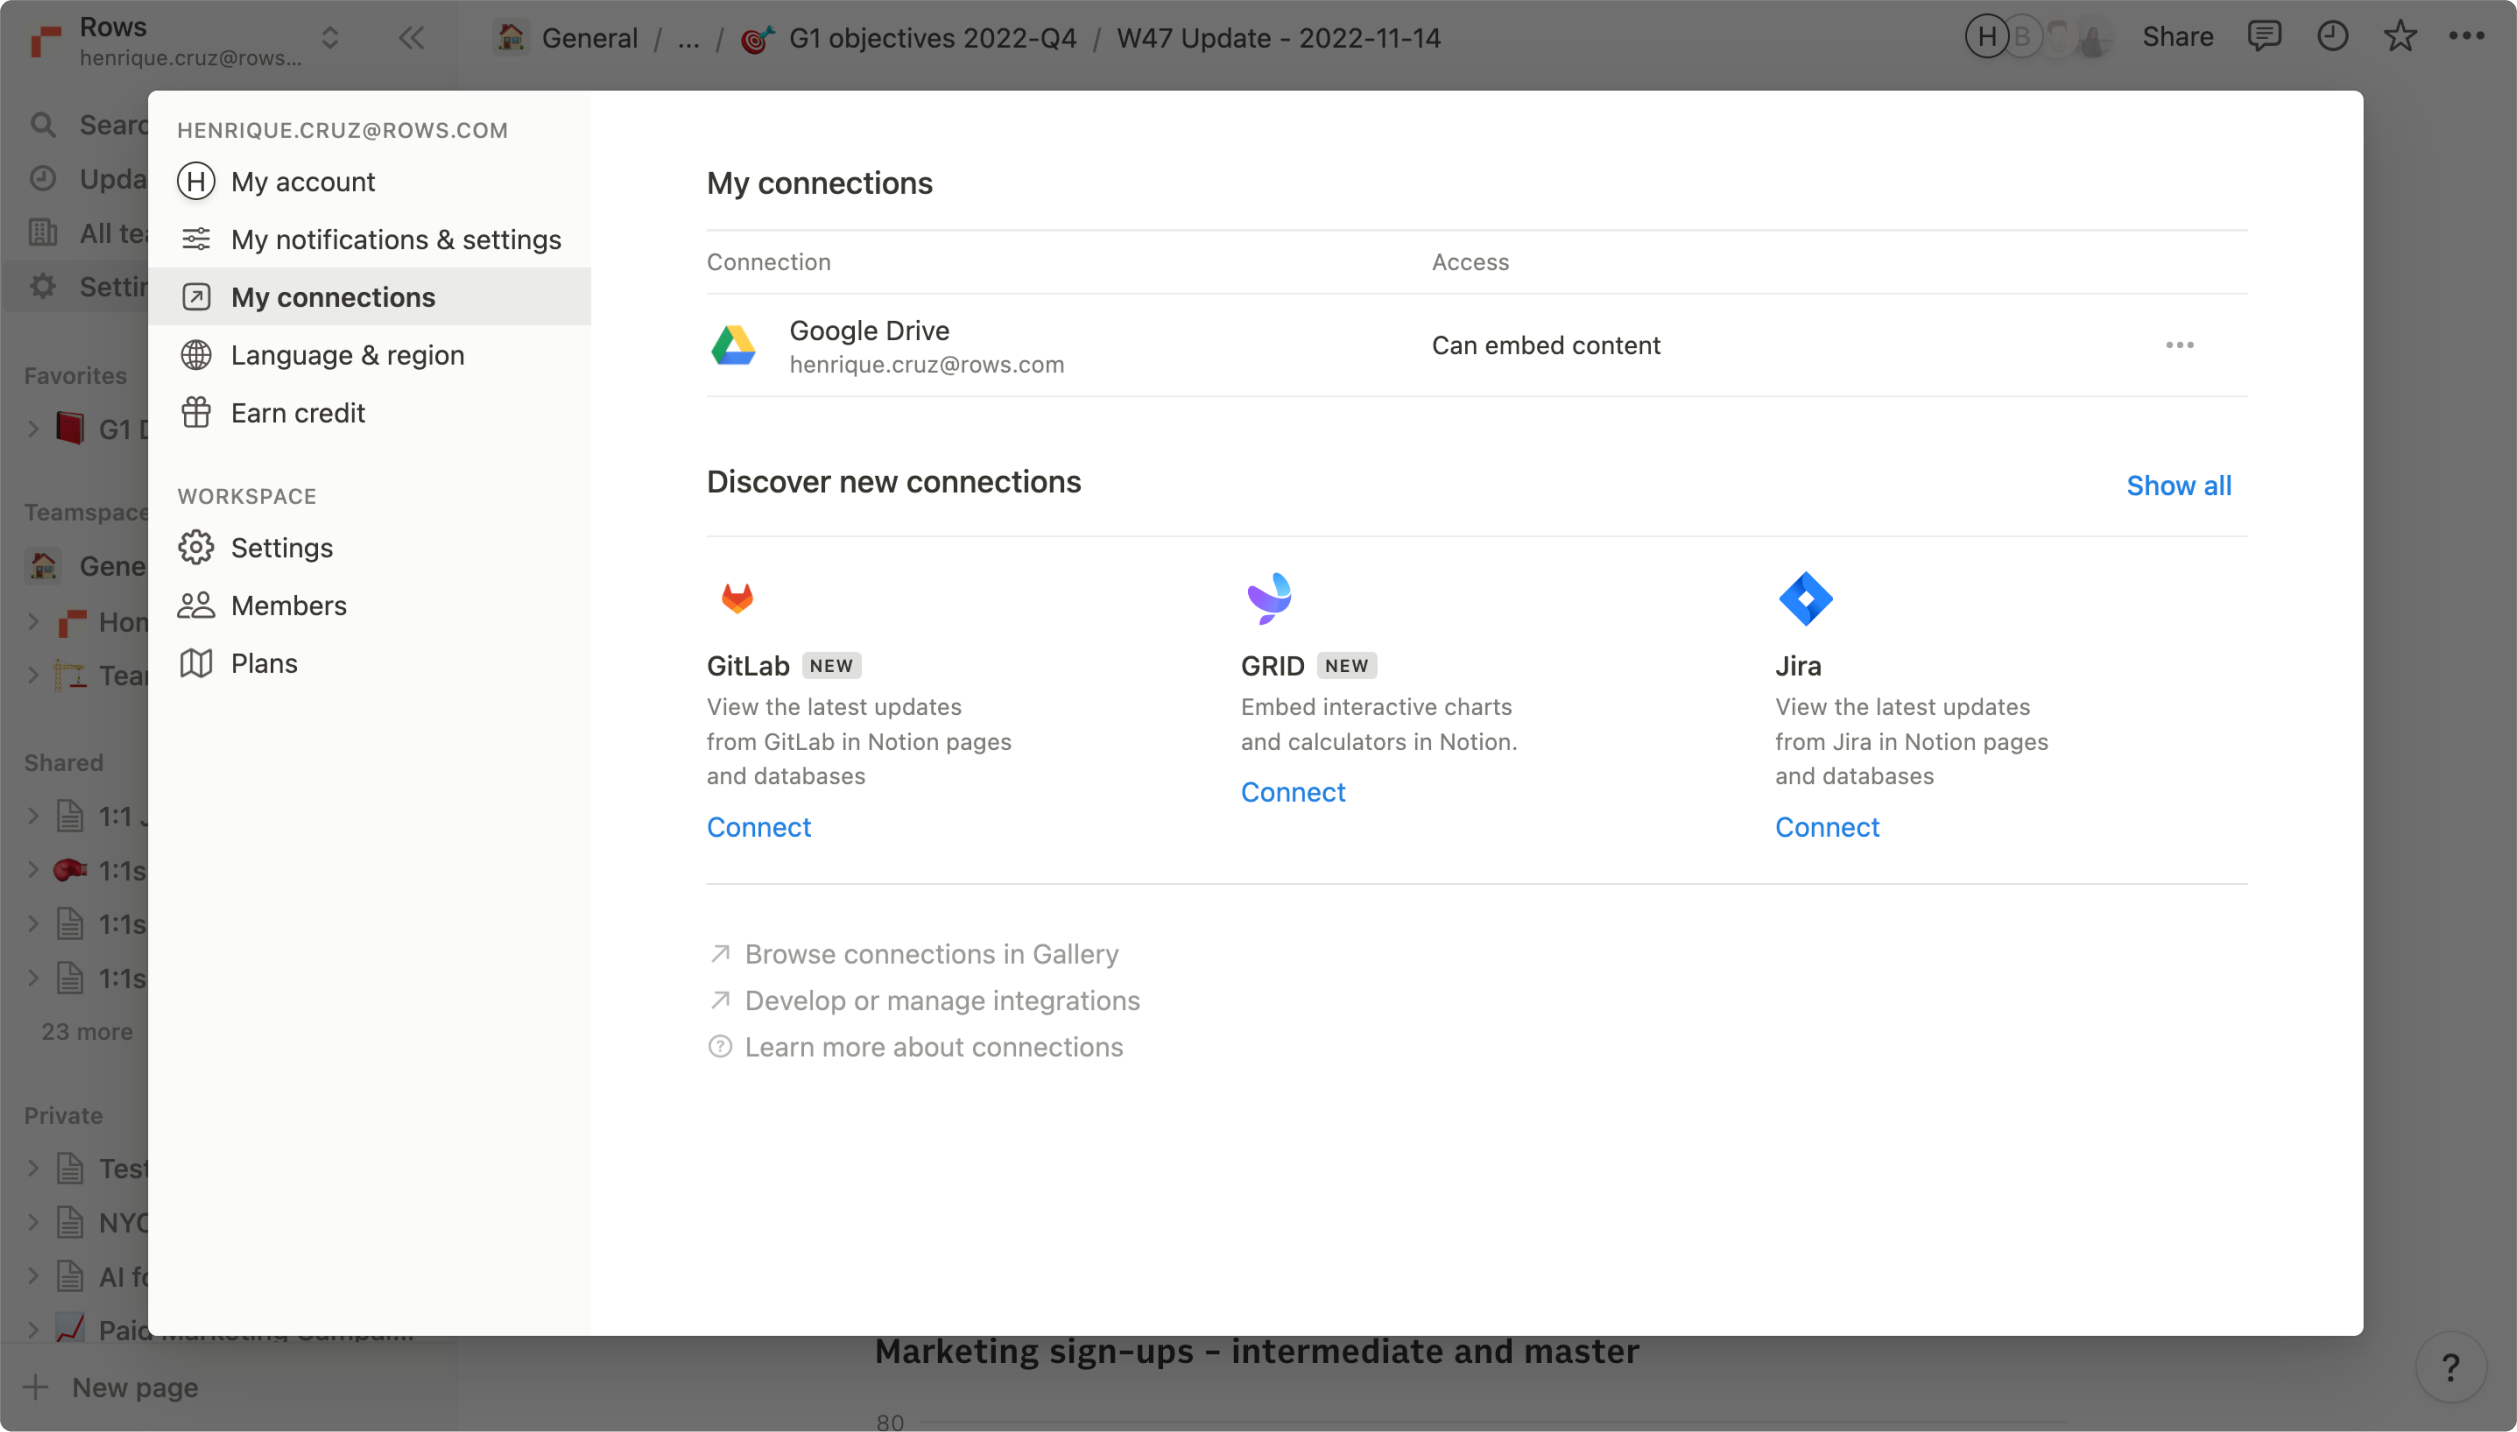 The "My connections" settings on Notion
Click + New Integration
Add the basic information about the integration, including a name, logo and Associated workspace. Make sure to enable Read, Update and Insert content access to the integration.
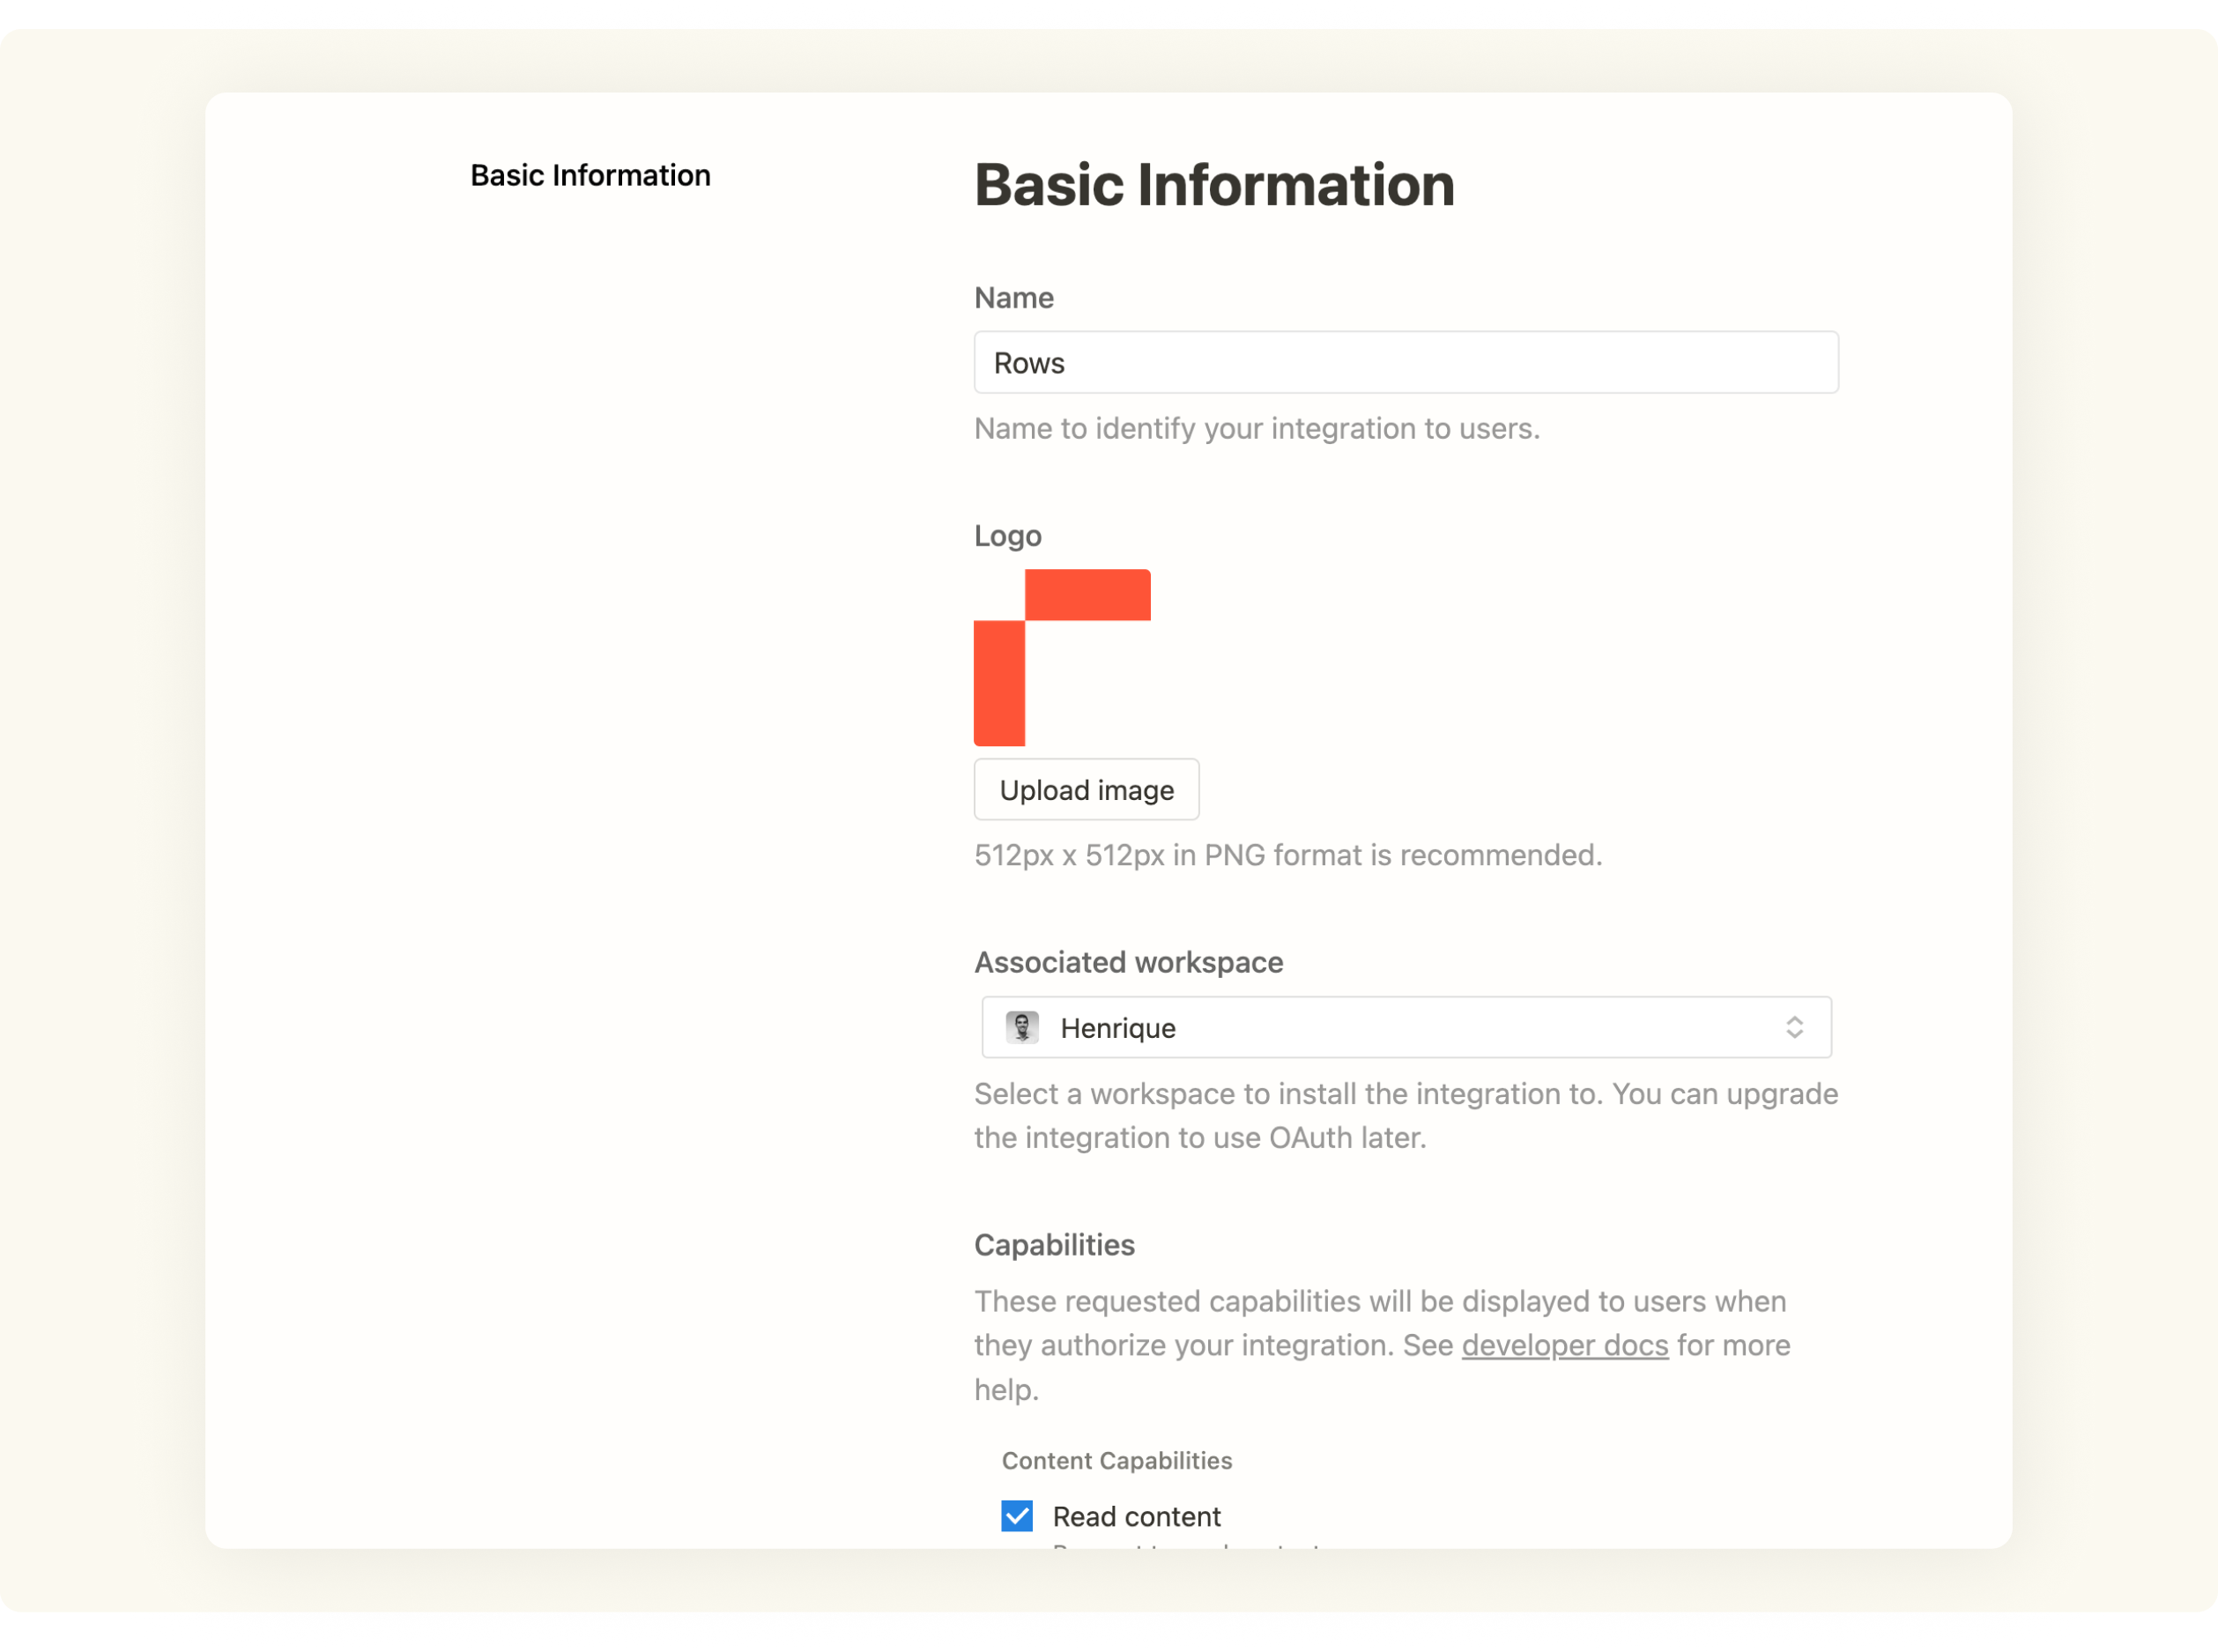 Page with information about integration
Click Submit.
You will be directed to a page with the Internal Integration Token. Click to Reveal it and Copy it.
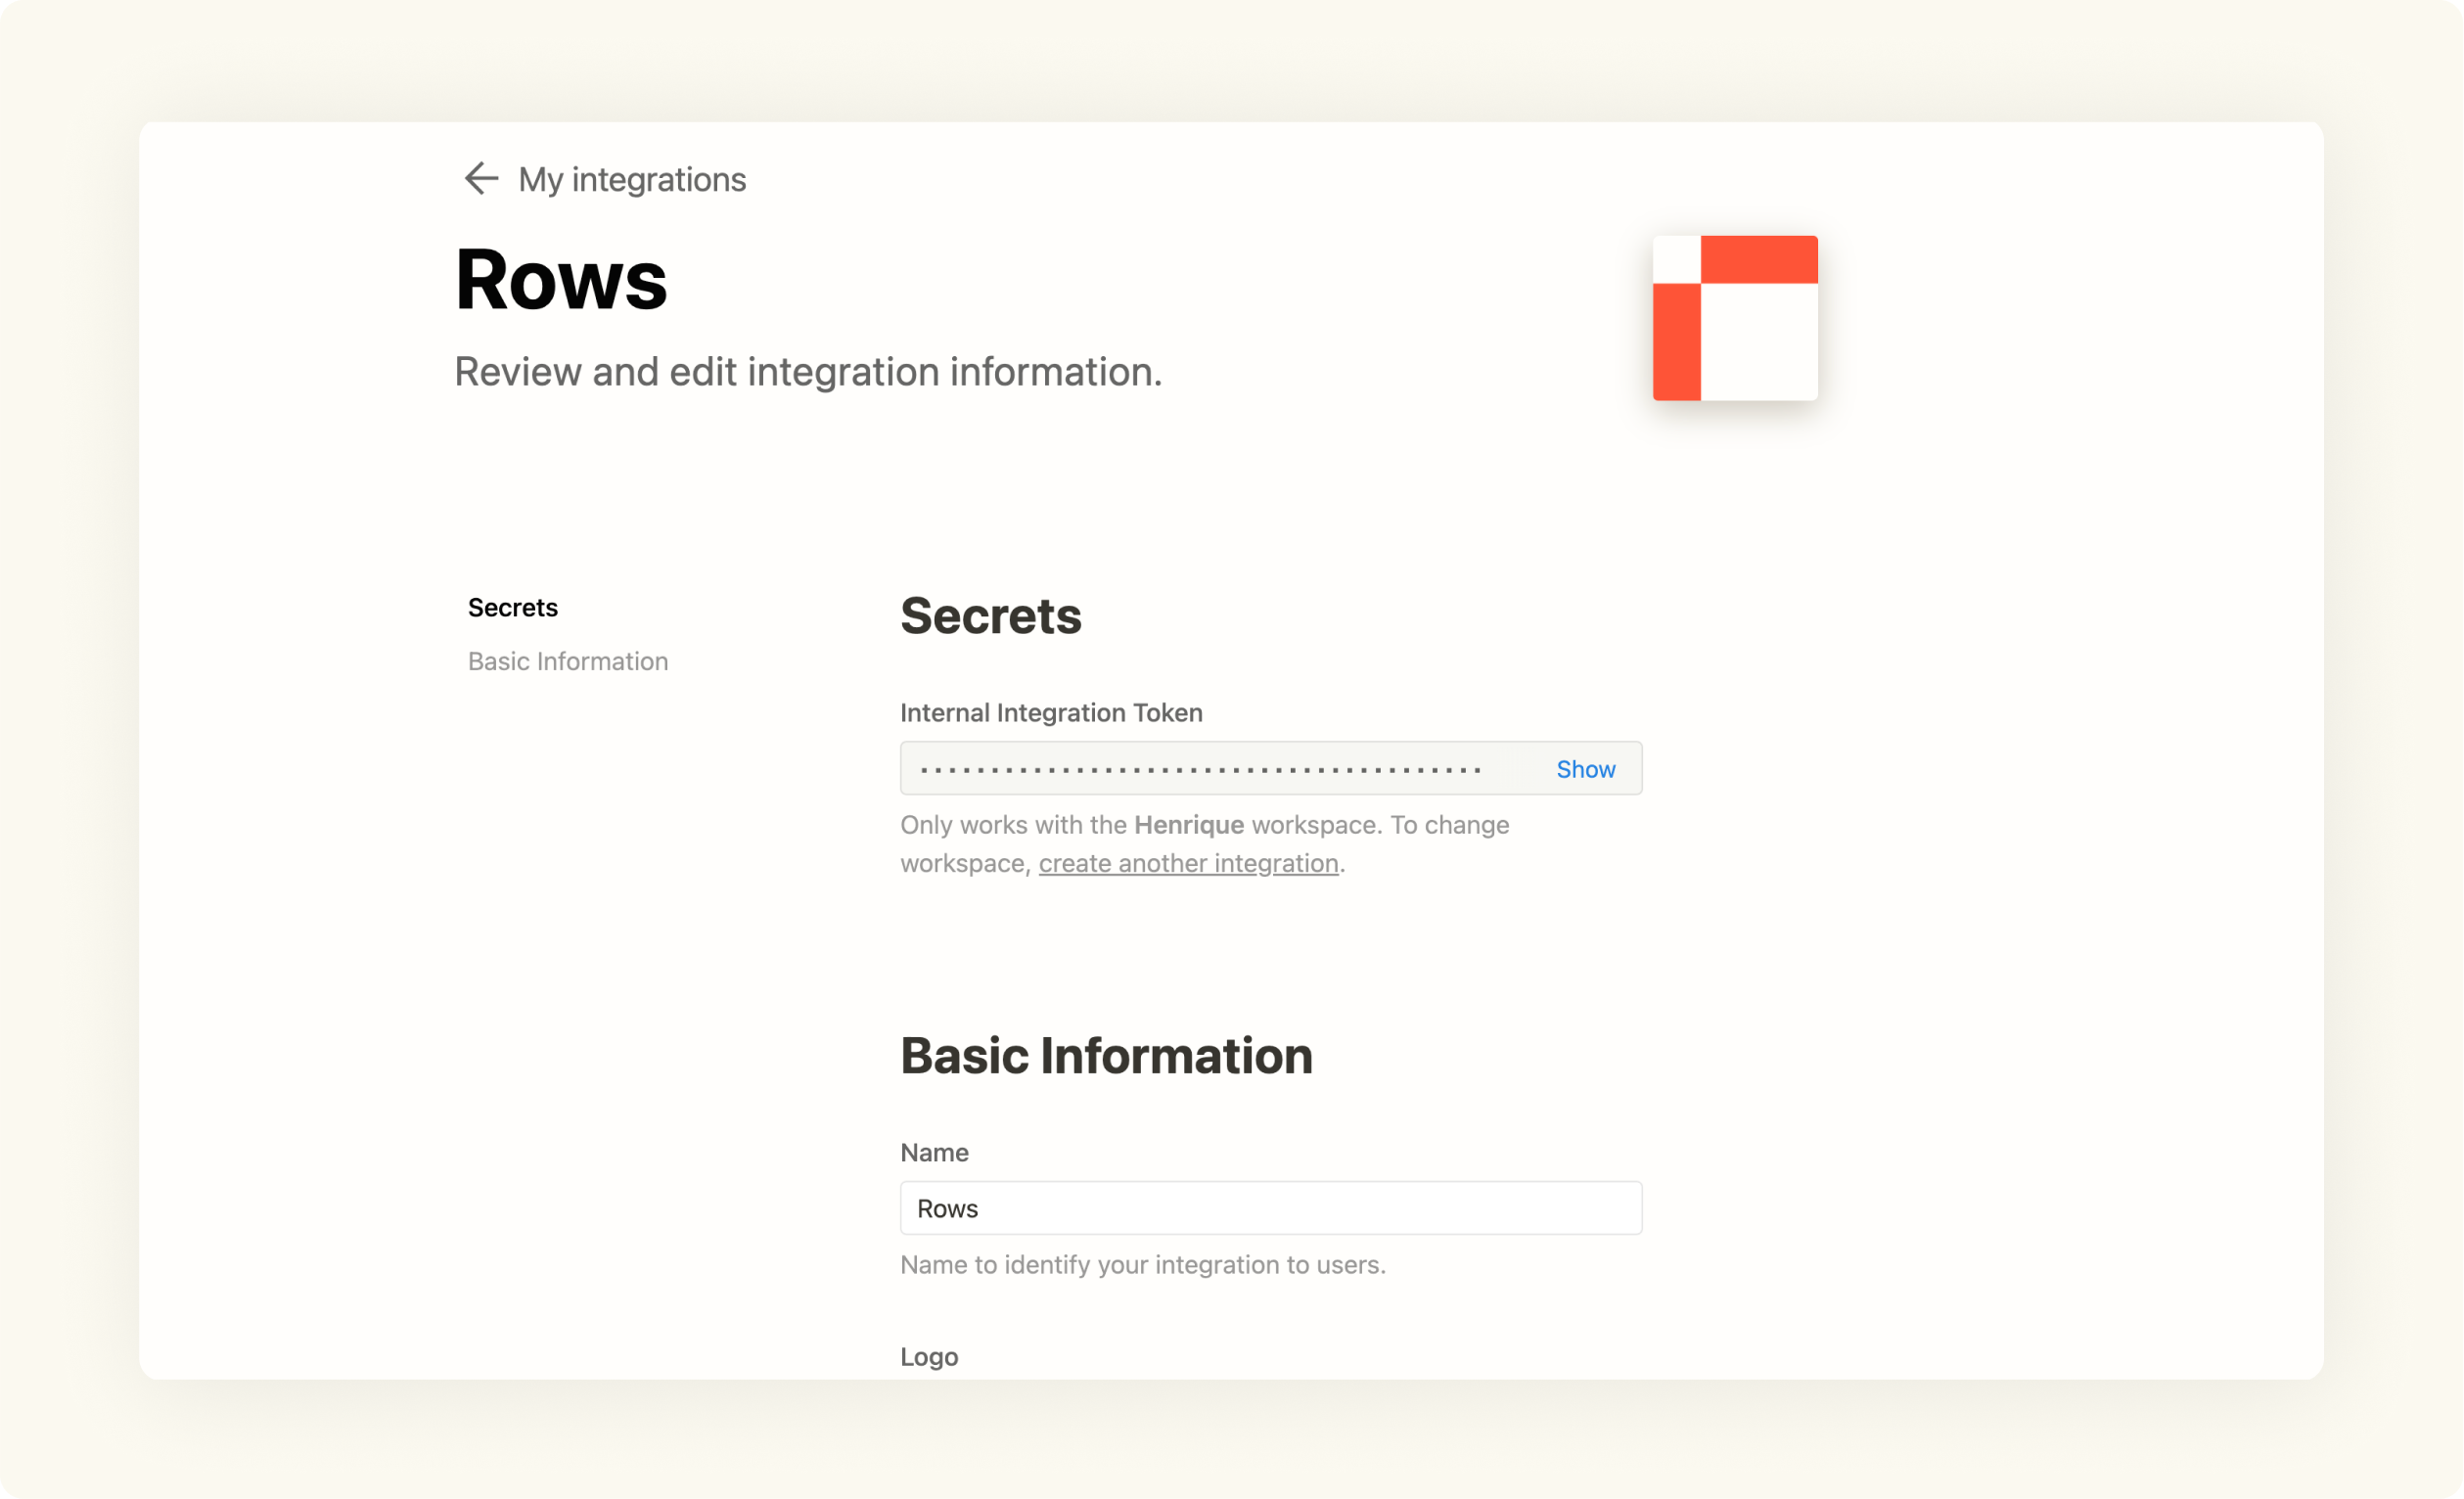 Copy the Internal Integration Token from your integration
2. Allow access to your integration to the Notion page
The second step is to give access to the Notion page to your newly created integration. By default, the integration will not have access to the content of the page, so you need to give it access explicitly. Follow these steps:
Go to the page that contains the database and click the ••• button on its top right corner.
Scroll to the bottom and select Add connections
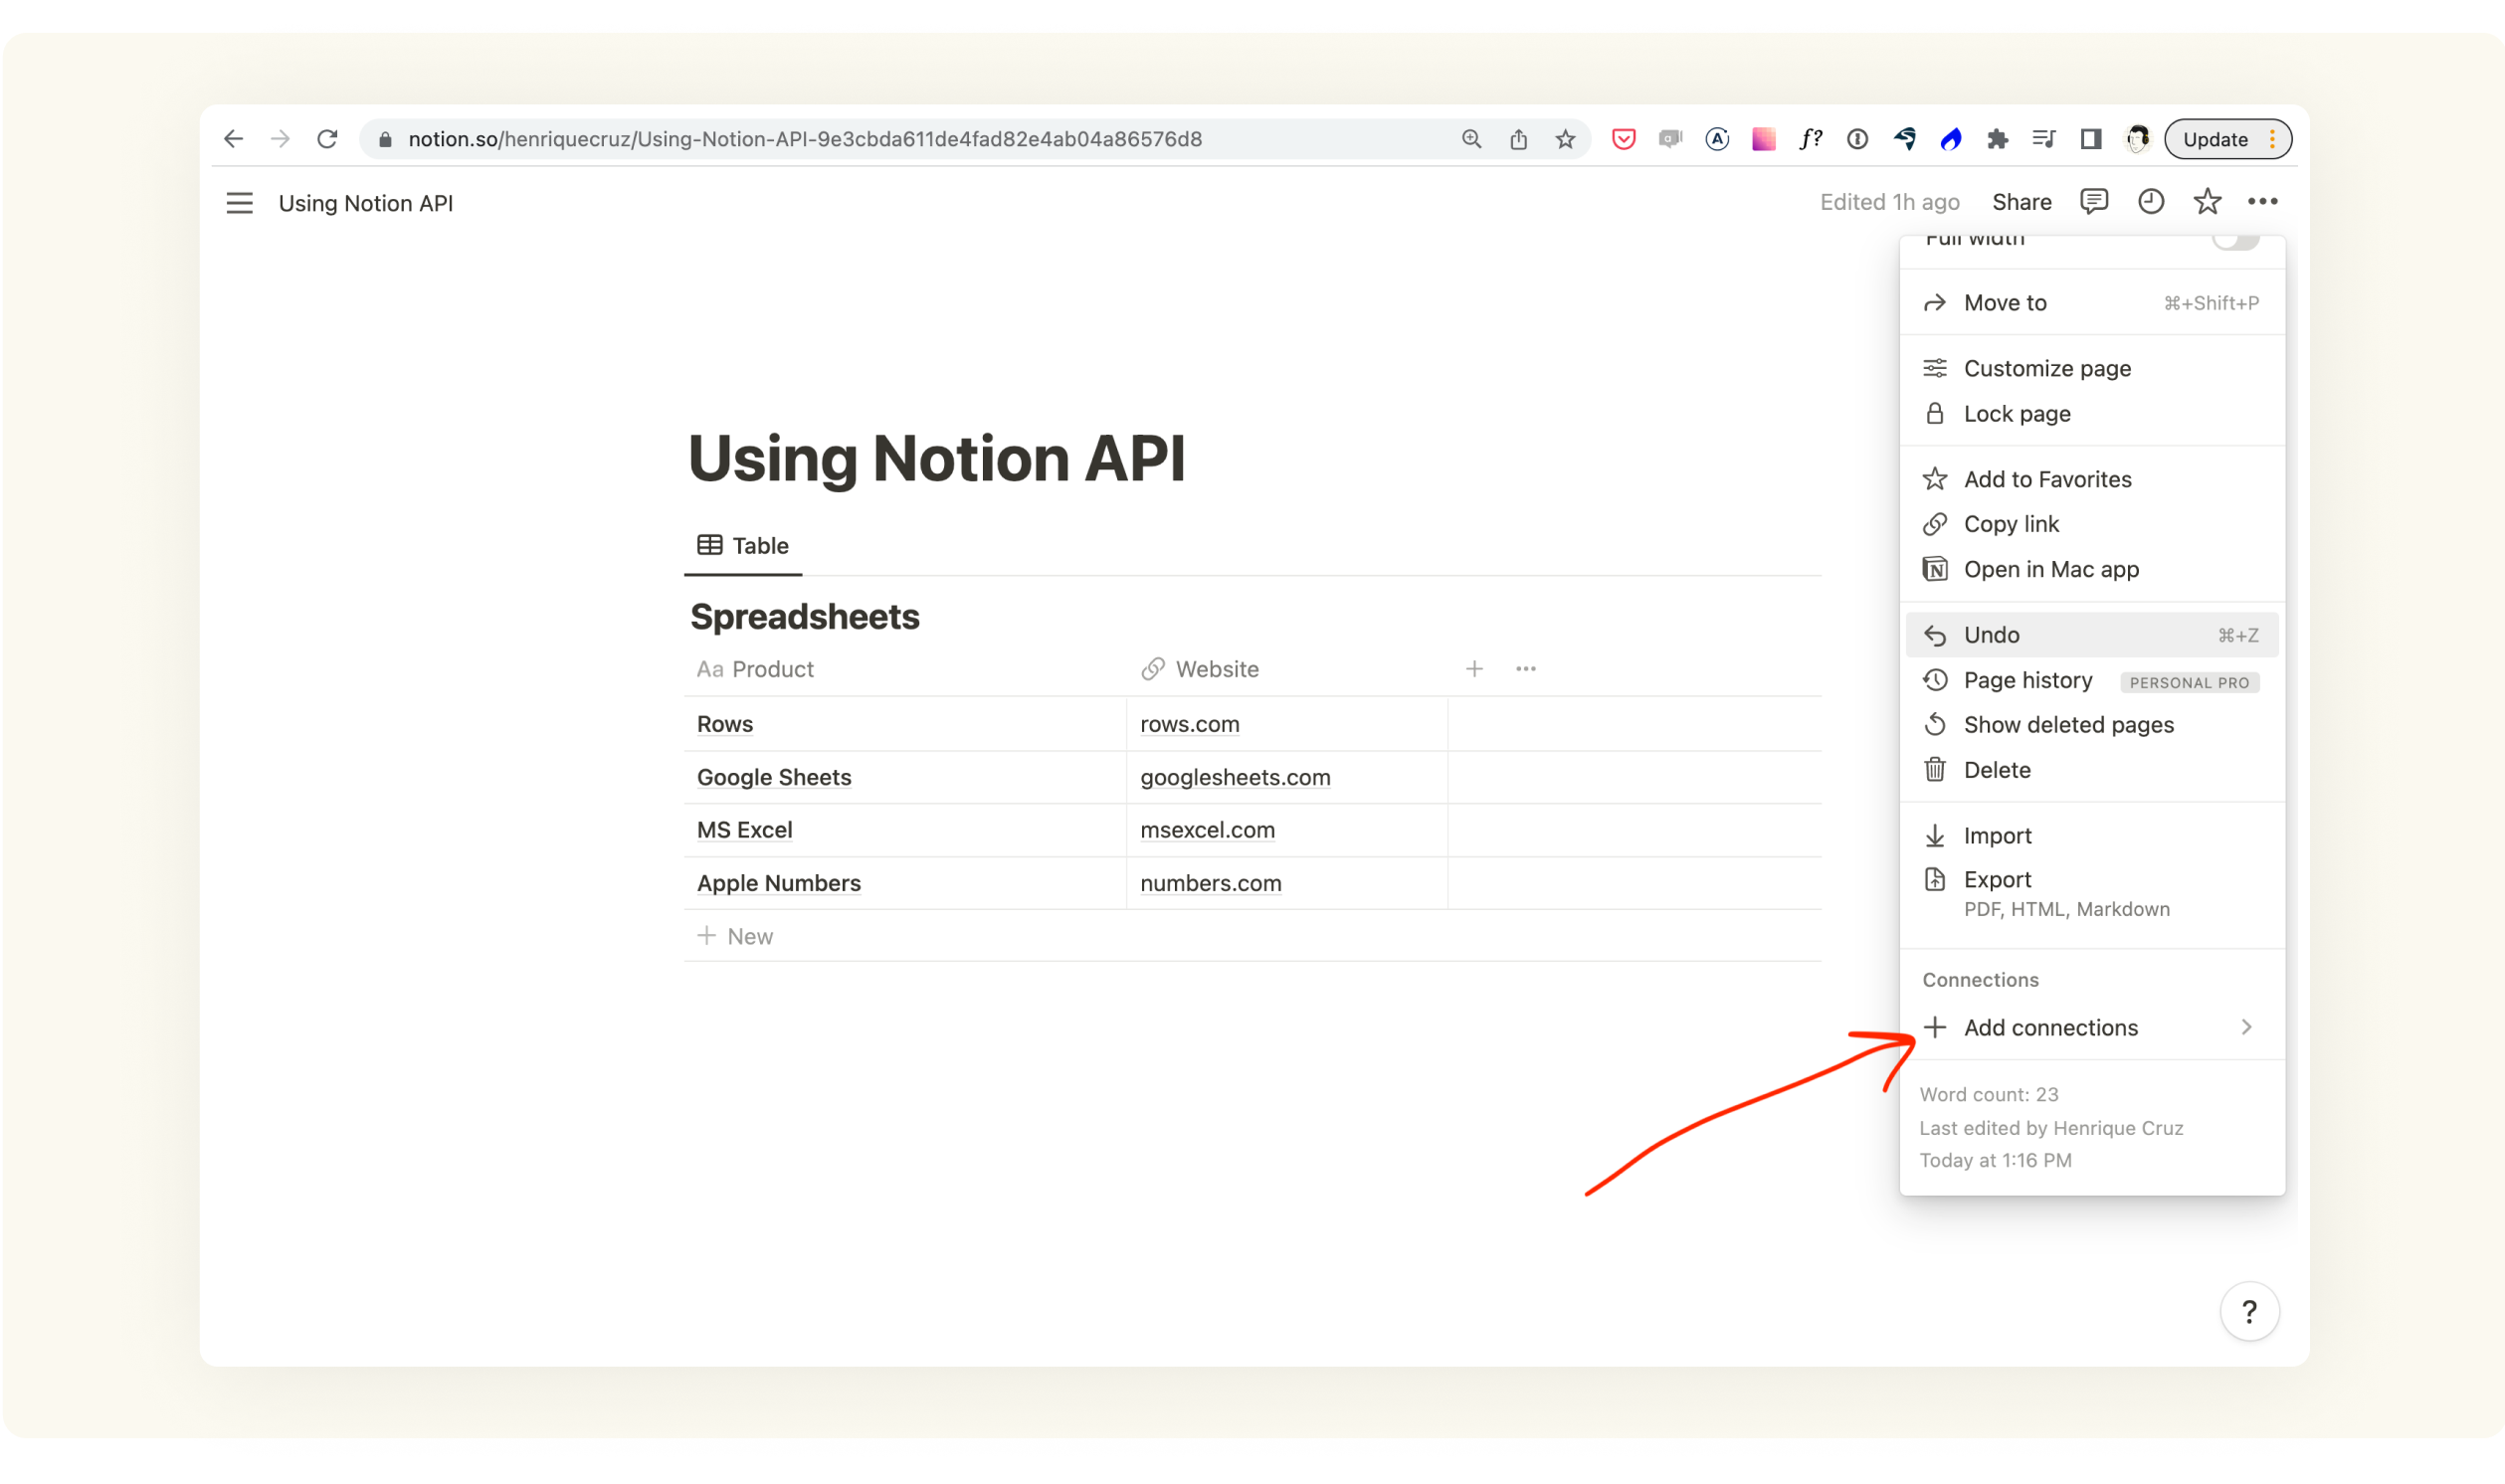 Add the connection to your Notion page
Search for the name of your integration and click to give it access to the page.
Once it is done, you will see the name of your integration with a green dot indicating that the access was granted.
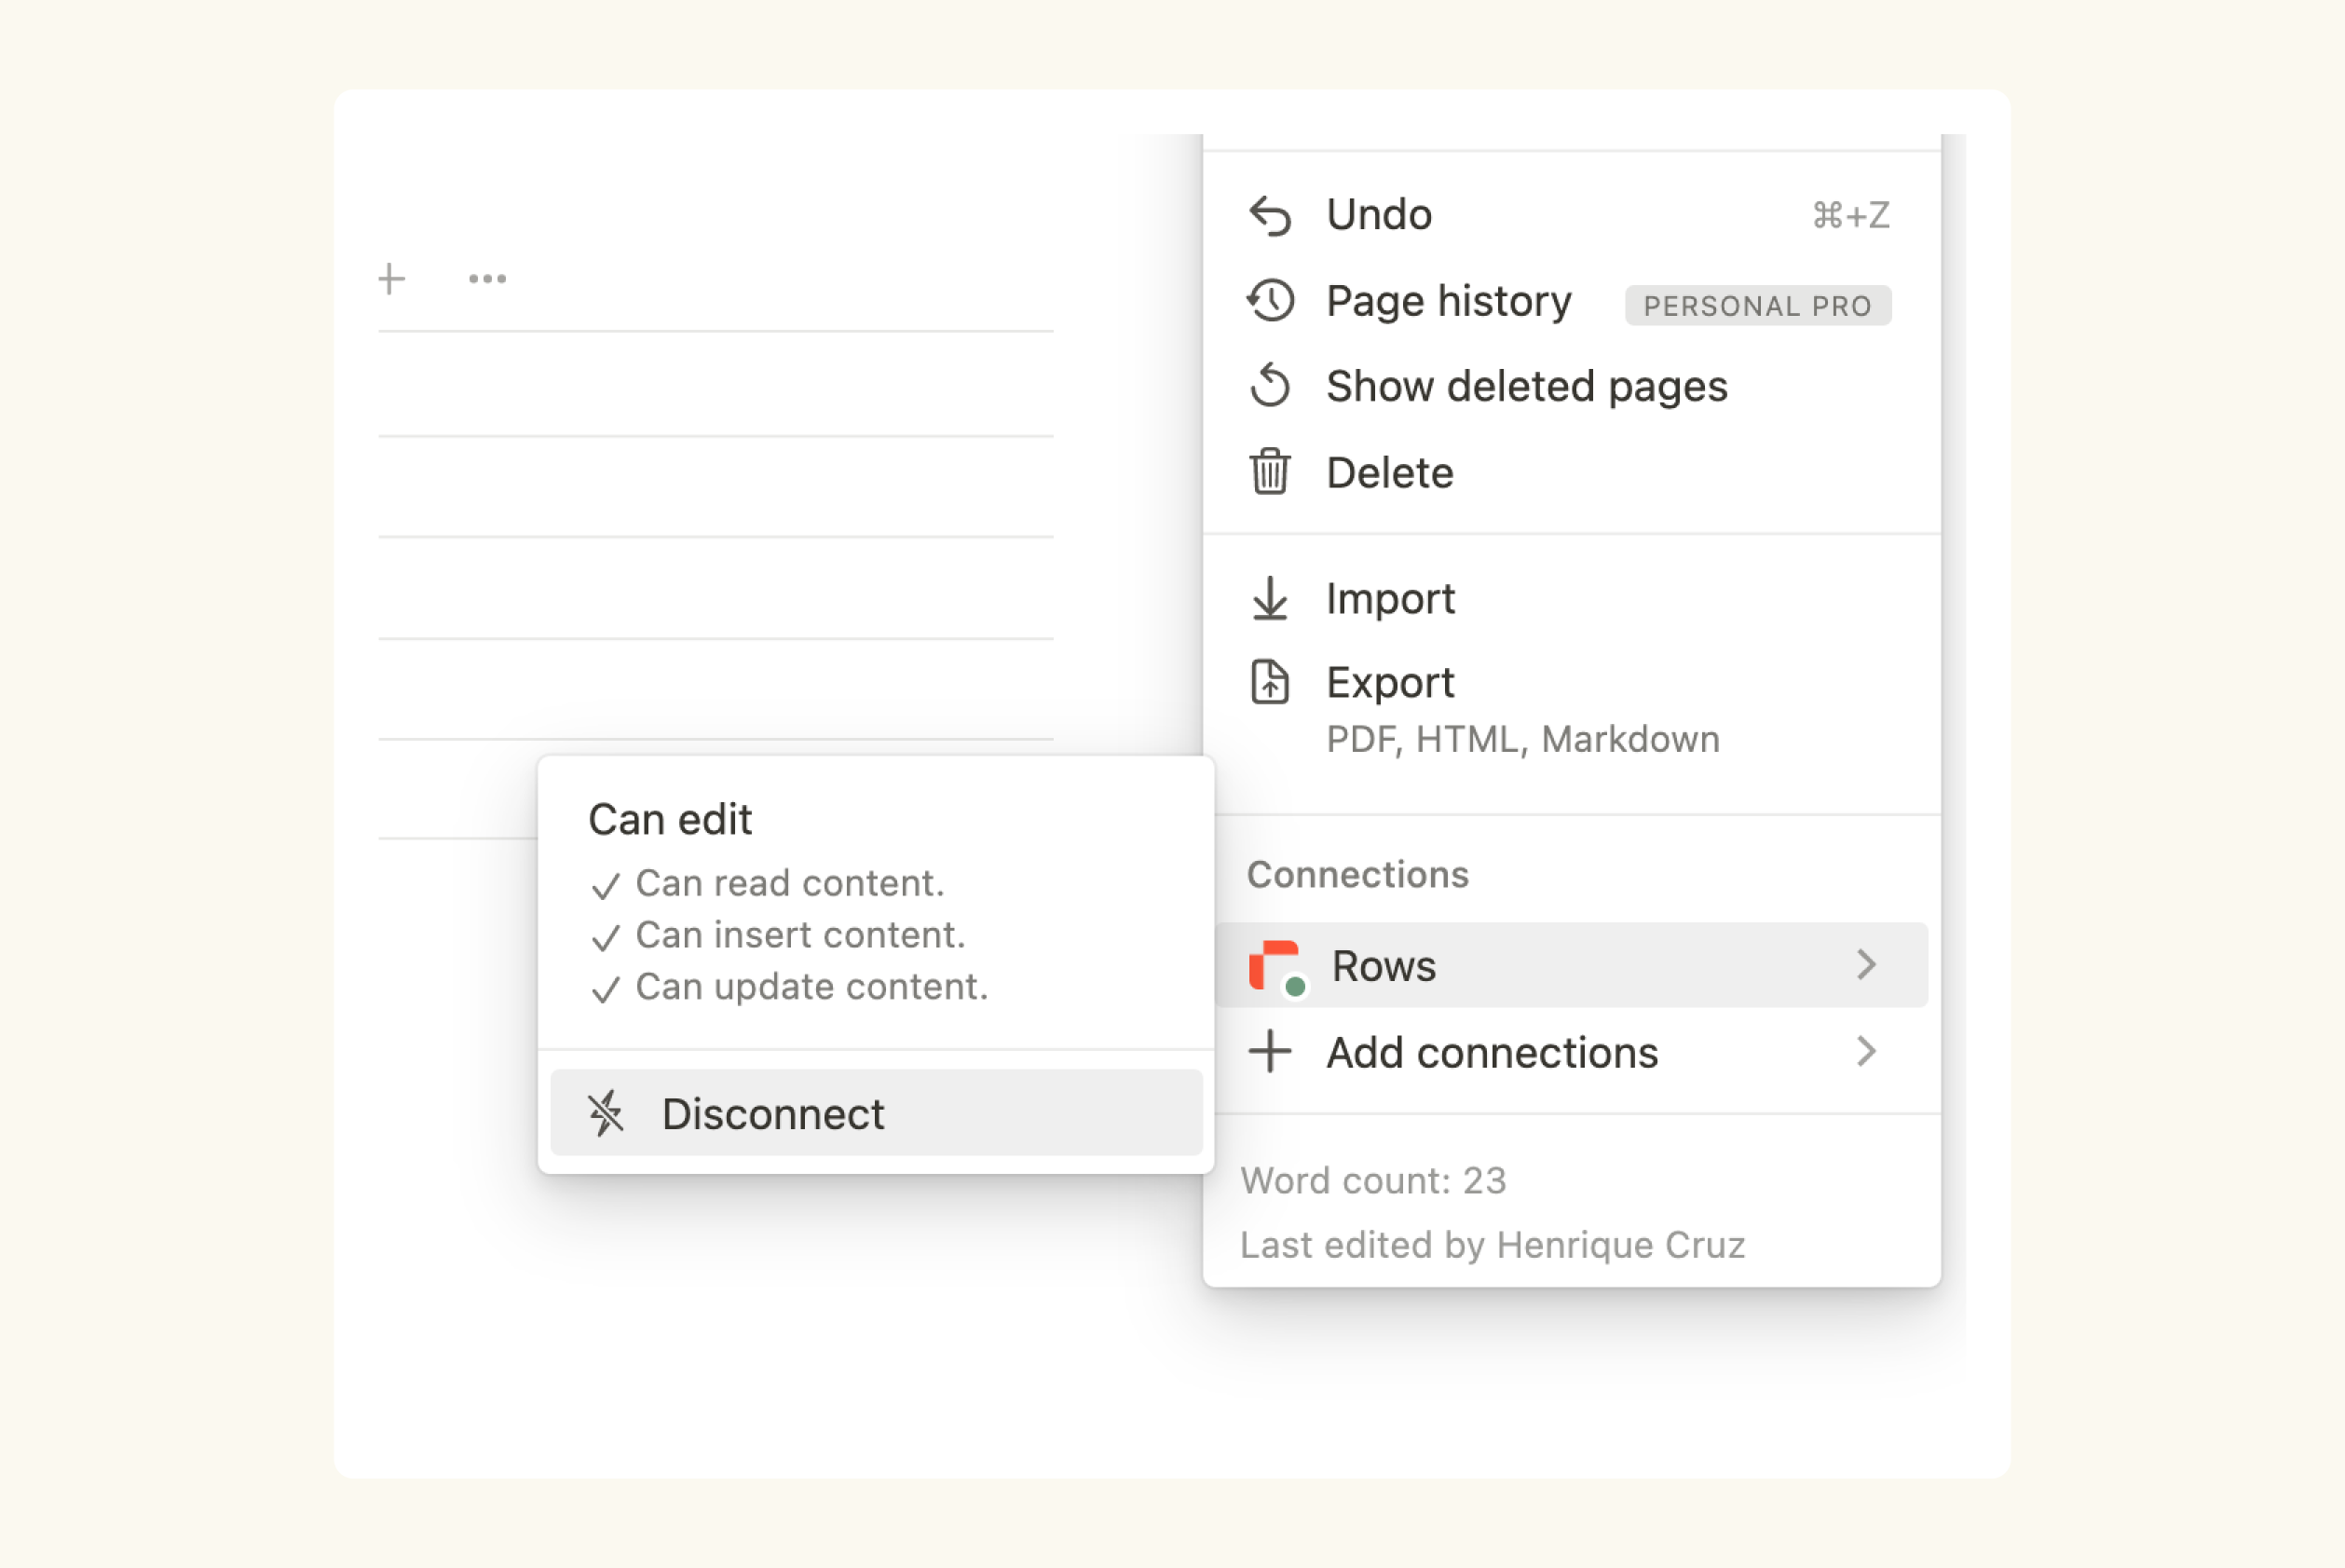 You'll see a green connection symbol when the access was granted
3. Import the content of the database to Rows
Now for the fun part. Let’s sync the database with the spreadsheet. If don't have an account, sign up on Rows here and login to your account. Once that is done, simply:
Create a spreadsheet in Rows. Do it by clicking on the “Create Spreadsheet” button in the dashboard.
Import the data from the Notion API. Using the API requires 3 inputs:
The Base url. This is the url that tells Notion which type of data (API method) we’re looking for. For this case we will use the Database Query method. Its url is
api.notion.com/v1/databases/database_id/queryThe API Headers: This is additional information that the Notion API requires to process the data. It includes the Internal Integration Token from our integration.
Body: The body parameter tells Notion what data we want from the database. To get all the data from the database, this parameter will be “{}”
Importing the data from the spreadsheet is very straightforward. Simply add this to the table in the spreadsheet, cell by cell:
A1: Base url
B1:
https://api.notion.com/v1/databases/A2: Database id
B2: Your database id
To access the id from your database simply open it in full page and the copy the database id. The location of the id follows this structure:
https://www.notion.so/workspace_id/database_id?v=view_id
 The database id inside the url of the page
A3: Request url
B3: =CONCATENATE(B1,B2,"/query")
A4: Secret token
B4: Your Internal Integration Token
A5: Authorization
B5: =CONCATENATE("Bearer"," ",B4)
A6: Notion-Version
B6: 2022-06-28
A7: Headers
B7: =PAIR2JSON(A5,B5,A6,B6)
A8: Import database
B8: =POST(B3,B7,"{}")
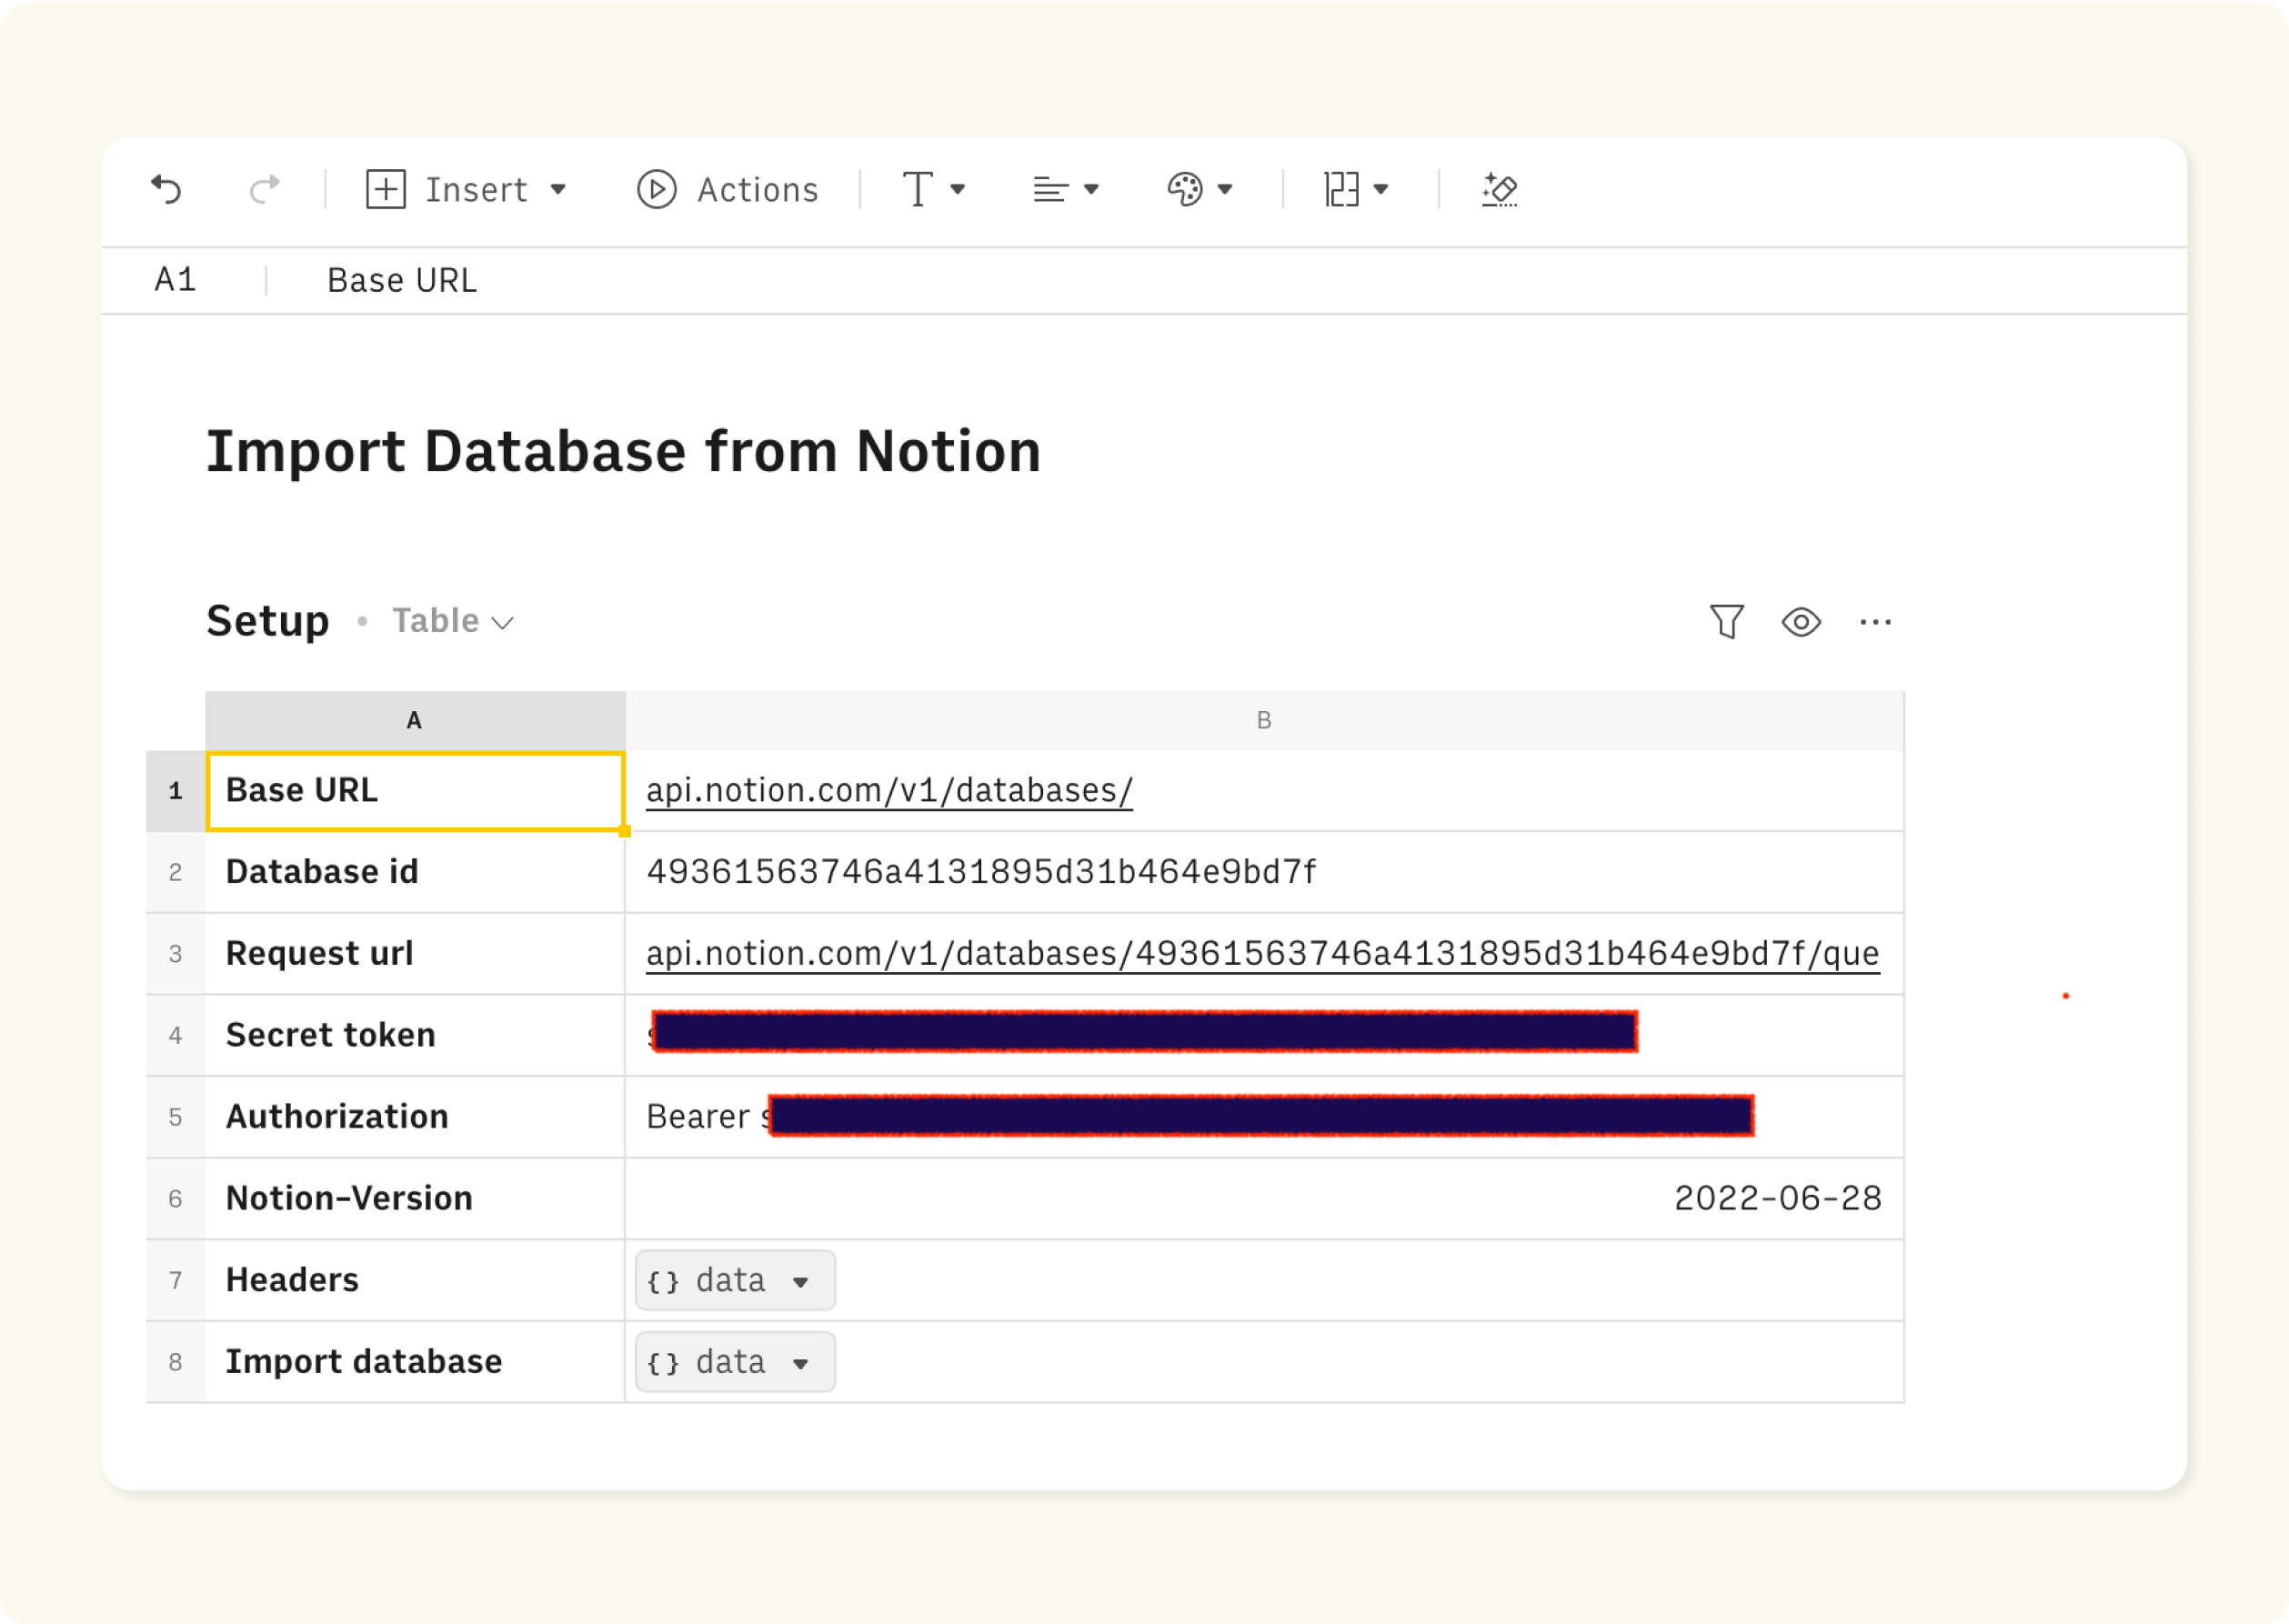 A Rows table with the setup to import data from Notion
That’s it. The data from the Notion database is now inside cell B8. All we need to do is create a table with the content of the database.
Your new AI Data Analyst
Extract from PDFs, import your business data, and analyze it using plain language.
Try Rows (no signup)4. Create a table with the content of the database
To create a table with the content from Notion:
Create a new table in the spreadsheet. To do this go to Insert and add a Table
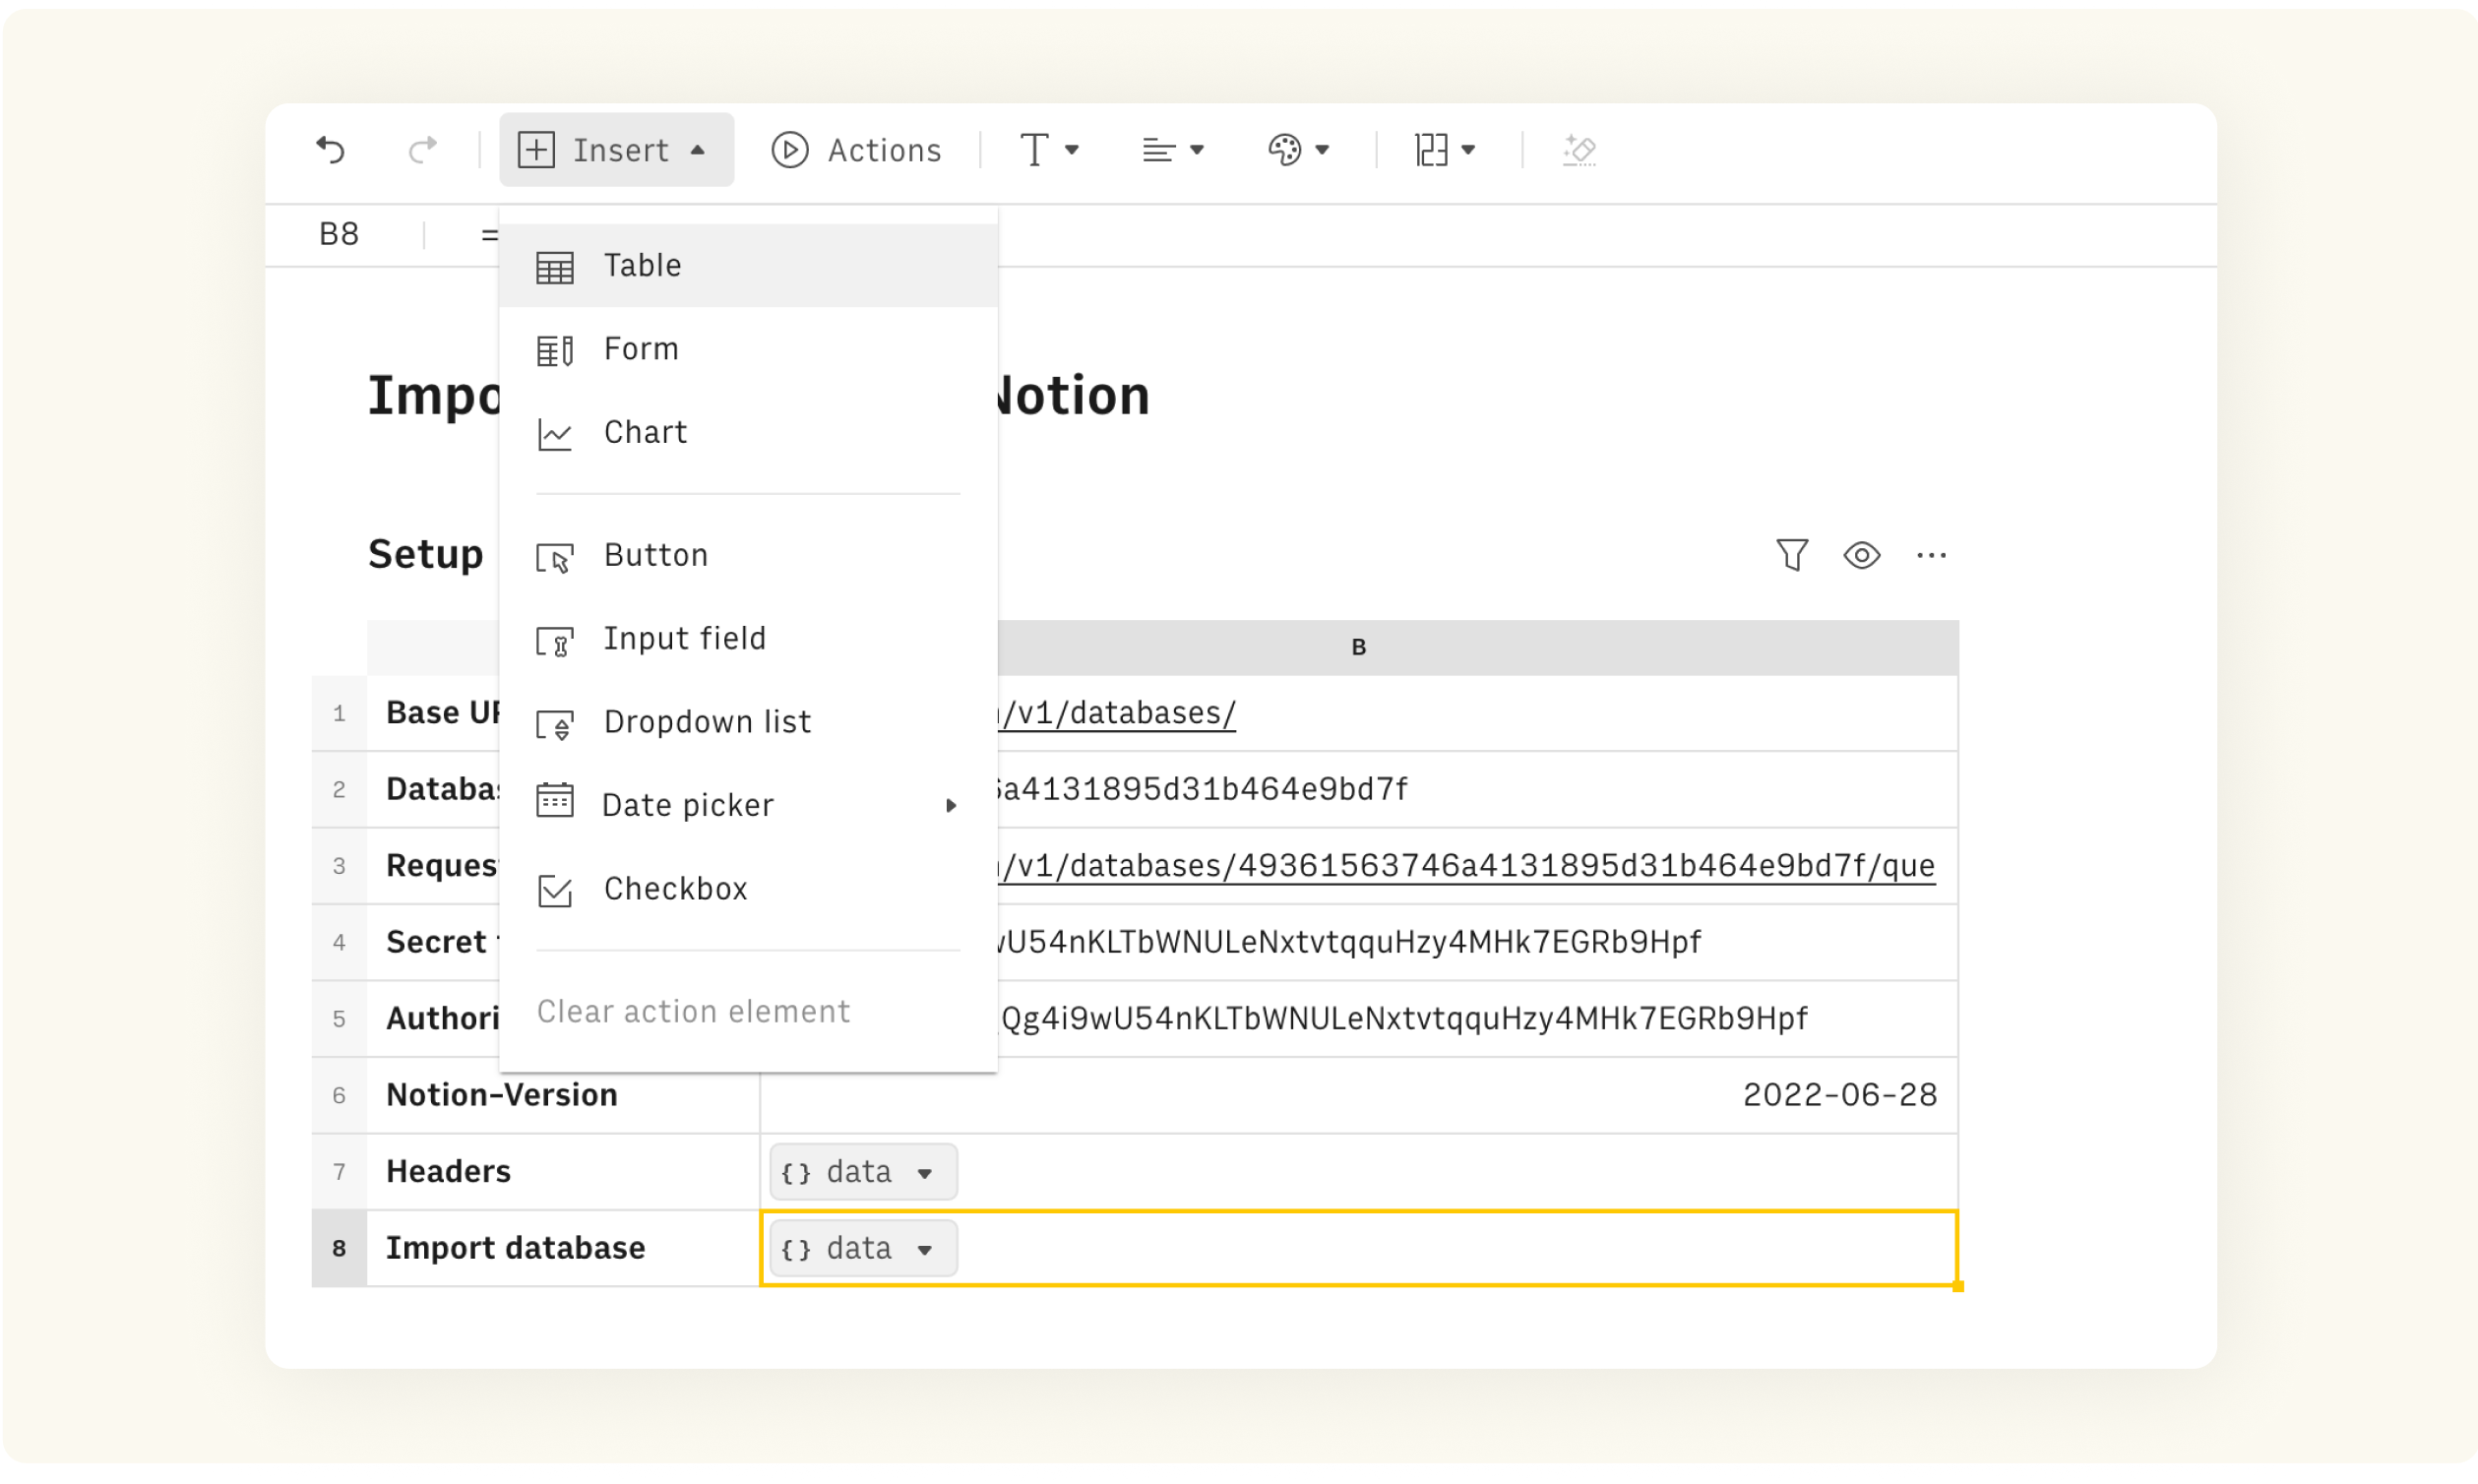 Add a new table from the Insert menu
Go to B8 (the cell where that contains the data from the import) and click Create Data Table
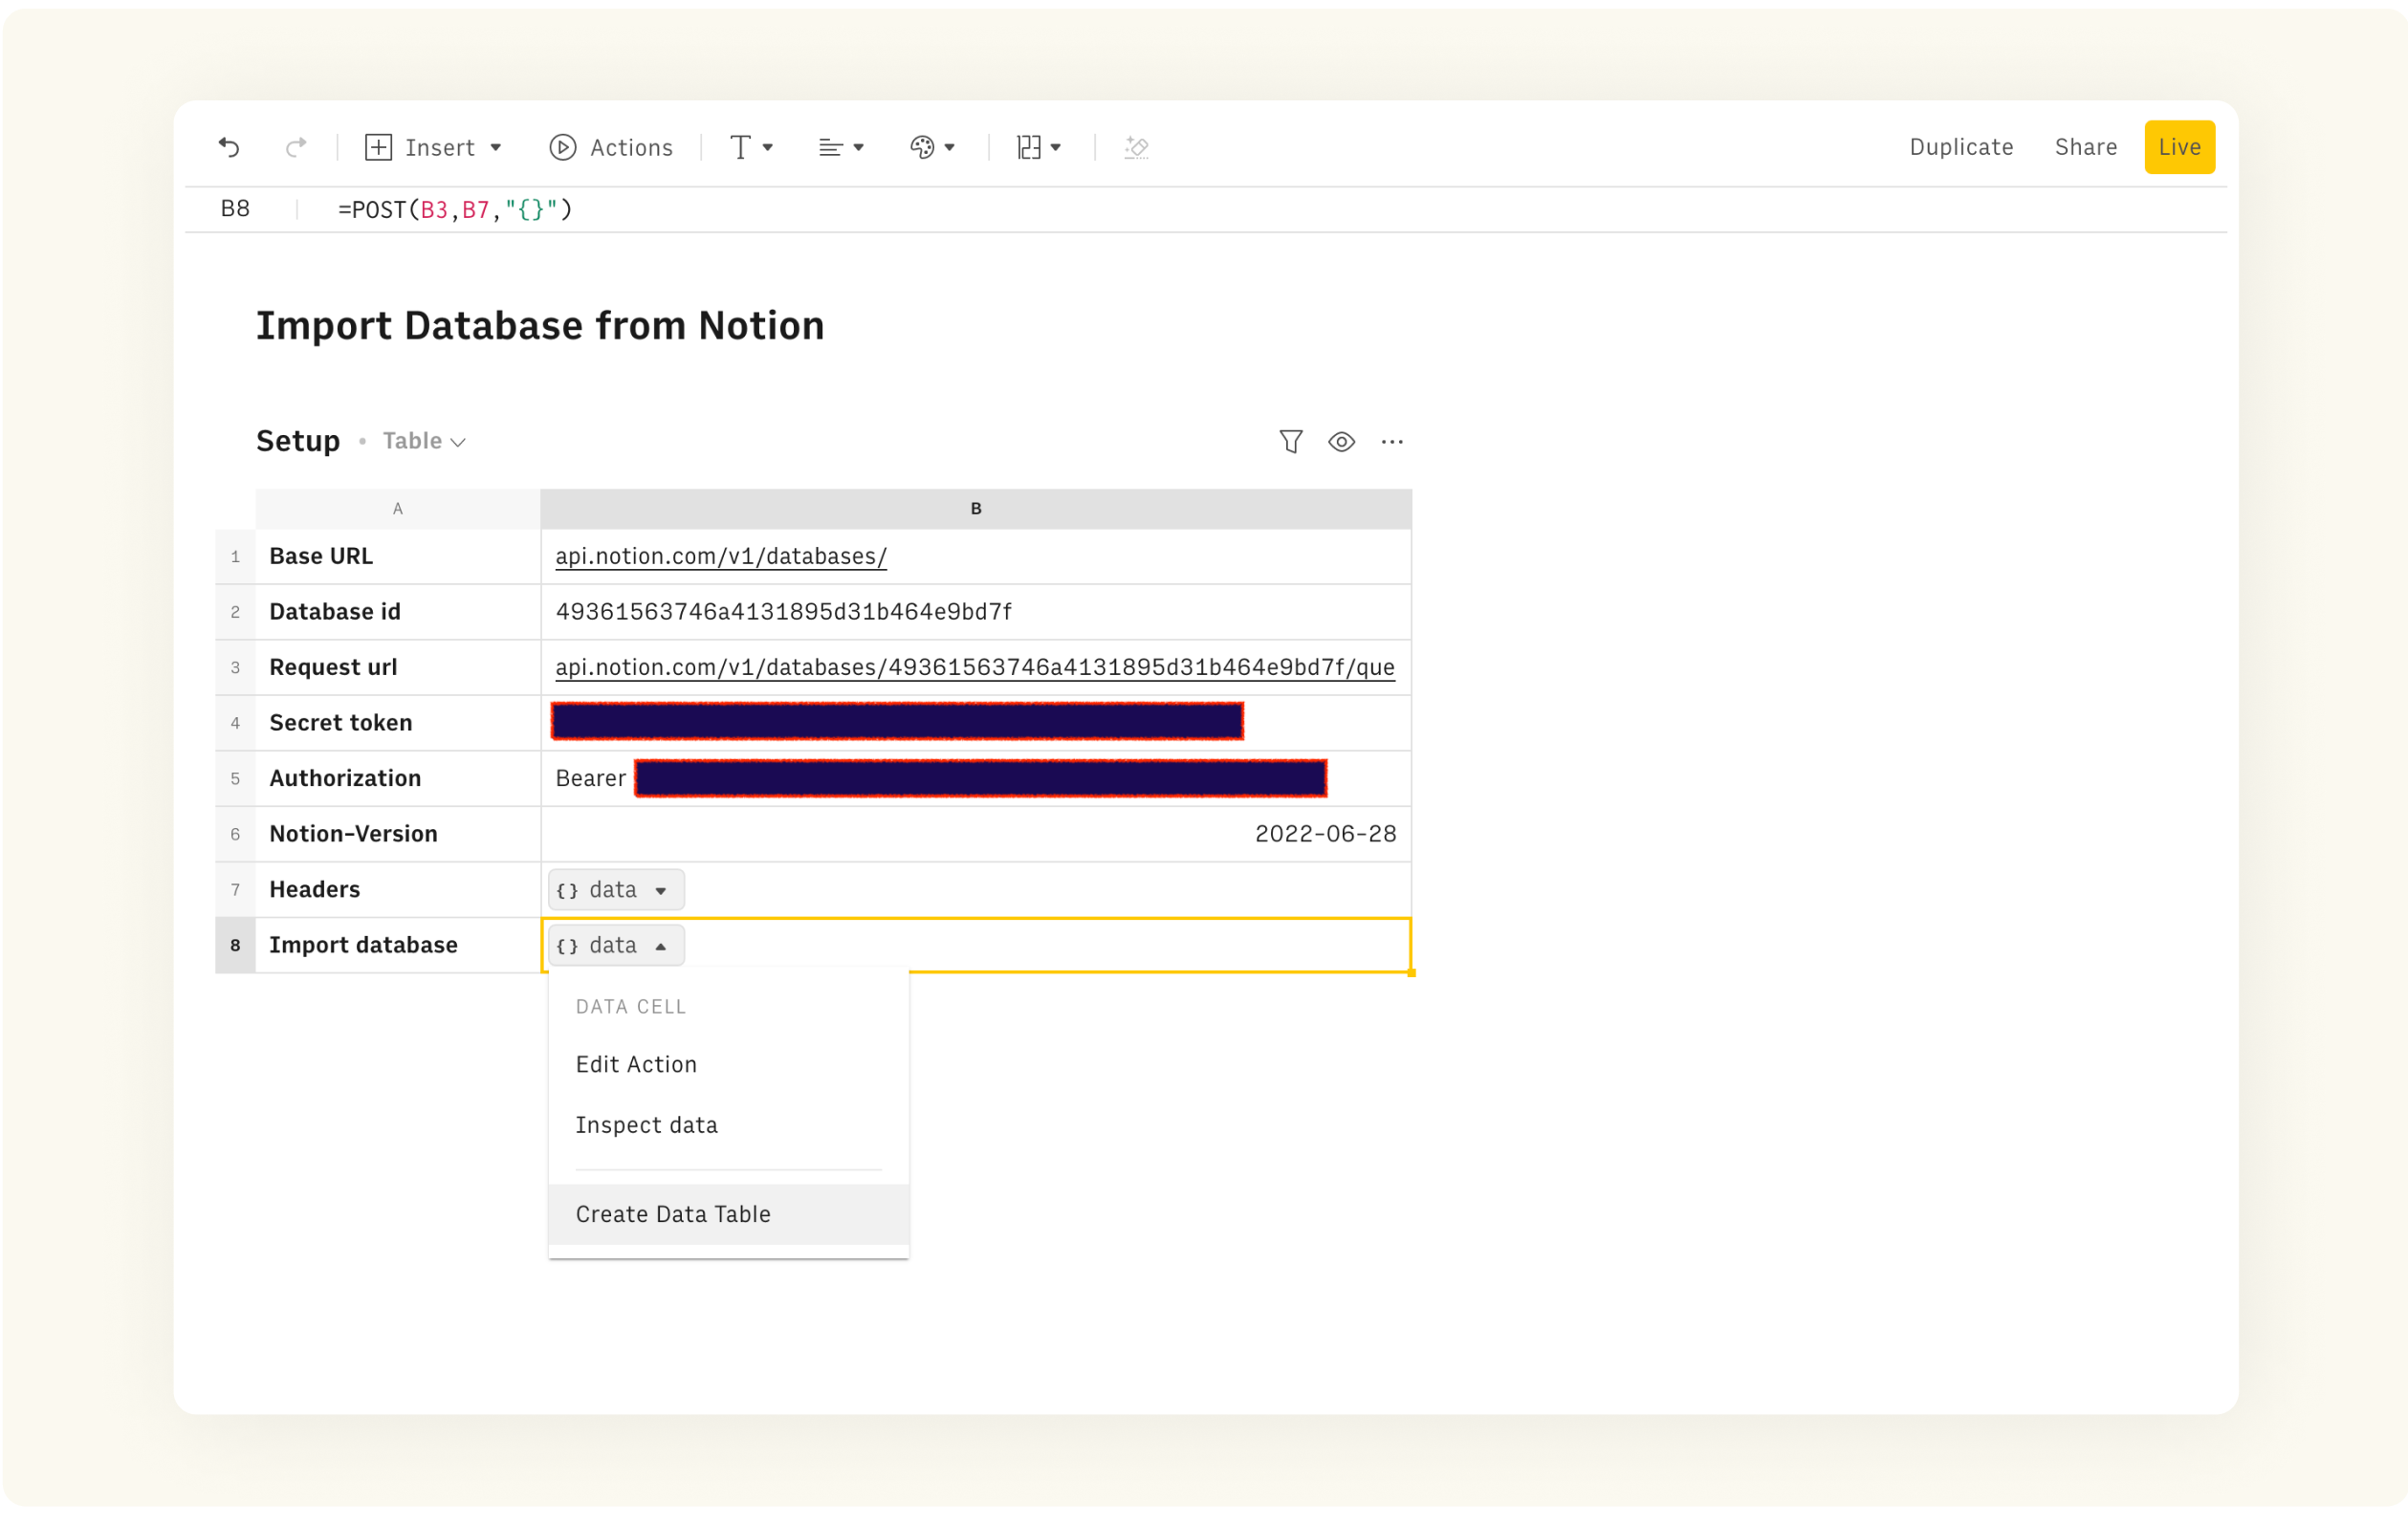 Create Data Table action
In the 4th option of the side panel select cell A1 from the newly created table as the Table destination.
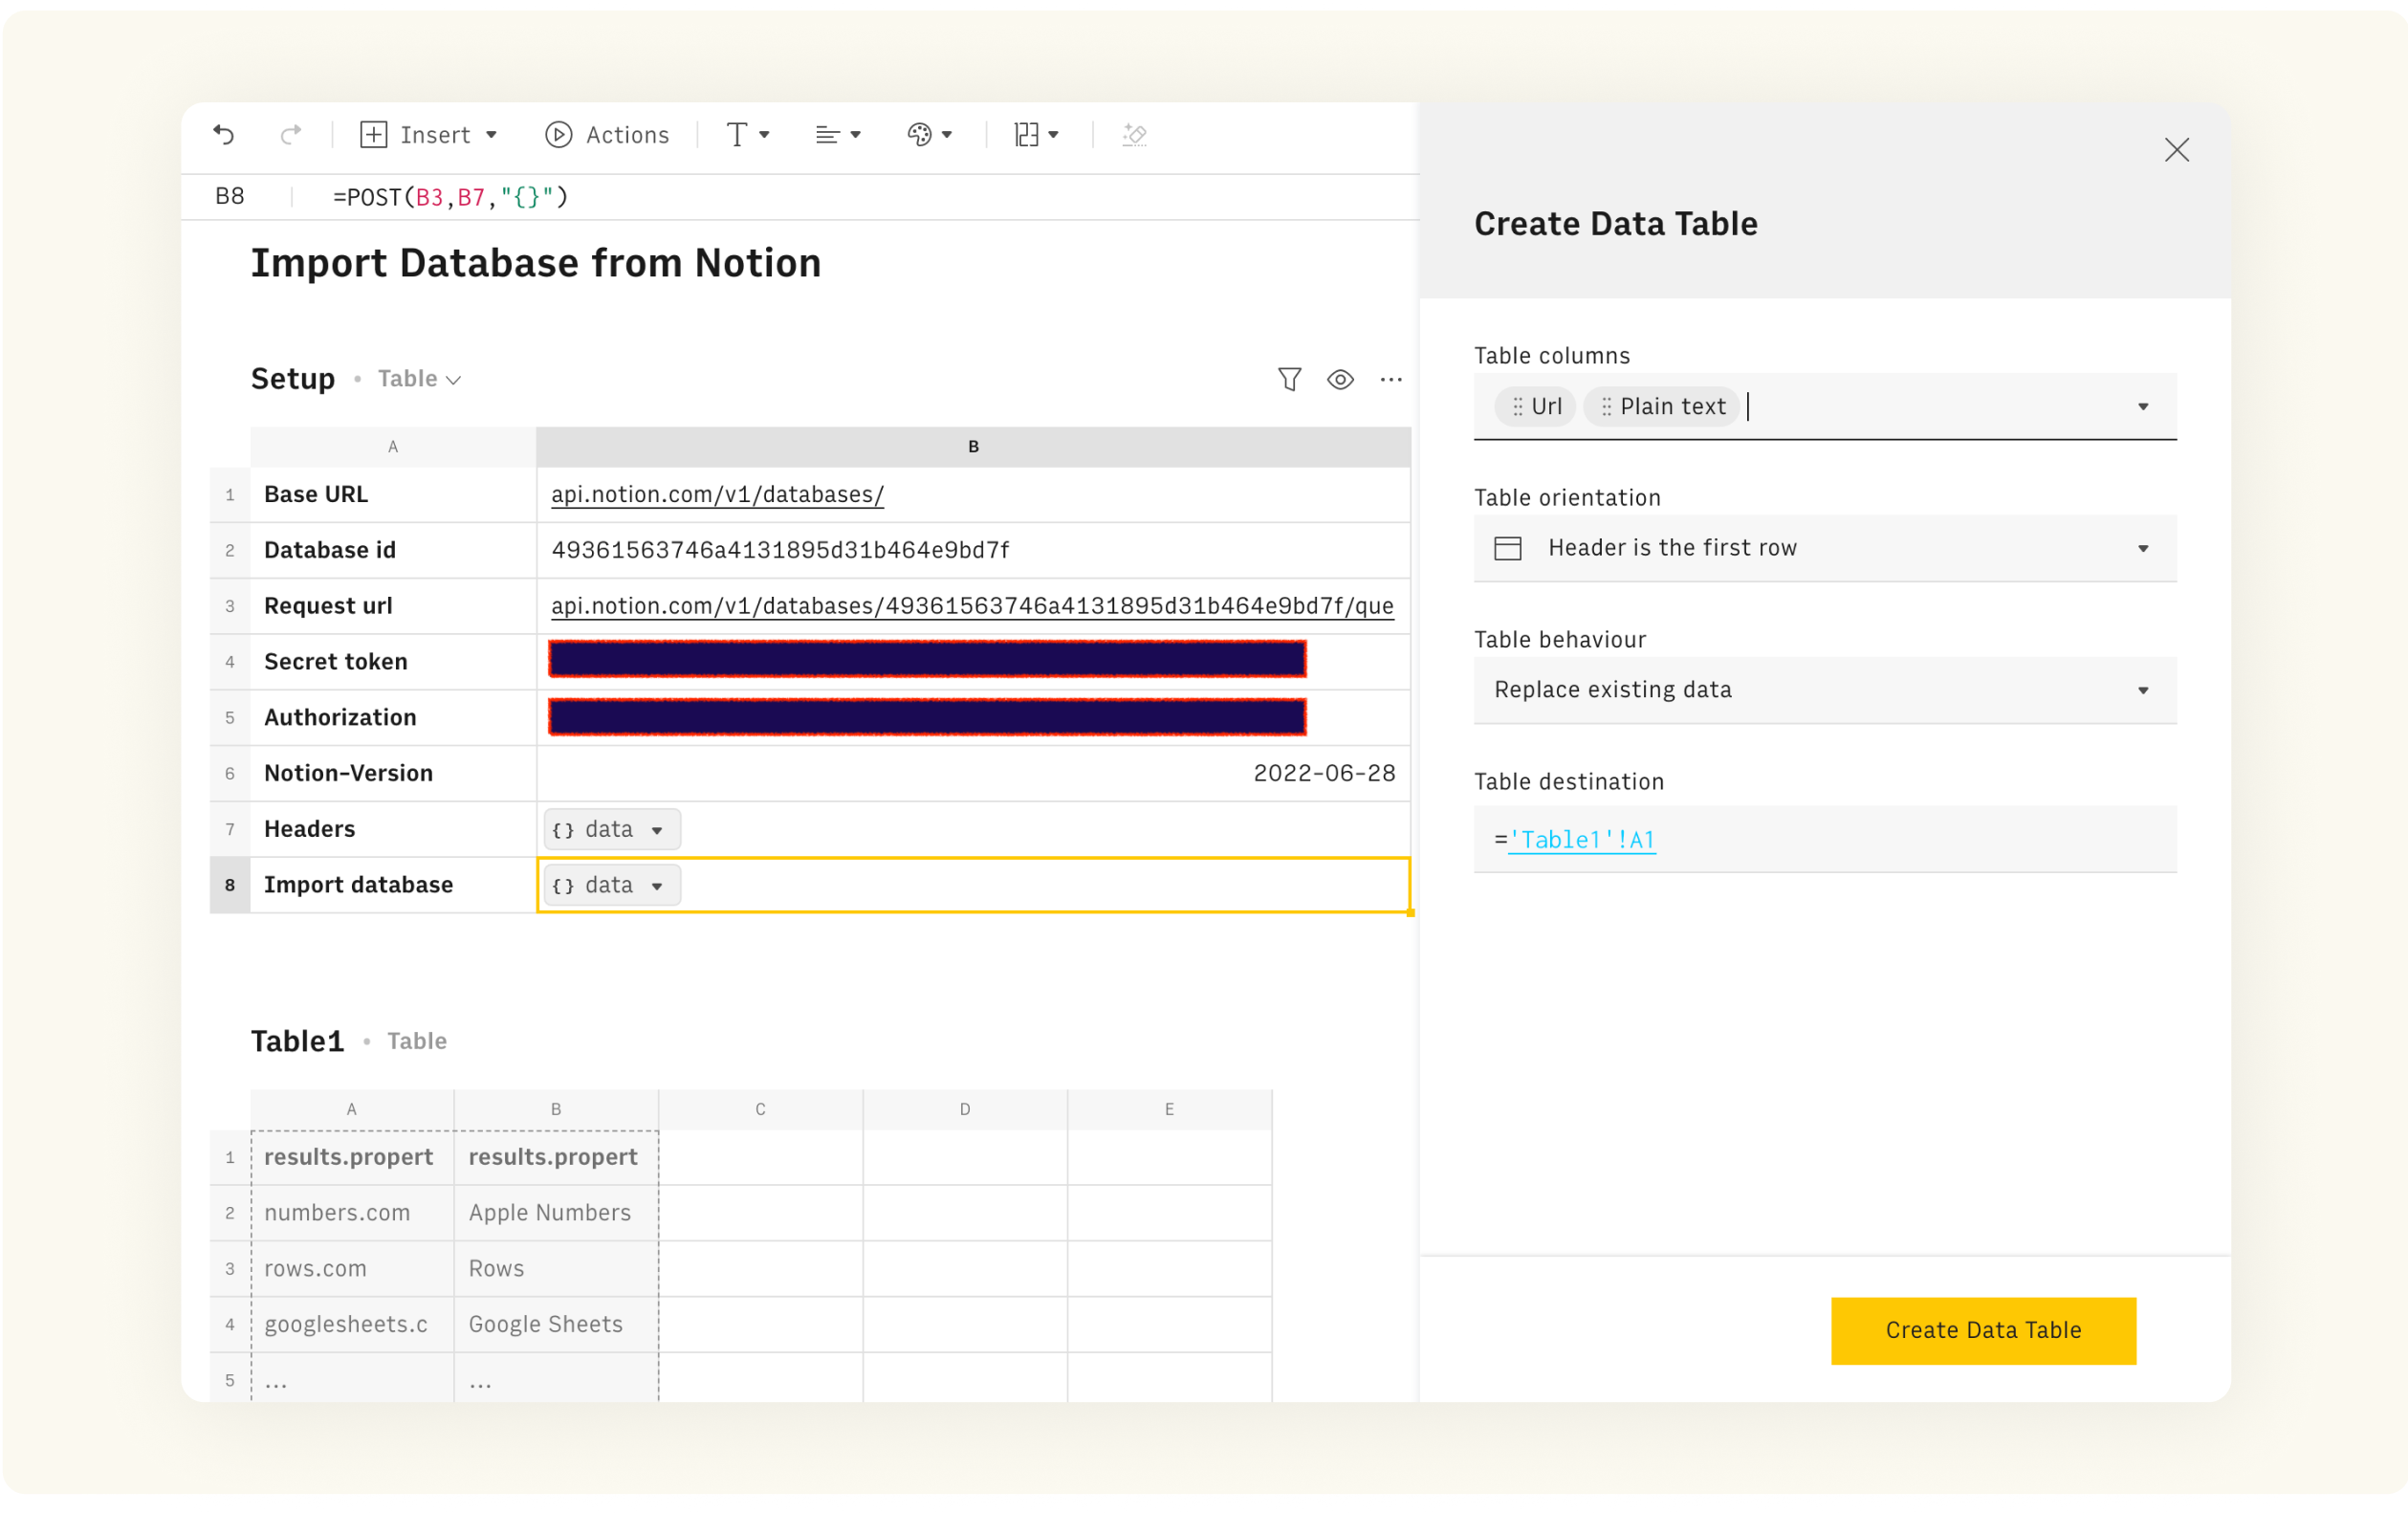 Set the destination of the table in the Actions wizard
In the 1st option of the table, Table columns, we’ll pick the columns with the actual content from the table. They will be under Results (click the arrow icon to expand it) and inside the Properties object. From there select the data you need. You’ll see a preview of the output table in the left.
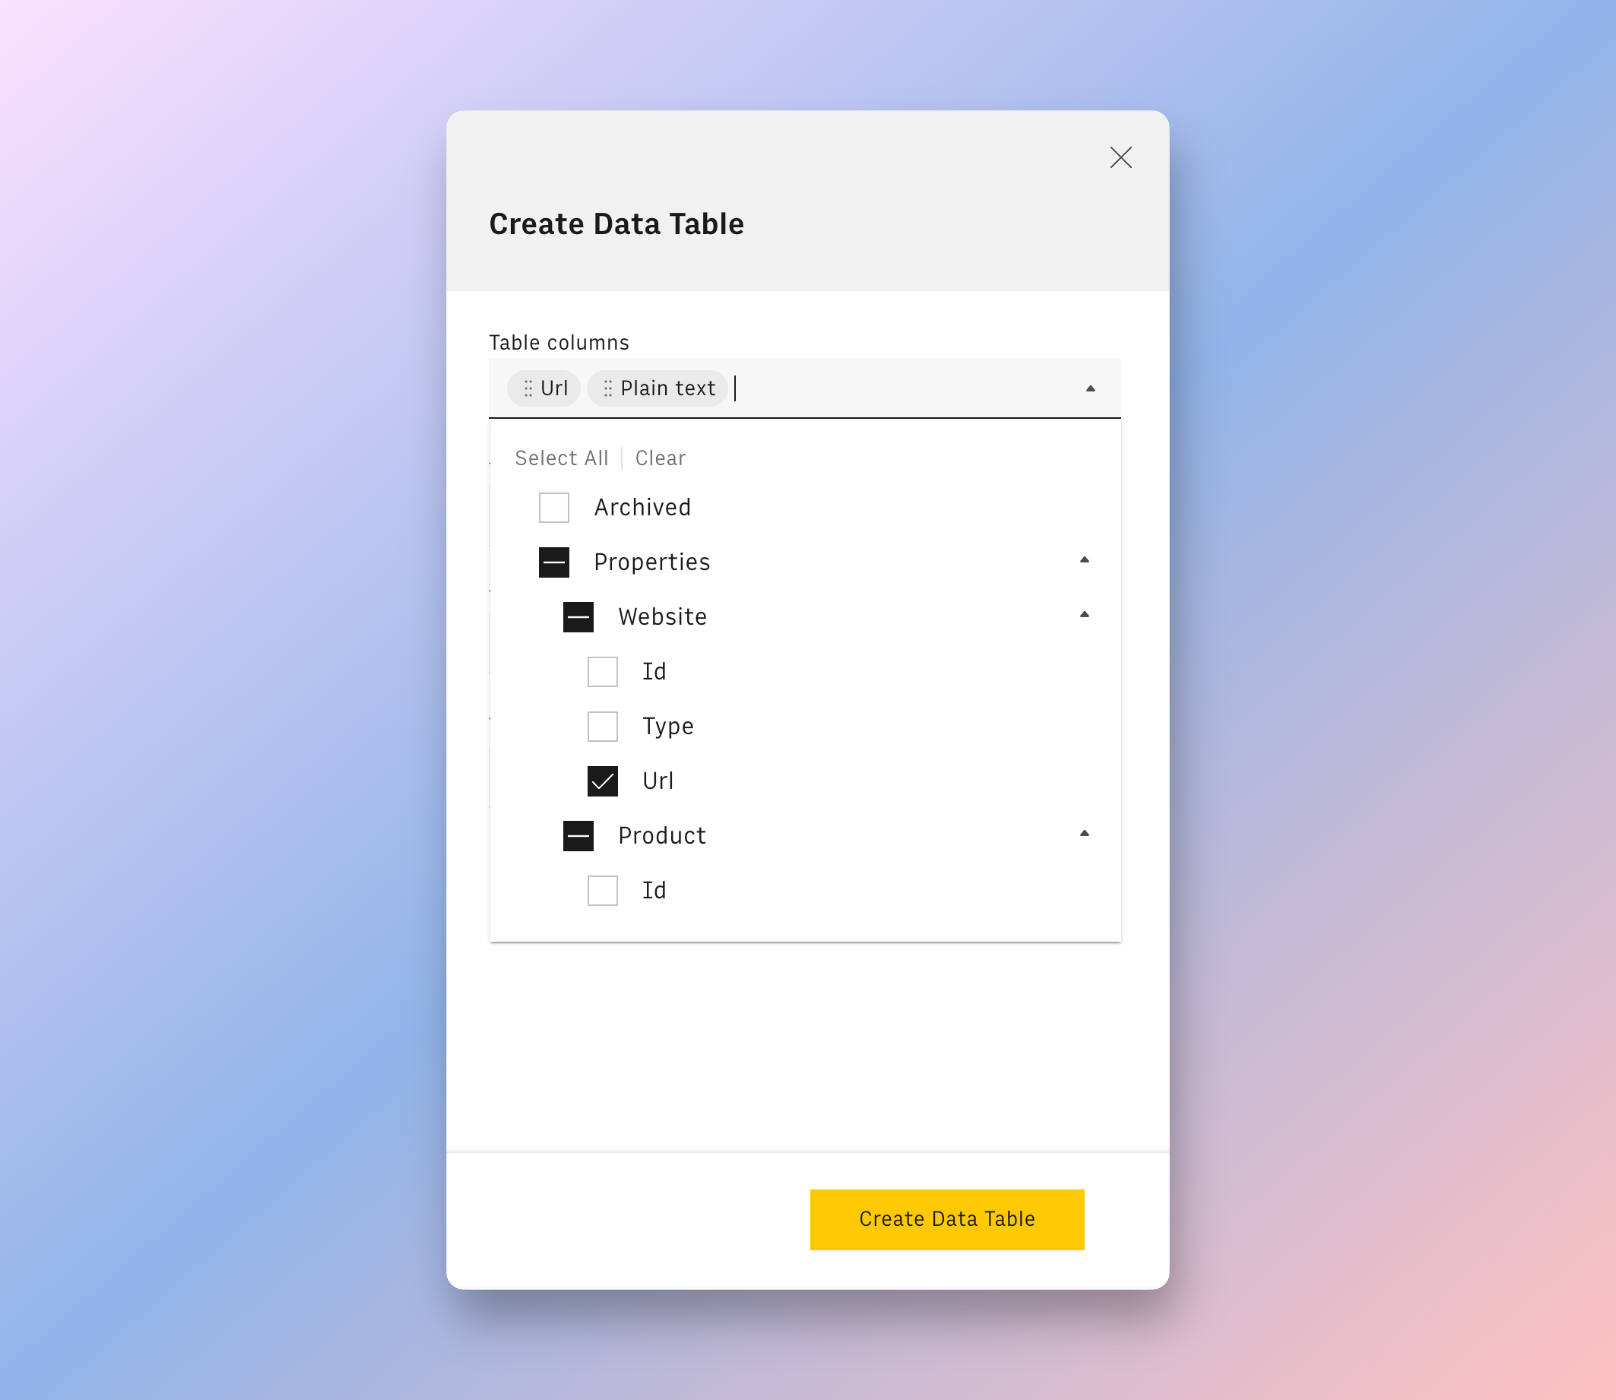 Pick the columns inside "Properties"-> "Results"
Press Create Table to add it to the spreadsheet.
Voilá! The table is ready. To rename the headers simply double click on the header of the column and follow the steps shown in the interface.
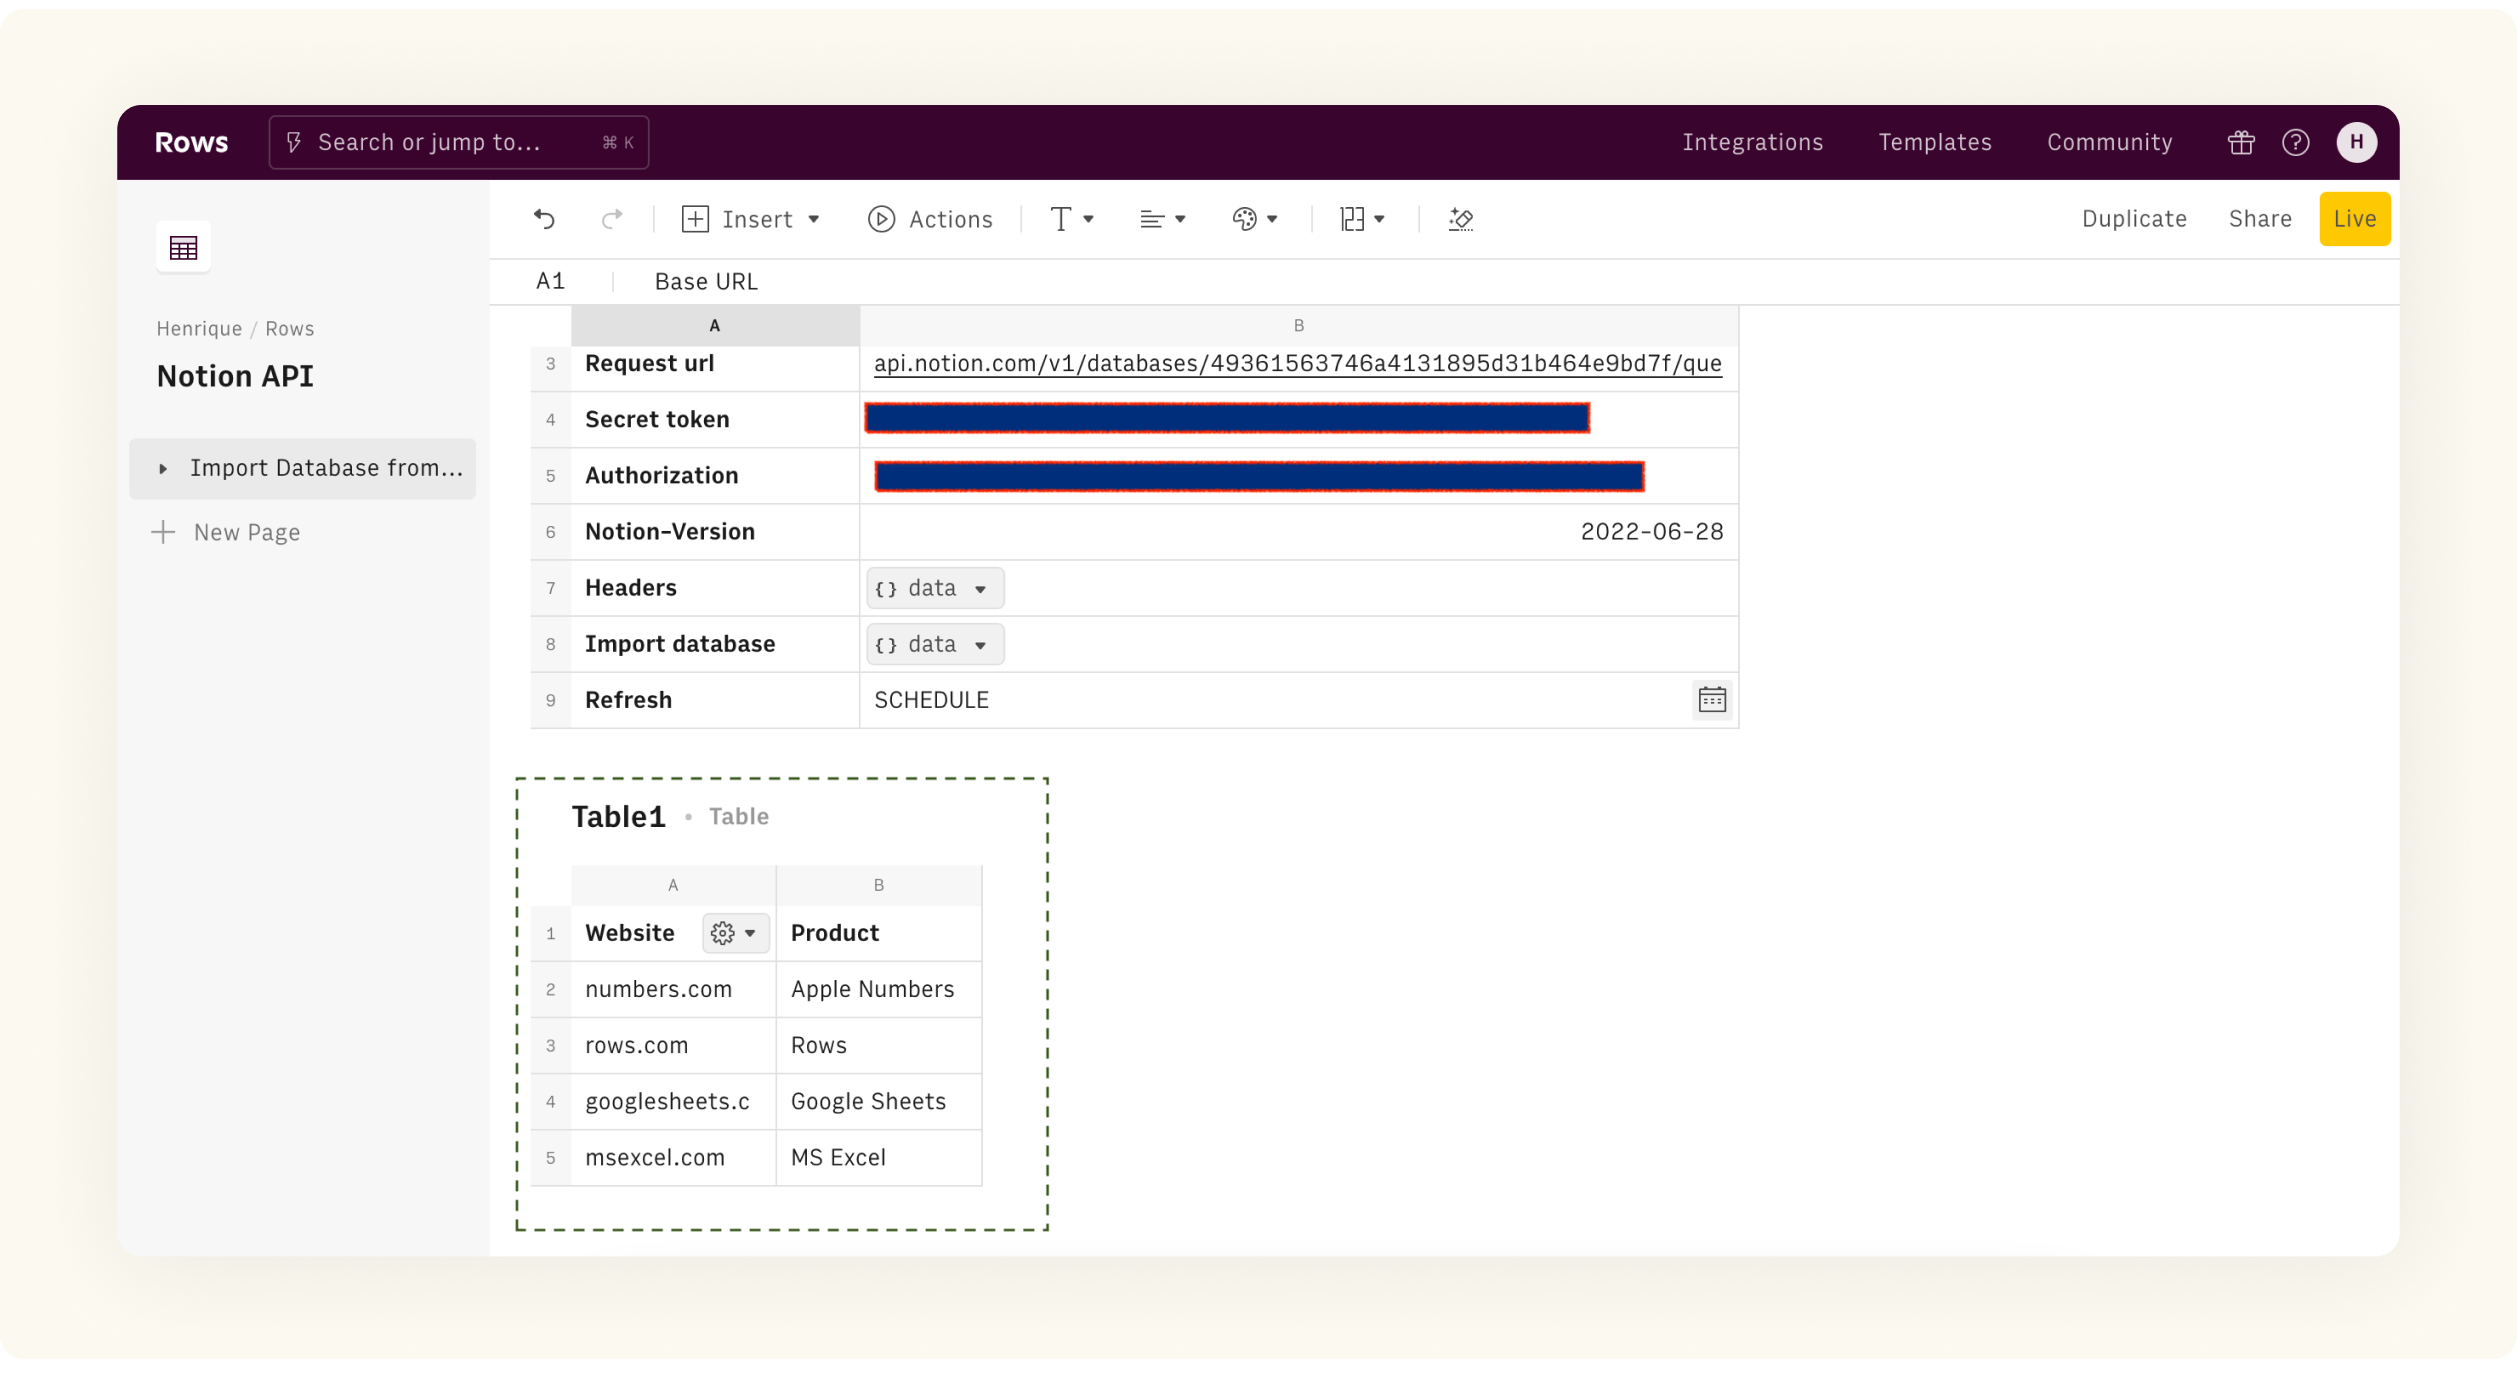 The Notion database imported into the spreadsheet
5. Refresh the data
Now that the database is connected to the spreadsheet, let’s refresh the data. We’ll set an action to refresh the data everyday. In Rows you can schedule any action to refresh periodically - from every minute to every month. To do this:
Navigate back to the first table and add a new rows to the table. You can simply go to the last row and click the arrow-down keyboard key to add a new row.
Then go to the toolbar on top click Actions and type Schedule inside the search box.
Once inside, use the side-panel to configure it. Pick B8 as the task (or whatever cell you’re using to import the data from the API), select the Schedule frequency, and add the Action.
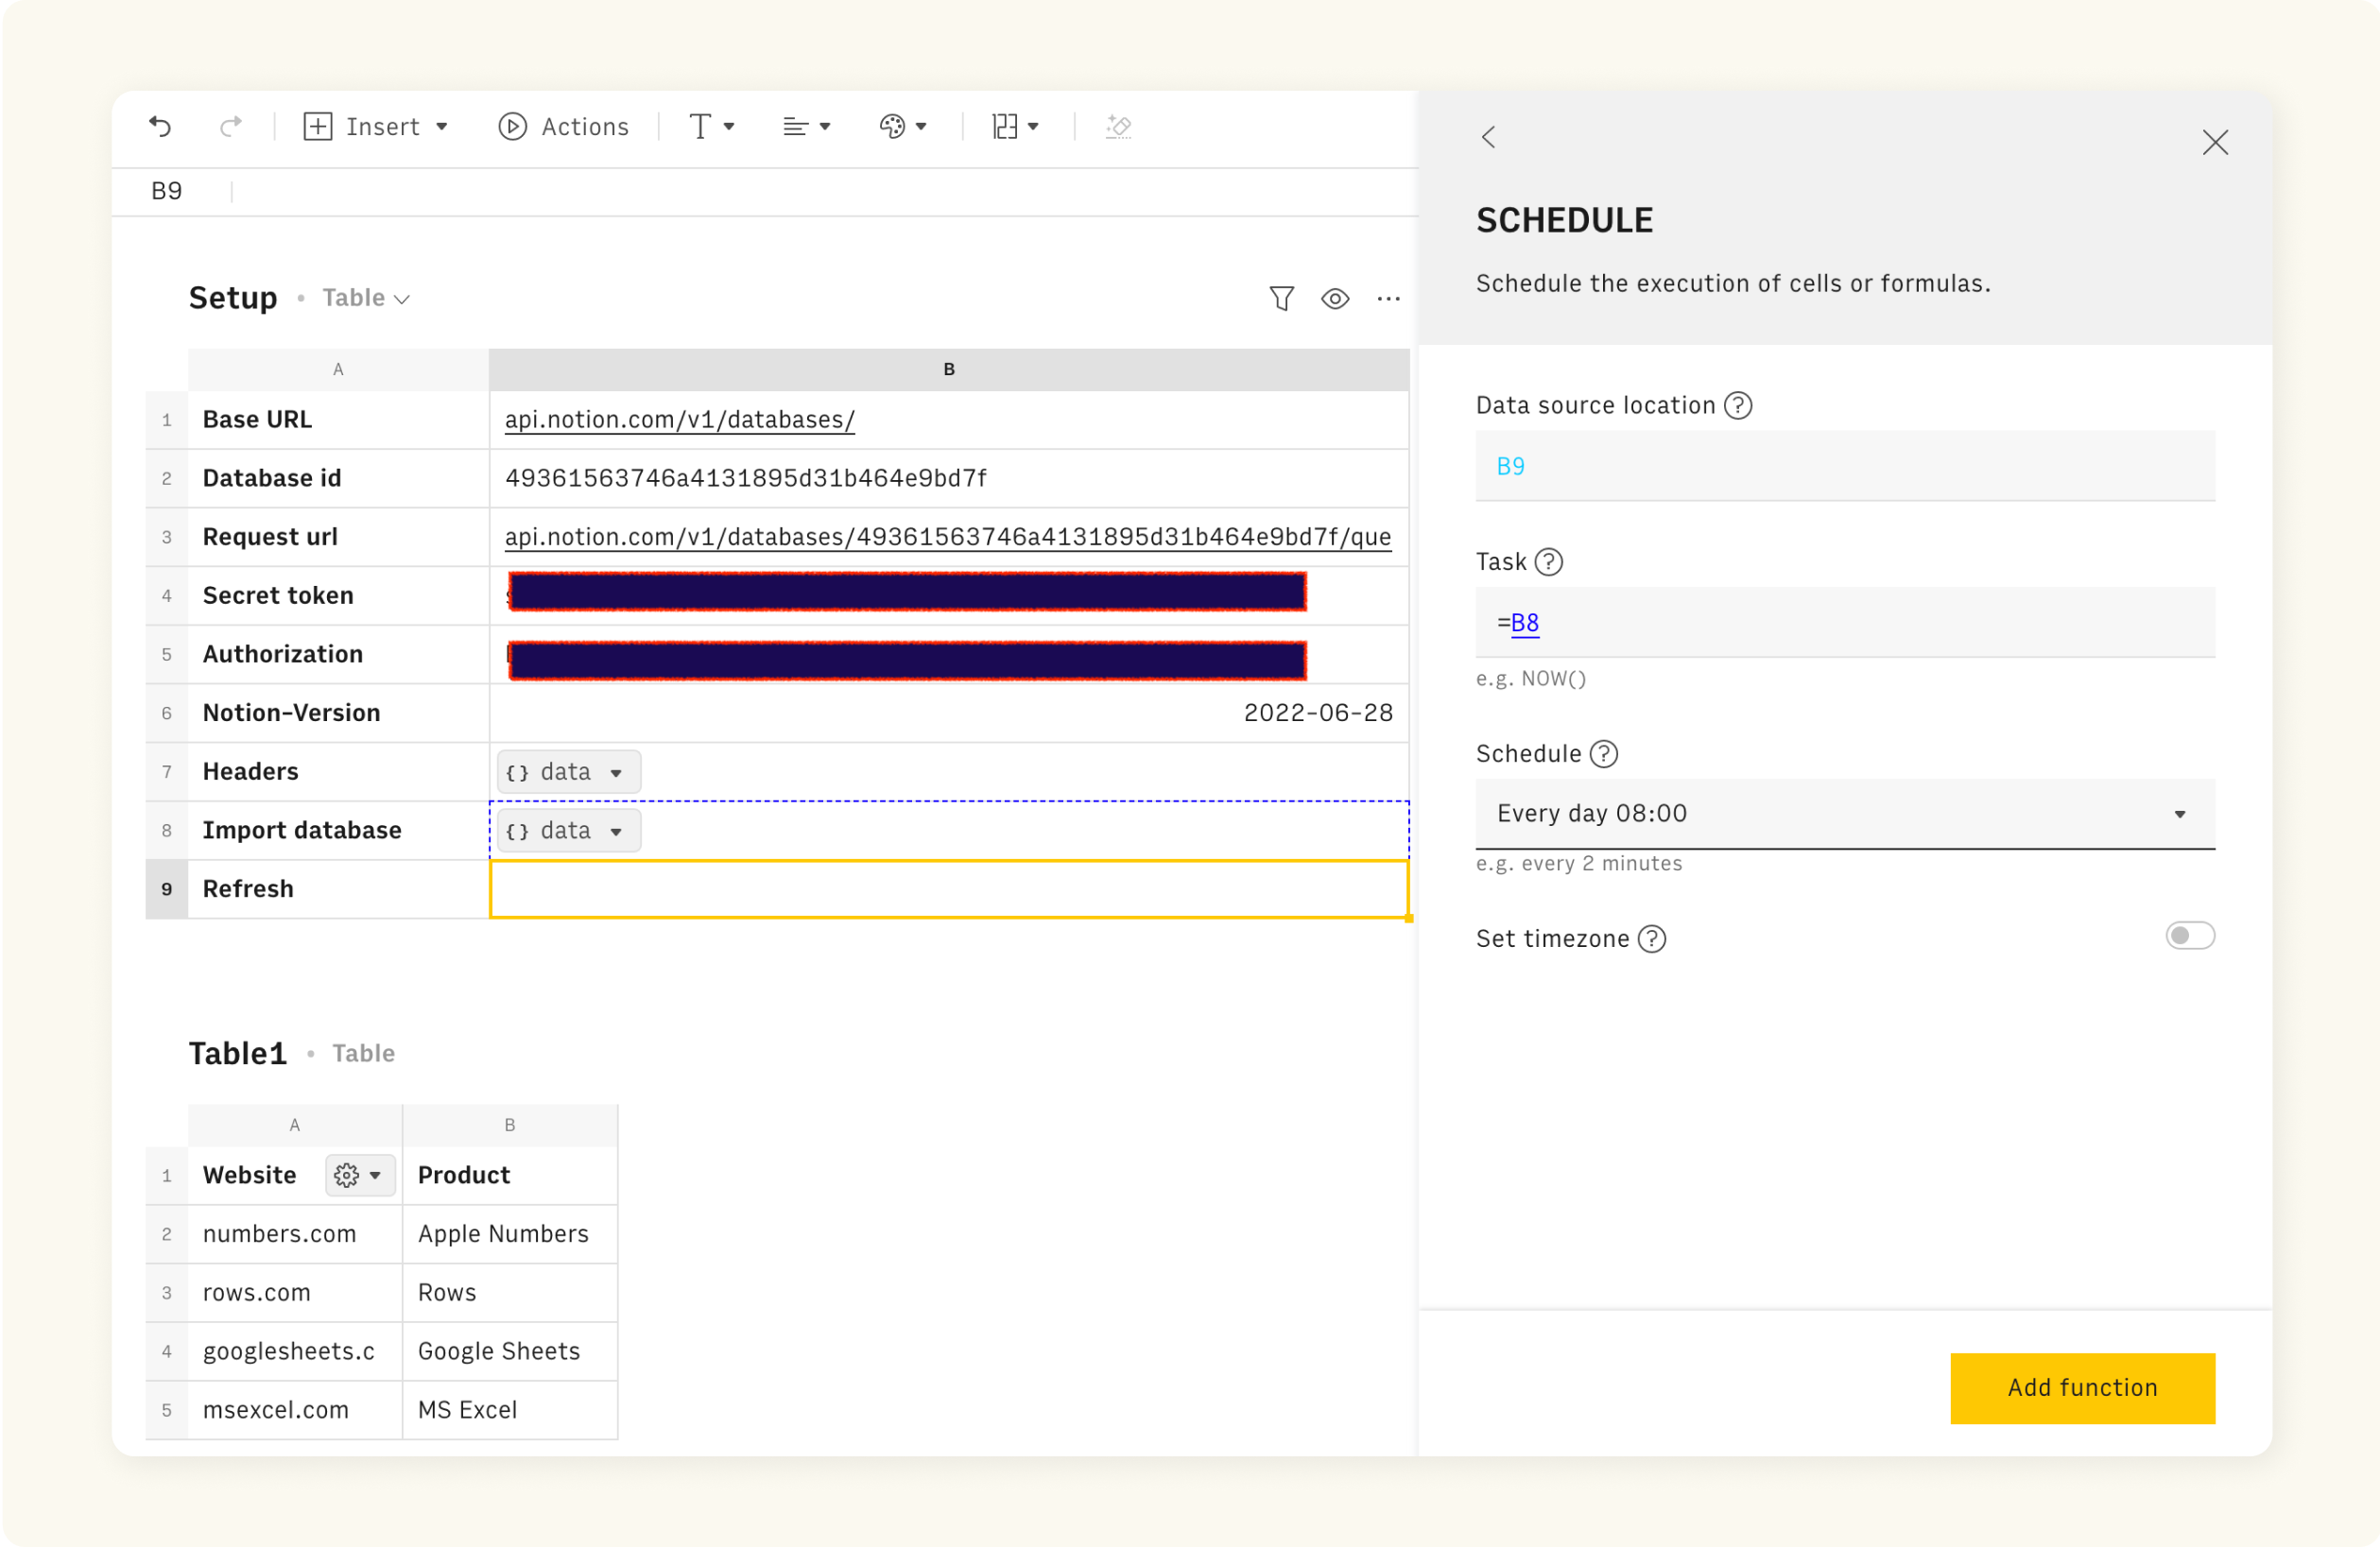 Add a "Schedule" action to refresh the data every day.
Done. You’ve just created an automation that syncs the Notion database to the spreadsheet and updates it every day.
You can use Rows for Notion goodness. Use it to embed interactive charts, tables and calculators into Notion pages, and explore our Notion templates of weekly meeting notes, marketing reports and more to make your docs stand out.
 The Website Traffic Report template
Got any questions? Let us know what you think and how we can help. Explore what everything else you can do with Rows and see what others are building at rows.com/community.