Rows Power BI Connector
We are excited to introduce you to our Rows Power BI Connector. This Power BI Connector allows users to seamlessly connect Power BI with a Rows spreadsheet table or range, unlocking powerful data analysis and visualization possibilities.
Power BI is a robust business analytics service by Microsoft that enables users to visualize and analyze data from various sources. With Power BI, you can create interactive reports, dashboards, and data visualizations, making it easier to gain insights and make data-driven decisions.
Our Rows Power BI Connector is currently in beta.
We encourage you to already start using it and to provide us feedback to help us improve it further. You can also share your experiences and upvote the connector in the Power BI community. This will help speed up certification, so it'll be easier to use the connector in the future.
Installing Rows Power BI Connector
Since the Rows Power BI Connector is in beta, it has not yet received certification from the Power BI team. Therefore, you'll need to follow these steps to install it:
- Download the Rows Power BI Connector using this link.
- Copy this file to the
Custom Connectorsfolder, located inside thePower BI Desktopfolder located on theDocumentsfolder.- Note: if the Custom Connectors folder doesn't exist, you can create it.
- Enable the Installation in Power BI
- Open Power BI and navigate to "File" in the top-left corner.
- Select "Options and settings," then choose "Options."
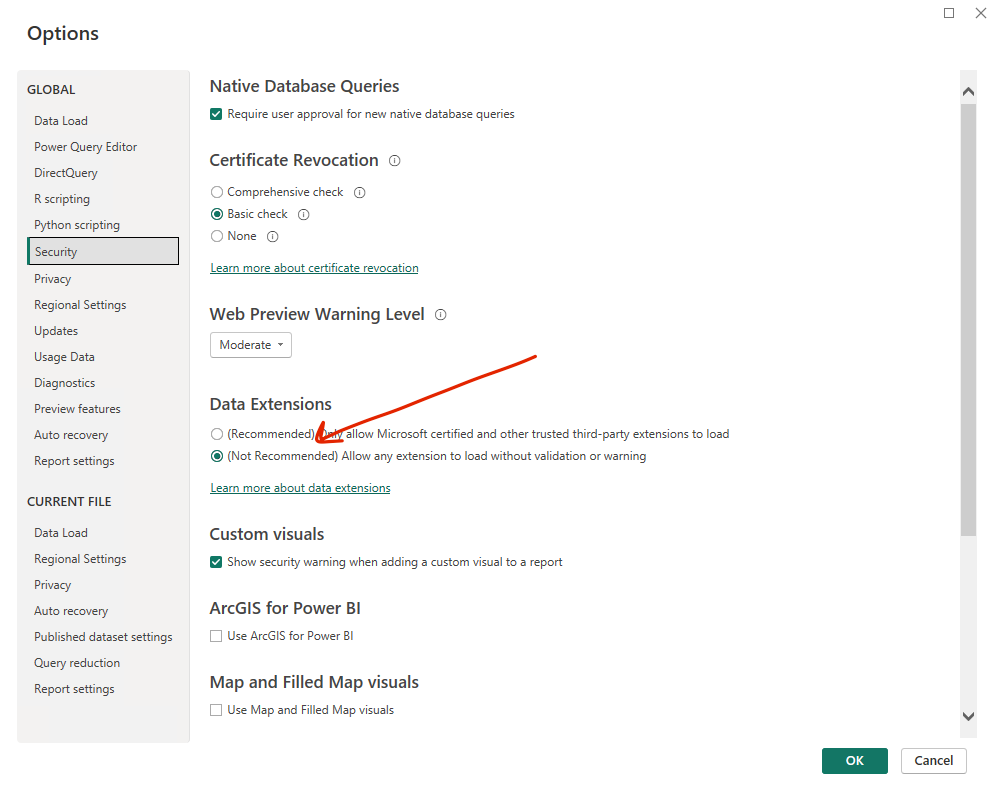
- In the options window, go to "Security."
- Under the "Data Extensions" section, find "Allow any extension to load without validation or warning" and enable it.
- Click "OK" to save the changes.
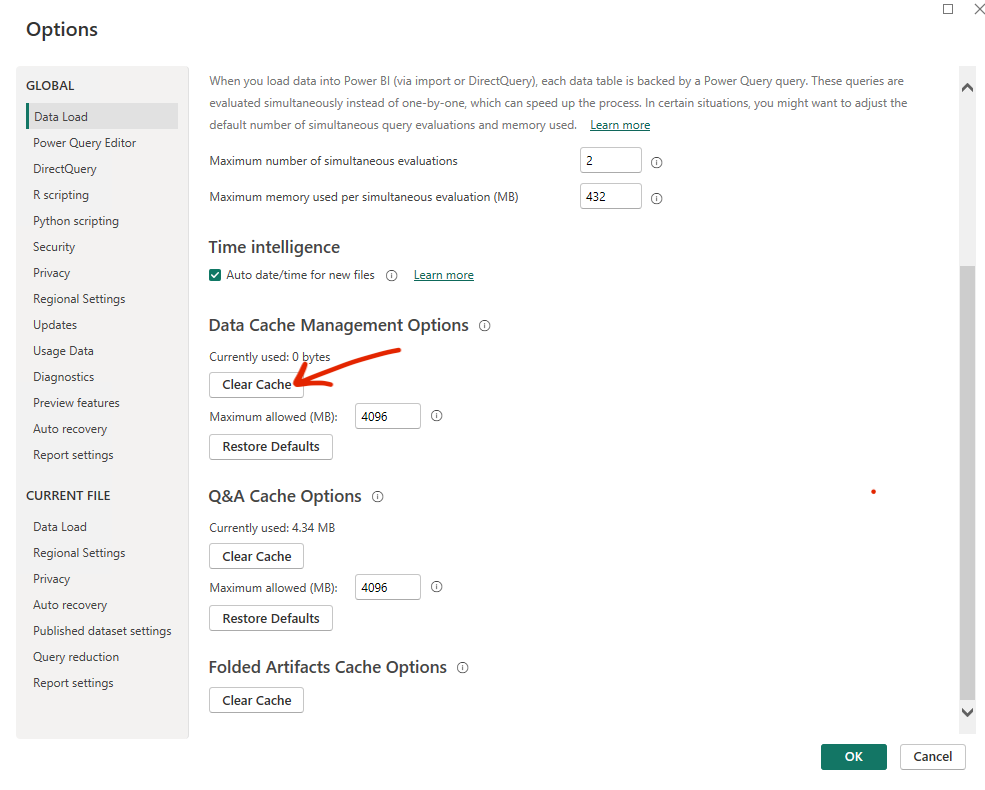
- Navigate to "File" again in the top-left corner. Select "Options and Settings", then "Data load settings" and finally "Clear Cache" under the "Data Cache Management Options" section.
- Restart the Power BI application.
Create a new spreadsheet & add headers
Once the installation is done, let’s create a new spreadsheet that we can use for this data connector. You can also use an existing spreadsheet.
Make sure the first row is the header row with column names. We recommend all your columns have text in the first row (known as the header row), but the most important is that the range you'll use to create the connector contains headers.
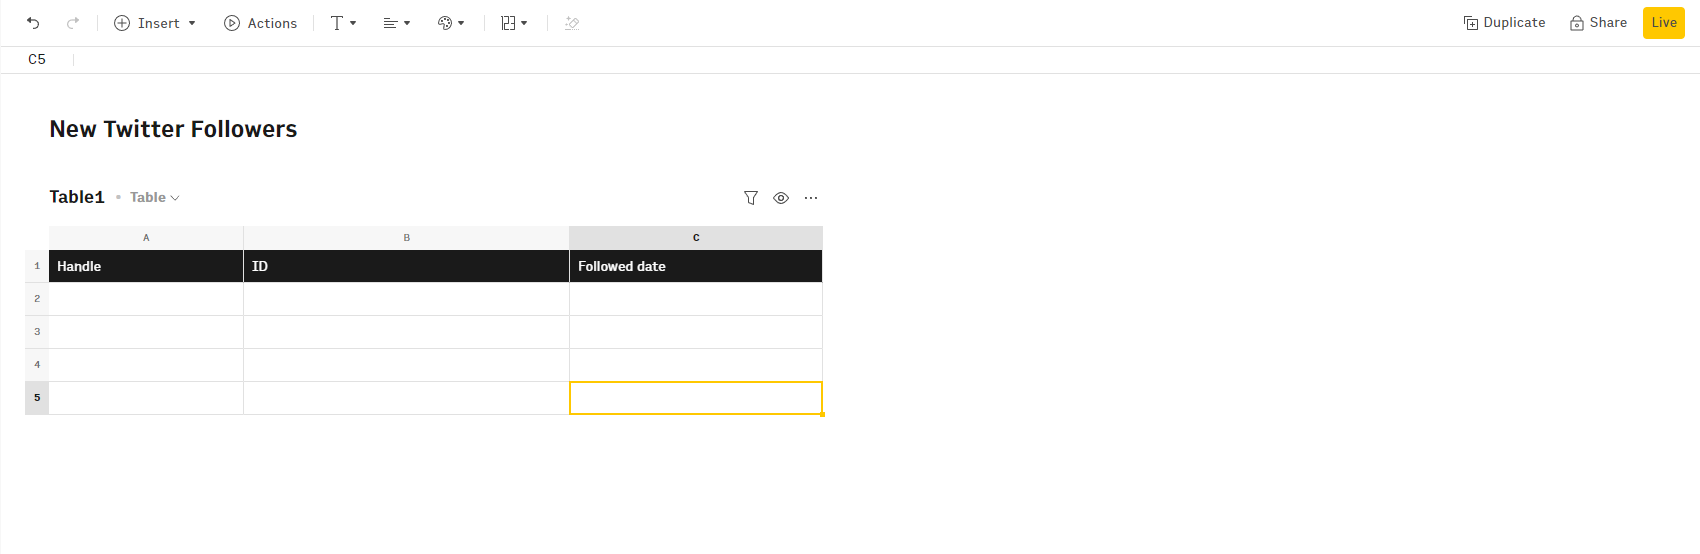
It's also very important to have unique column headers. These headers will be used to create the keys for the data source and Looker Studio requires them to be unique. Otherwise, you'll get an error when creating the data source.
Get data from the spreadsheet into Power BI
- Open Power BI and click on the "Home" tab.
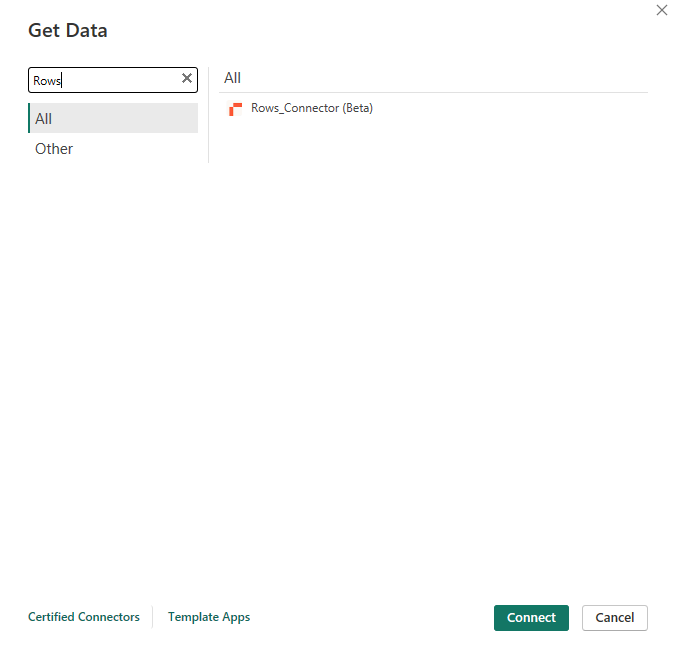
- Select "Get Data" and then choose "More..."
- In the "Get Data" window, search for "Rows Connector" in the search bar.
- Click on the "Rows_Connector (Beta)" option and select "Connect."
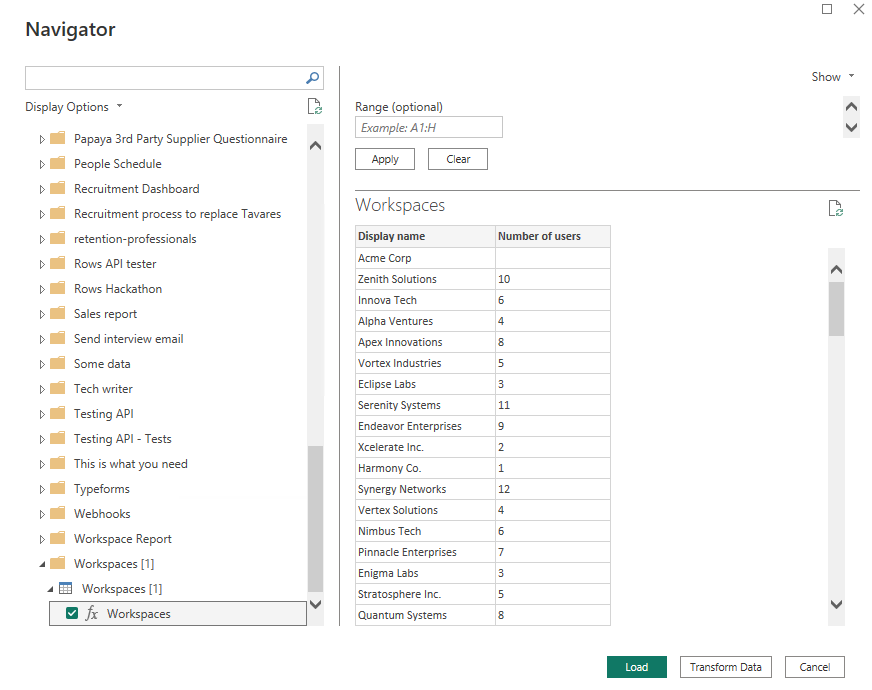
- In the next screen, you'll need to choose the Spreadsheet and the corresponding table you want to connect to.
- Optionally, you can select a range.
- Click "Load".
Great success! 🥳
Congratulations! You have successfully installed the Rows Power BI Connector and are now ready to unleash the potential of seamless data analysis and visualization between Power BI and Rows.
Now you can use the power of Rows to take this to the next level.
Join the Discussion and Upvote the Rows Power BI Connector
We value your feedback and suggestions! Since the Rows Power BI Connector is still in beta, we invite you to participate in our community forum. You can access the forum and find the request to implement this connector using this link.
We encourage you to engage with other users, share your experiences, and upvote the request to show your support for the full integration of this powerful connector.
Useful links
- Rows API technical documentation.
- Learn How to Manage your API Keys.
- Learn about the differences between Google Sheets API and Rows API
If you have any questions or feedback about Rows API beta, please contact our support team at support@rows.com.